Showing posts with label Chocolate. Show all posts

Tuesday, 12 April 2011

Nuts About Ironcupcake:Leeds

Following on from last month's post I did indeed enter April's Ironcupcake:Leeds competition. This month's theme was Nuts or Seeds. Usually when it comes to deciding what I am going to make, I tend to procrastinate - a lot! However, this one was different. I definitely knew I wanted to go down the nut route. I wasn't very inspired by seeds, lemon and poppyseed cakes aren't exactly Ironcupcake winning material, so nuts it was.

Out of all nuts, my definite favourite is the pistachio - from a flavour and colour perspective, so I knew this was what I wanted to incorporate into a cake.


Way before I started this blog, last year I actually made some lime and pistachio cupcakes I used a recipe from Eat Me! by Xanthe Milton... I remember them turning out a complete mess, sunken sad little things that I had to patch up with lurid bright green lime buttercream. According to the recipe "They may sink a little due to pistachios..." You're not wrong Xanthe, they were like craters! Taste wise, they were nice, with a nice smack of lime zest but the overall cake texture was quite greasy. The book itself is beautiful but as I have found out since, I'm not convinced with a lot of the cake recipes... Anyway, this isn't a book review, so I shall cease ranting!

I definitely was not going to use this recipe as a basis for my cupcakes, but I wanted to use the overall flavour of lime with pistachio. After doing some research, I stumbled across this recipe from an American cookbook called Baked Explorations, entitled Aunt Sassy's Cake, which is a pistachio, honey and vanilla cake. I decided to give it a bash but substitute the vanilla for lime in the frosting. The main difficulty was converting the measurements into metric (I do have US cups, but I find weighing out the ingredients much easier / accurate) the linked recipe makes a huge amount of batter so have adapted it to make approx 18 cupcakes (I got 4 regular cupcakes and about 46 minis)


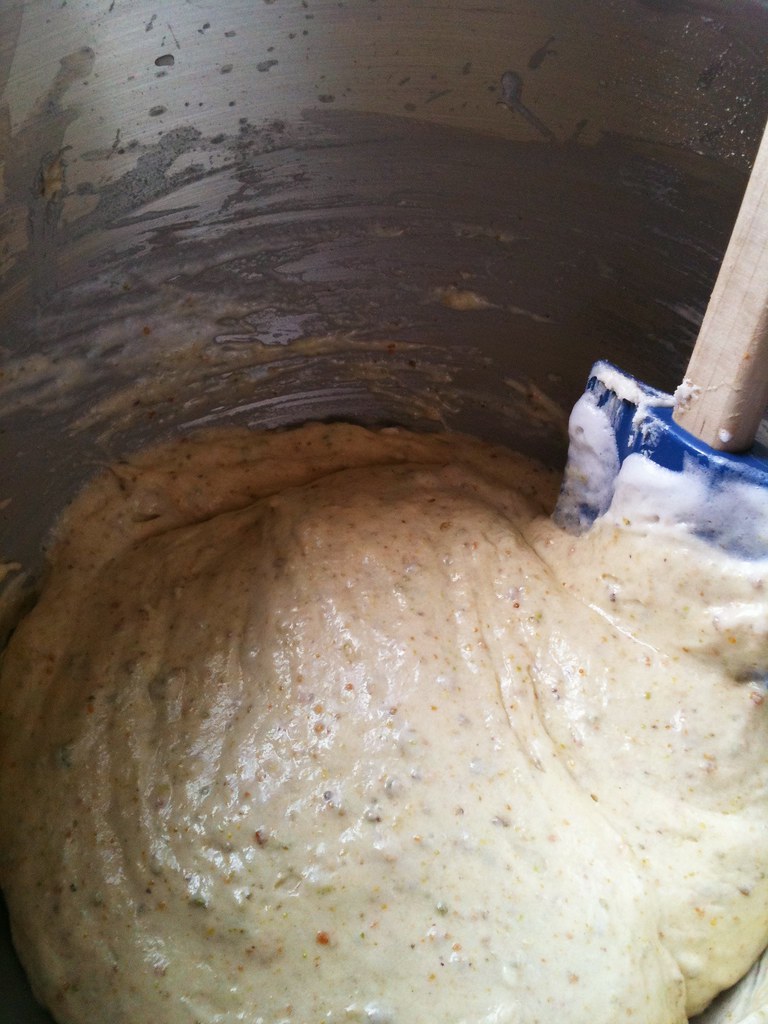
The cake recipe itself is all pretty straightforward, but with the addition of adding egg whites to the batter at the end to make the sponge really light and airy.

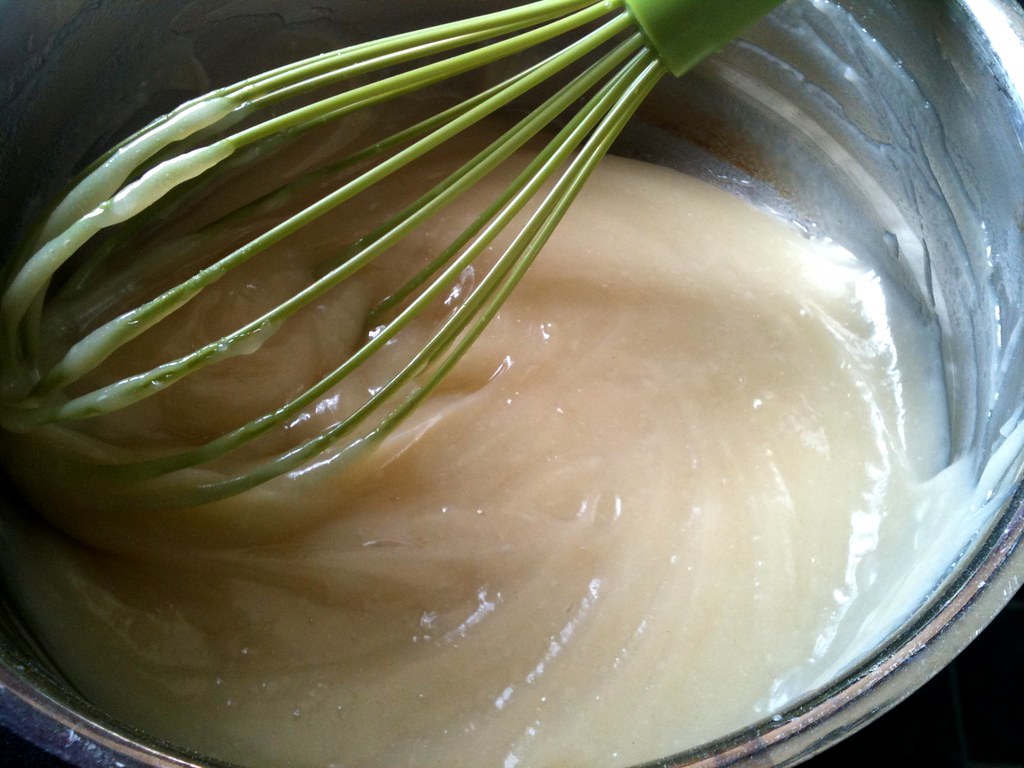
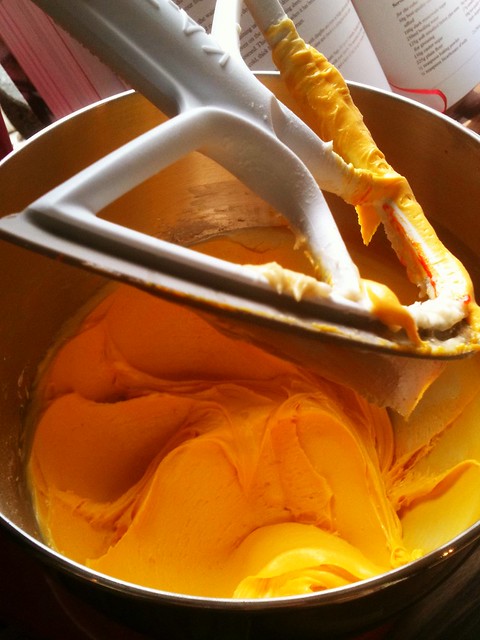
What really interested me was the recipe for the buttercream - it calls for the use of flour, more specifically a sweet roux which is then beaten with butter to create the buttercream. Sounds strange and unappetising, but I have to go all out there and say this is one of the most delicious frostings I have ever eaten. It's really light, not too sweet and has a really nice mouth feel. Although you could add more sugar if you desire, and very, very stable for piping. Plus, it avoids the mess of clouds of icing sugar. Bonus.

This method for making buttercream is quite common in the states, and is actually the traditional topping for Red Velvet cakes. Magnolia Bakery in NYC uses this frosting on their cupcakes. If you fancy something different then please do give it a try.

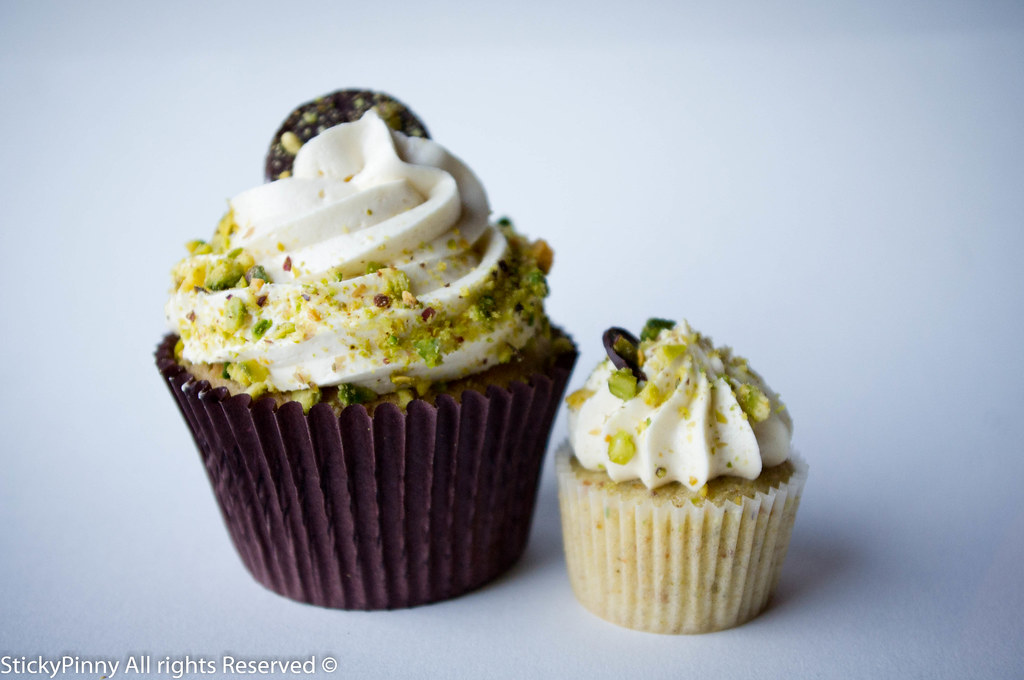
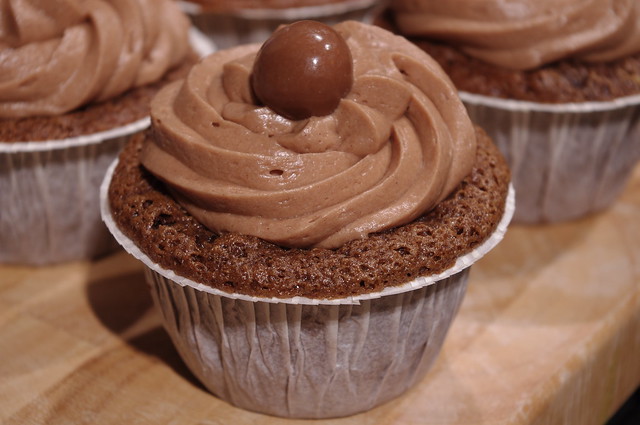
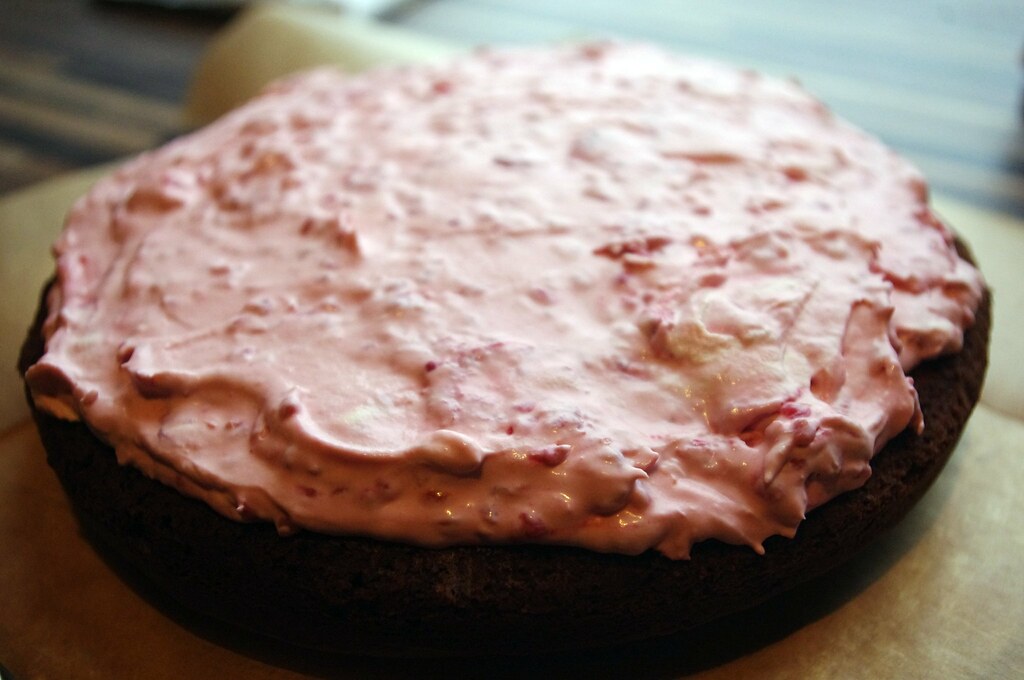
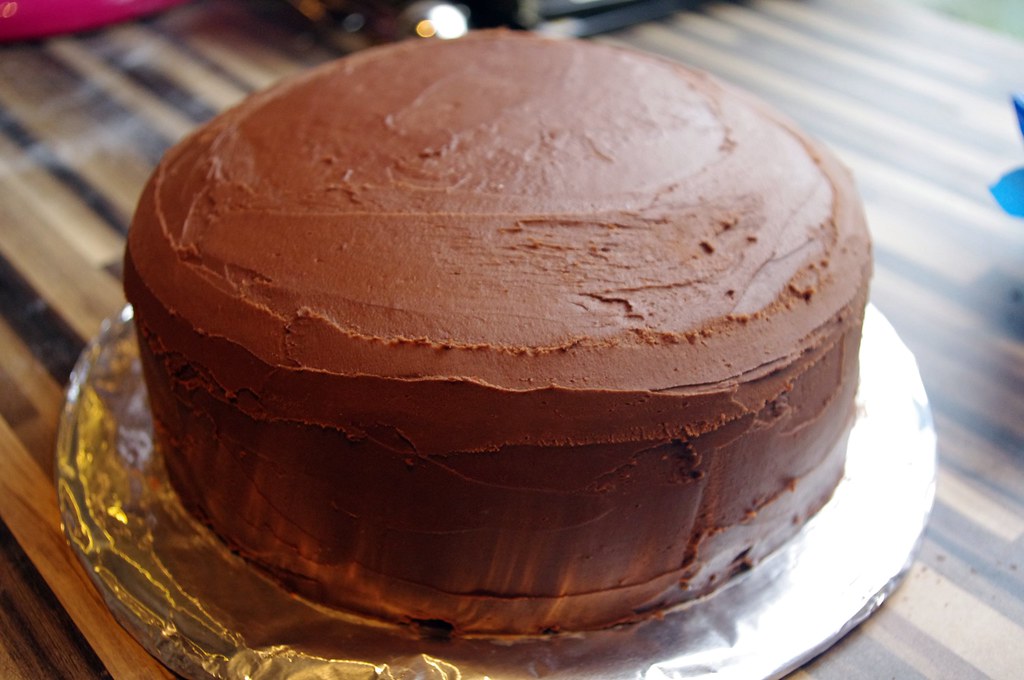
All in all I was pleased with the result, a nice light cake with a good proportion of nuts, you could definitely taste the pistachios coming through. The frosting was light and fluffy, with the flavours of honey and lime coming through, but without overpowering each other. A nice, understated cake.

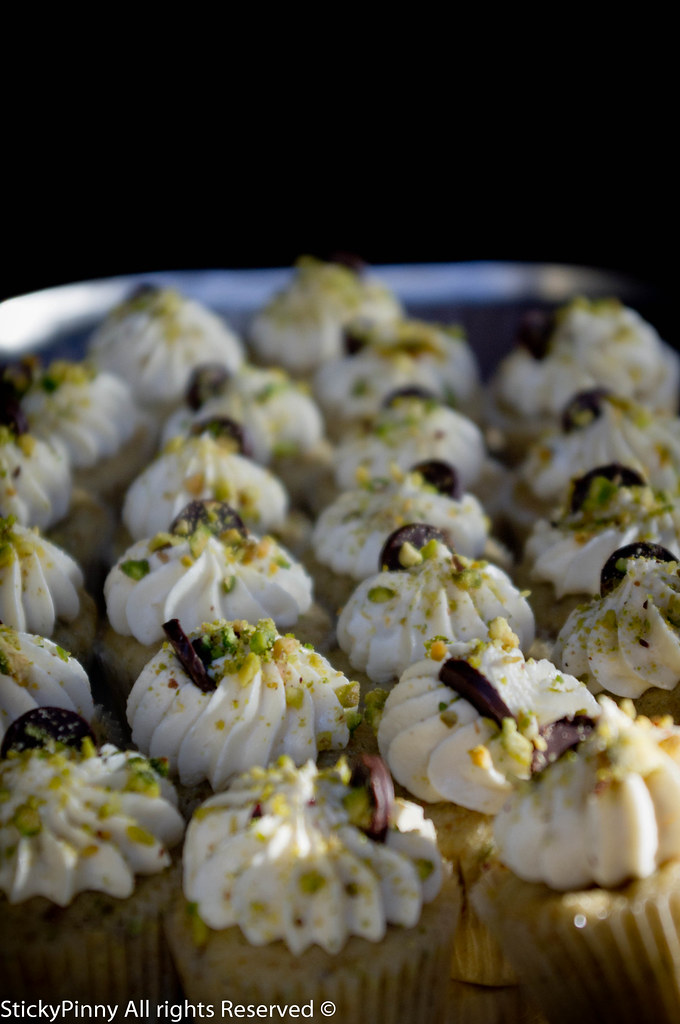
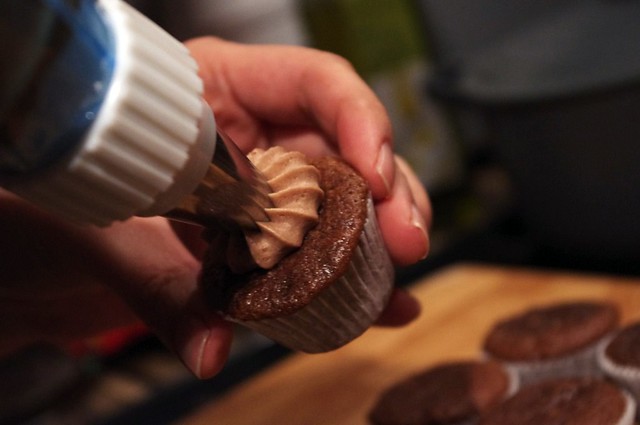
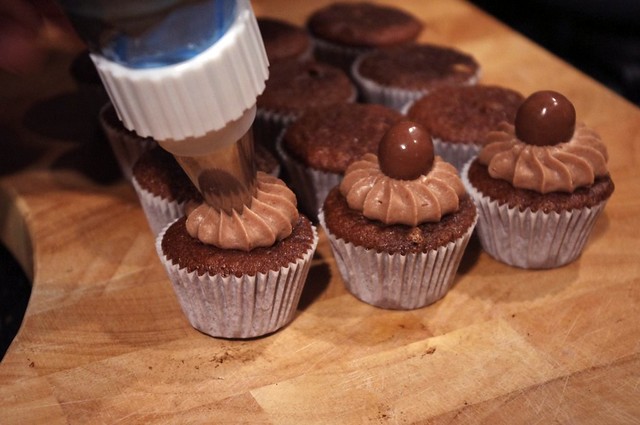
Decoration wise, I decided to use a simple swirl of buttercream and use chopped, bright green pistachios to sprinkle around the base of the cake. No bright green frosting here - I was after a classy look! However, I just thought that there was something missing, I just needed some further contrast, and something else that would add depth of flavour to the cake, so I set my mind on some bitter chocolate. In the end I made some pistachio "bark" which I cut out into discs to top off the cake.

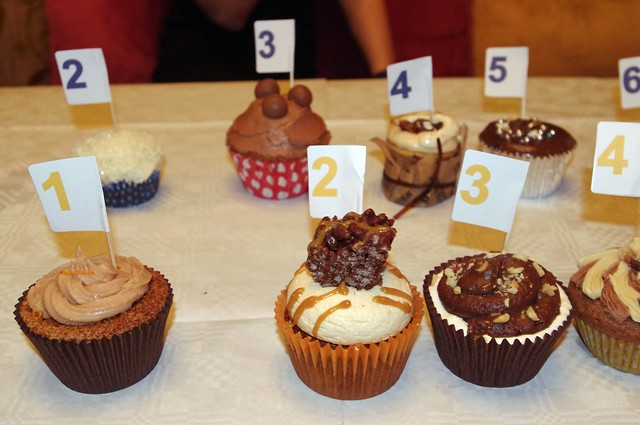
Image Courtesy of www.ironcupcakeleeds.co.uk
This month's event saw 11 entries in total - quite a few less than last month, which was surprising seeing as it was a free event for bakers and eaters this time around. Perhaps people weren't inspired by the theme, but I like challenging themes as I really think it gives bakers an opportunity to stretch themselves. I met a couple of lovely new bakers there too, Jo and Rebecca who made some lovely cakes - Cherry Bakewells, Ferrero Rocher and Hazelnut Latte. To have a peek at the other entrants then please view the Ironcupcake:Leeds website.

So how did I do? I won! Again! I was quite shocked because I don't enter the competition to win, I enter it to challenge and push my baking skills and experiment with new ideas, but I enjoy meeting new people and seeing what other people create too. Of course if I do come first it's a brilliant bonus and it spurs me on to create something better for next time I enter. Next month's theme is Fizzy Drinks - best get my thinking cap on, as I think it's going to be a popular one!

Pistachio Cupcakes with a Honey and Lime Frosting 
(Adapted from Aunt Sassy's Cake from Baked Explorations) - Makes 18 Cupcakes

Ingredients

For the Cakes
60g shelled, unsalted pistachios
190g plain flour 
1/2 tbsp baking powder
1/2 tsp salt
1/4 tsp bicarbonate of soda
60g unsalted butter , softened
60g vegetable shortening (I used Trex)
150g caster sugar, plus an extra 25g set to one side
1/2 tbsp vanilla extract
1 large egg at room temperature
175ml ice cold water
2 large egg whites , at room temperature
1/4 tsp cream of tartar

For the Frosting
150g caster sugar
35g plain flour
175ml whole milk
40ml double cream
175g unsalted butter, softened
2 tbsp honey
Finely grated zest of 1 lime

To decorate
Half a handful of crushed pistachios

For the Pistachio Bark
100g plain chocolate
1/2 tsp butter or shortening
A handful of crushed pistachios


Method
Pre-heat the oven to 170C and line a muffin tin with paper liners.

In a food processor or pestle and mortar, crush the pistachios until roughly chopped. Set aside a couple of tablespoons and then contunie to process the remaining pistachios just until finely ground. 

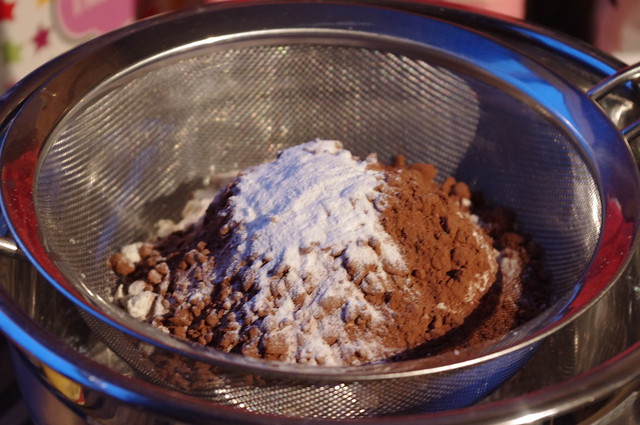
Into a bowl, sift the flour, baking powder, salt, and bicarb into the bowl with the roughly chopped pistachios and the ground ones too.

In another bowl, beat the butter, shortening, vanilla and 150g sugar until light and fluffy. Then add the egg and mix well. Mix in a third the flour mixture, then half of the cold water, and then alternate until all flour has been mixed in. 

In a clean bowl, whisk the egg whites and cream of tartar until foamy. Then add the 25g of sugar that was set aside earlier and beat until you achieve soft peaks - be careful not to overbeat. You then need to gently fold whites, a third at a time, into batter just until it is all combined. Do be careful not to knock out the air from the egg whites.


Divide between the muffin cups and bake for approx 20 minutes, but do check from around 18 mins. If you are making minis, then they will take about 10 minutes.

To make buttercream (warning, do not try and do this if you do not have an electric whisk!!)
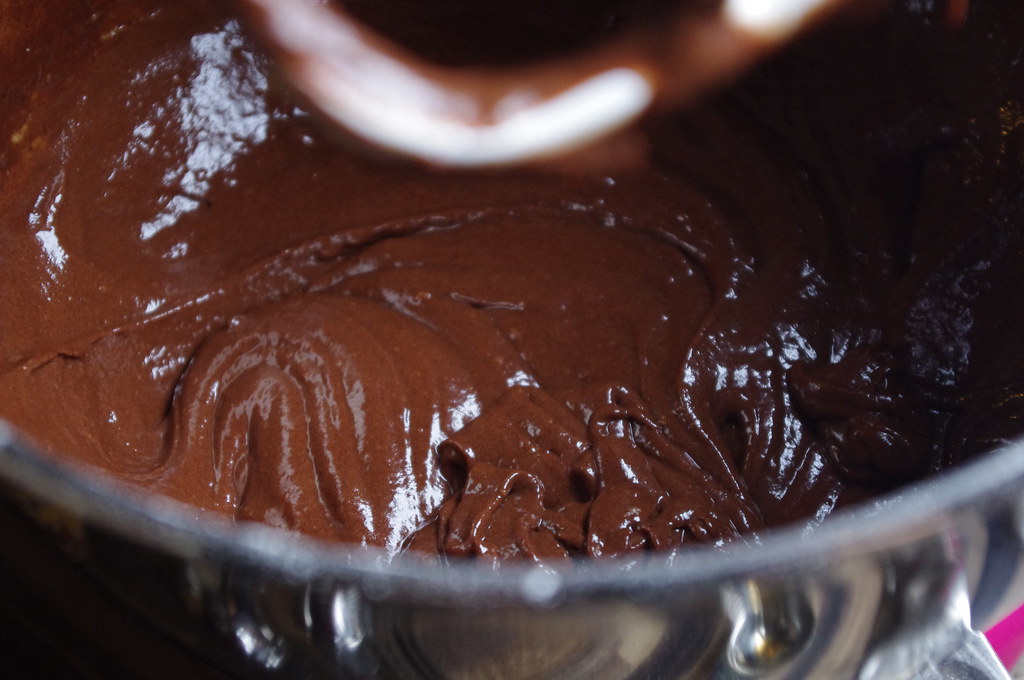
In a medium saucepan, whisk sugar and flour until well blended. Add milk and cream and whisk until smooth. Stick the pan on a moderate heat and stir constantly with a heatproof rubber spatula, until mixture thickens and comes to a simmer, this will take about 5 minutes. Reduce heat to low and cook, stirring, for 2 minutes. Take off the heat and leave to cool completely. Be warned, it will look like PVA glue! 


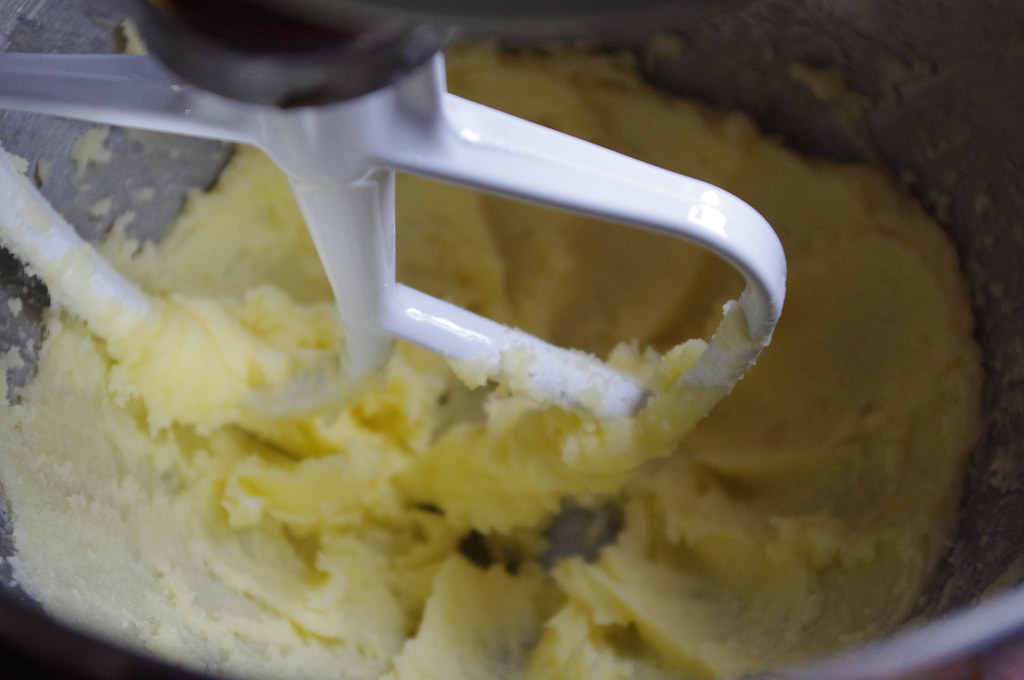
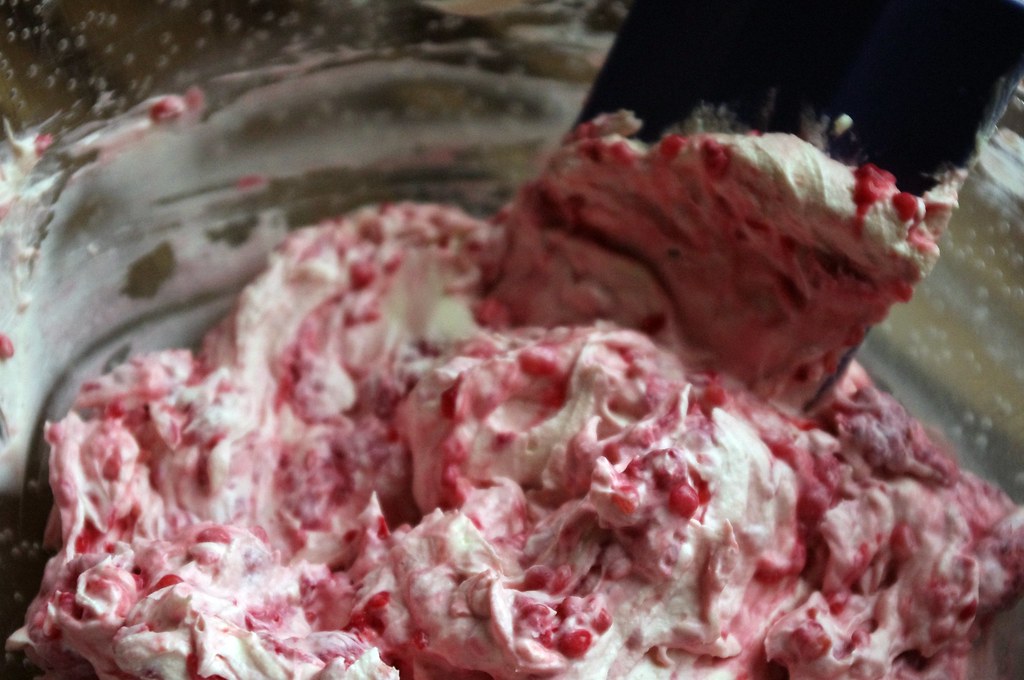
Beat the butter on medium speed until fluffy. Gradually beat in cream-flour mixture, beating until blended with butter. Continue beating until fluffy and smooth. This will take a good couple of minutes, it'll get to the stage where it has a similar consistency of whipped cream. Mix in the honey and lime zest. Refrigerate until you need to use it - beat again if it gets too cold in the fridge.

For the chocolate pistachio "bark"
Melt down the chocolate and butter, then spread over the base of a baking sheet covered in cling film. Scatter over the chopped pistachios and leave in the fridge until just about set. (About 15 - 20 mins). 


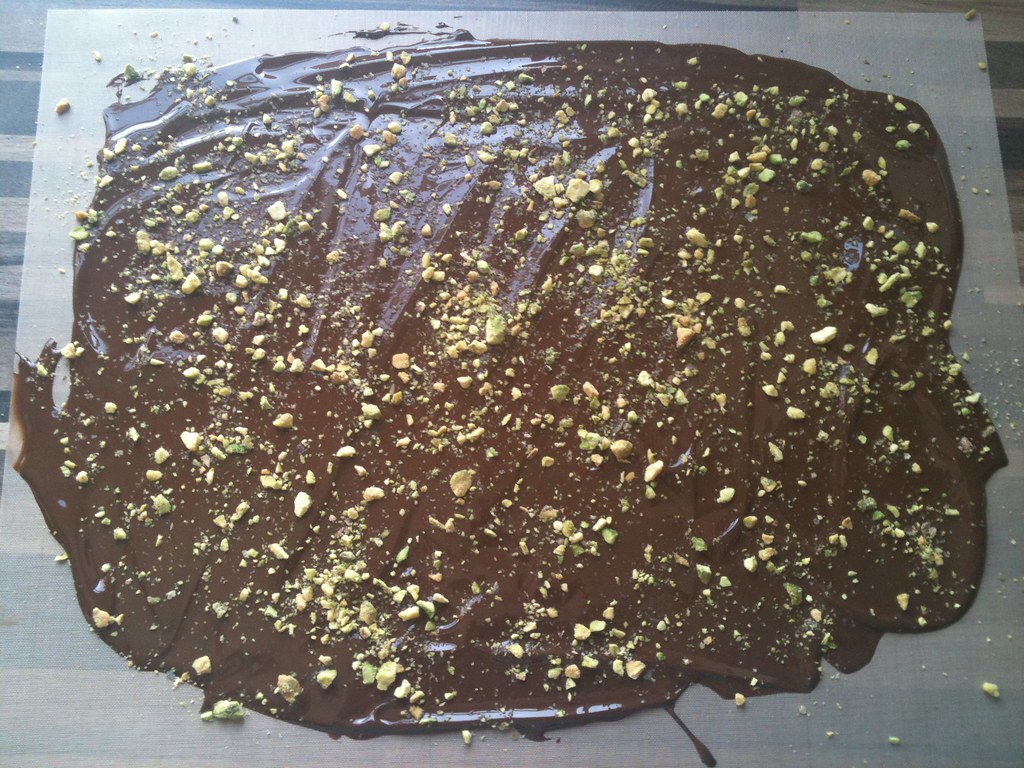
Either break up the bark into shards or use a cutter to make decorative shapes to top off the cupcake.

Try not to devour the cakes all at once!


Saturday, 9 April 2011

Cakes for Japan Part One


One of the things I love about my work colleagues is that they're always willing to part with cash if it's for charity. If there is cake involved in exchange for money for charity, then even more so! A few colleagues had expressed their concerns about the devastating earthquake that affected Japan, so we decided to do something to raise some money for the Red Cross tsunami appeal. I mentioned the Cakes for Japan events, started off my Miss Cakehead, that had been taking place up and down the country and suggested we held our own mini Cakes for Japan bake sale.


Now not wanting to be predictable, I obviously decided to make cupcakes. As I would be baking in the evening straight after work I wouldn't have much time to make wildly different varieties of cupcakes, so I decided to stick with making chocolate cake bases, then top with with different flavoured frostings.

After a while deliberating over which flavours to make, I settled on Malteser, Oreo and Mint Choc Chip, all which match perfectly with a chocolate cake.

I needed a pretty quick to make chocolate cake recipe, as I was intending to make 36 cupcakes plus minis, so decided to try out Martha Stewart's one bowl chocolate cupcake. The cake, as the name suggests, is made all in one bowl and uses the simple method of adding wet ingredients to dry. The whole process literally lakes a few minutes and there is no need to wait for butter and sugar to be creamed. If you want cupcakes fast, then this is the recipe for you!

All in all we made a total of £150 on the day. Luckily, work is going to match fund this so £300 will be winging its way to the Red Cross this week.

I am going to be baking and volunteering at Cakes for Japan Huddersfield, which is being organised by Marie Claire Nouveau Cakes, who I met at the last Clandestine Cake Club. Come along to the demonstration Zone at Queensgate Market on Sat 23rd April and help support the cause, buy buying lovely treats from a number of generous folk. See the website for more details.


One Bowl Chocolate Cupcakes (Makes 18)
Ingredients
220g plain flour
70g cocoa powder
340g caster sugar
1 1/2 teaspoons bicarb of soda
3/4 teaspoon baking powder
3/4 teaspoon salt
2 large eggs
180ml warm water
180ml buttermilk
45ml vegetable or sunflower oil (or any oil that does not have a strong flavour)
1 tsp vanilla extract

Method

Preheat the oven to 180C / 350F (Fan 160C)
Line a muffin tin(s) with liners
Sift the flour, cocoa, bicarb, baking powder, sugar and salt into a large bowl.

Make a small well in the middle of the dry ingredients and then add the eggs, buttermilk, water, oil and vanilla and mix until all just combined and smooth.

Divide the batter between the cases, filling each no more than 2/3 full.

Bake in the oven for 18-22 minutes, rotating halfway if you need to. The tops should be springy - test with a cake tester to make sure they are done. Leave to cool in the pans for 5-10 mins, then turn out onto the cooling tray. (For minis, bake for 10 minutes).
Once cool they are ready to be topped with a number of different frostings.


Cookies & Cream (Oreo)


First off, just to mix this one up a bit, I actually baked half an Oreo into the bottom of this cake, so for these ones, I twisted off the tops of some Oreos and placed the half with the biscuit filling, filling side up, in the bottom of the liner before adding the cake batter and baking for the time specified above.

The frosting is essentially a cream cheese frosting, with the addition of a few of the leftover Oreo halves crushed, then foled through at the very end. It's important that you don't add the crumbs until the end, other wise you'll end up with grey frosting. Not attactive!

Ingredients
100g unsalted butter (room temp)
600g icing sugar
200g full fat cream cheese
4-5 oreo halves, crushed

Method
Beat the butter and icing sugar until mixed well - this may take a few minutes. Then add the cream cheese and beat slowly until soft and fluffy. Throw in the crushed Oreos and carefully fold in. It's then ready to be used to top the cakes. I topped the cakes off with a mini Oreo.

I did have an issue with the Oreo half sticking at the bottom of the liner, so next time will add the Oreo after adding a spoonful of batter to the liners.

Malteser Cupcakes


The recipe for the frosting can be found on a previous Malteser cupcake post.

Mint Choc Chip


Rather than messing around with chopping chocolate and peppermint extract, I just made up a batch of buttercream and then added a box of chopped up After Eight mints. The beauty of this frosting is that the longer you leave the buttercream, the more the mint flavour seems to infuse through. However, feel free to add grated chocoalte and creme de menth instead if you don't like the idea of using a whole box of After Eights.

Ingredients
150g unsalted butter
500g icing sugar
50ml milk or cream
300g box of After Eights
Green food colouring (optional)

Method
Beat the butter, icing sugar and milk until mixed well - this may take a few minute, until soft and fluffy. Add a few drops of food colouting (if desired) and mix until you get a nice mint shade. Throw in the chopped After Eights and carefully mix through throughly. It's then ready to be used to top the cakes. I decorated the cakes with some Poppets which I found in the supermarket.


I won't be making these flavours for Huddersfield Cakes for Japan - keep your eyes peeled to see what I make next, or come along on the 23rd, support us and see for yourself!

Sunday, 3 April 2011

Wedding Bells

This weekend marked my first ever attempt at creating cupcakes for an event - a wedding. However, the bride is also my boss. So no pressure there to try and make the cupcakes even more perfect!

Luckily, I wasn't really given a brief as such - the Bride wanted a mixture of standard and mini cupcakes and decided to stick with the simple flavours of vanilla and chocolate. The colour theme for the wedding was purple, so other than that I pretty much had free reign.


Rather than create a tower of uniform cupcakes, I wanted to bring in some different looks and textures, to create a bit of a vintage tea party feel to them. So i decided to use different piping swirls, colours for the vanilla cakes and also decorative touches. A bit unconventional if you like, which I really thought tied in to the bride's personality. The wedding itself was beautiful, and I was really pleased I could help be a part of it.

Seeing as this was the first time I was creating cakes for a large number, I had to be prepared. A really good blog post I read up on can be found here on Cupcake Bake Shop which really helped on hints and tips on baking in bulk.

I won't go into the recipes for either of the cakes, as they were just simply vanilla and chocolate, which can be easily found.

I spread the baking out over 2 days - the first I got the kitchen organised and made up the frostings, they keep well for up to a week in an airtight container. The second day I got down to the business of baking the cakes.

The cakes overall didn't take too long to bake - all in all they were completed in 6 hours. that was including an absolute baking fail where I accidentally had the oven at the wrong temperature, resulting on overflowed, sunken cakes! However, apart from this hurdle I think the whole process went really smoothly but I am under no illusion that this is due to the fact I am very lucky and have a Kitchenaid mixer, and also 2 ovens which makes things much much easier.

The most nerve wracking part of the process was transporting the cakes - I was so paranoid that the cakes would be ruined every time we went over a bump or hole in the road!

I think that overall I was pleased with how everything turned out. Unfortunately I am very very self critical and kept thinking I should have done one thing or another differently, that they could be better. The Husband soon knocked that out of me though! Speaking of the Husband, I really have to thank him for the beautiful pictures he took - think they made the cakes look better than they actually were. You can see more of his stuff on his blog.


I think the overall response to the cakes was a good one! I saw a few people taking them home with them too at the end of the night and I got a few compliments too - but of course the cakes weren't the star of the show, that accolade went to the Bride!

Creating 100+ cakes was a challenge but one I enjoyed. The fact I was given the freedom to be creative with the design was a bonus too! I felt slightly on edge throughout the ceremony and up until the point of the wedding breakfast - the Bride had no idea what the cakes were going to look like until the day, so once I had seen she was happy with them, I could kick back, relax and have a drink!

Cheers Mr & Mrs L - here's to a long, loving marriage!


Tuesday, 15 March 2011

An Egg-cellent result at Ironcupcake:Leeds!

Last Sunday I decided to make a return to the Ironcupcake:Leeds competition. I haven't been for about 8 months sadly due to one thing and another but I decided I needed to get myself out there again....I have previously entered 3 times and won the last 2 times I entered, which gives me a 66.6% success rate...But could I do it again?? I have been keeping an eye on the competition over the past few months, and I have to admit, the competition is fierce!


(Cut to a Rocky training montage, but instead of drinking raw eggs and running up and down stairs think of me eating cake batter and chasing a cat out of the kitchen with a wooden spoon...)

For those who don't know what Iron Cupcake is, it's actually a global competition that was started over in the US (Milwaukee to be exact). It usually happens monthly and each competition has a theme and the bakers have to create a cupcake which ties in with said theme. To my knowledge there are 3 Ironcupcake cities in the UK - London (which is unfortunately taking a bit of a hiatus at the moment), Leeds and Northampton. Those who attend are either "bakers" or "eaters" the eaters also do the judging and score each cake for taste and presentation. For more info on the Leeds competition, which is held at the lovely Adelphi pub, please visit the site.

So March's theme was Chocolate Bars - I was racking my brain to think of a cake inspired by chocolate bars. I've done Malteser cupcakes before and I've also done Dime Bar ones too and I didn't want to just go with something I was comfortable with! Lunch hours have been spent staring at the chocolate aisle in the supermarket, looking for inspiration, when the thought of Cadbury's Creme Egg came to me after a conversation with my friend Heather and also whilst passing the Easter eggs in said supermarket... But how would I do it?

Mmmm Creme Eggs...
I had various ideas on how to create my cake - I thought about just filling a chocolate cake with a creme egg filling and topping with chocolate ganache, but I just thought that visually, it would just look like a chocolate cake and I wanted it to look fun, like the eggs themselves!

So I settled on incorporating the Creme Egg fondant filling within the icing, using a chocolate cake as a base. Because the fondant is so sweet, I thought a devil's food cake base would work well and also use a cream cheese icing to further cut back on the sweetness. I wanted to top the cake with a mini creme egg, but rather than just plonk a whole one on top of the cake, I wanted the icing to look like it was actually coming out of the egg, so I decided to "crack" the Creme egg open.

Creamy Eggy Chocolaty Goodness!


As part of the competition rules, bakers are asked to provide 12 cakes, with 9 of them chopped into quarters for tasting. My issue with this from previous experience in other competitions is that it's difficult and messy to chop them up at the event. I've also tried chopping the cakes up prior to arriving but the sponge seems to dry out. I thought it would be a good idea to make up 3 standard sized ones and then make up 36 minis - meaning all the eaters get their own cake and presentation wise, it means the cakes still look good!


Minis


Overall I was happy with the cake, but if I'm honest I didn't think it was a winner - I'm not sure why, maybe I'm just too hard on myself! The Eaters seemed to really like it so that's all that matters - so much so that I came first place!Yay! Success rate is now 75% - not that I'm counting.

I had a taste of a few and I really liked Zoe's Toffee Crisp. For more pictures of the other cakes, check out the Ironcupcake Leeds site and also Em's blog, All the Small Things - she entered with a lovely Bounty cupcake and also was the evening's photographer. See if you can spot the hilarious picture of me grinning like an idiot, looking like a Chinese Janet Street Porter...

Some of the other cakes - yellow number 2 was my fave, Toffee Crisp!

More of the other cakes - some of the detail on some of them must have taken forever! Check out the characters on yellow 7 - Fruit and nuts!


April's theme is Nuts and Seeds...best get my thinking cap on!

Creme Egg Cupcakes

Ingredients
For the cakes, see my Devil's Food Cake Recipe

Cream cheese frosting
500g icing sugar
125g cream cheese
125g soft unsalted butter

Creme Egg Fondant Filling
170g golden syrup
60g butter, room temperature
375g icing sugar
1 teaspoon vanilla extract
1/4 teaspoon salt
Yellow food colouring (I use gel colouring as the liquid stuff tends to water everything down)

To Decorate

3 x bags of Mini Cadbury's Creme Eggs

Method
Preheat the oven to to Gas Mark 4 / 160C (fan) / 180C.

To make the sponges, make up the devils food cake batter and divide into cupcake tins - cook for 20-25 mins for the standards sized cakes and about 10-12 minutes for the minis. Test with a cake tester - if it come out clean, they're ready. Leave for a couple of minutes in the tines and then take out the cakes and leave to cool on a rack.

To make the fondant filling mix the butter, syrup and vanilla in a bowl - ideally you want to do with with an electric mixer, or it will take forever! Gradually add the icing sugar, then the food colouring and carry on beating until smooth. Cover and set to one side.

YUM! Cream egg yolk!!


Make the cream cheese icing - again, beat the butter, cream cheese and vanilla extract and then gradually add the icing sugar continue beating until smooth and thick. Use immediately or if not, cover and store in the fridge.

Once the cakes are cool, you can start to decorate.

To get the two-tone swirled effect, place some of the fondant down one side of a piping bag and add the cream cheese down the other side - try not to combine / mix them up too much. you want a1/3 - 2/3 ratio of fondant to cream cheese icing.

Pipe out the frosting on a plate until the two tone effect comes through and then ice the cakes. To decorate, I used 1 mini egg per standard sized cake and a 1/4 of a mini egg per mini. Allow the fondant centre from the eggs to spill over the top of the cake...

Feel free to eat in whatever way you wish!

Thursday, 24 February 2011

F.E.A.R.

This is just a quickie...for the past few months / weeks I have been thinking about attempting macarons. Macarons scare the living shit out of me. The stuff of nightmares, well them and soufflés, oh and scary clowns. And ventriloquist dummies. Sob sob sob.


Now I love a good cake - cakes are easy, they're quirky and if you botch it up then cover it up with frosting and no-one would ever ever know. But macarons - they are refined and delicate and if you mess it up then EVERYONE can see and then I'll get upset and embarrassed. Me? perfectionist? No....

However, because I am just so stubborn and want to learn to be a better baker, I bit the bullet and decided just to give it a go. This was spurned on my the fact that my boss kindly brought me back some amazing macarons from Angelina in Paris whilst he was there last weekend... They were slightly battered, but delicious! Light, crispy, chewy and eaten on one sitting...all by me.

Ta Steven!
Anyway, to the macarons. As I said, I have been doing a lot of reading over the past few weeks and found a really good number of tutorials, a couple of which being from Food Nouveau, Bakerella and The Pink Whisk.

Across all 3 the recipes / techniques are pretty similar, using a French macaron recipe. I won't post the recipe details now as I want to follow up with a full and thorough post on method, etc. once I really feel that I have nailed it.

I ended up making chocolate ones, I added cocoa to the shells and filled them with chocolate ganache.

I thought they looked good, chewy and slightly crispy on the tops of the shells. I think that the next time I make some I will tweak them slightly - I thought the almonds could do with being finer and I might not have mixed the meringue in enough, for fear of knocking all of the air out... But hey, overall I was pleased!

As I said, going to make some more this weekend so macarons will be back...

Sunday, 13 February 2011

Chocs Away...

One of my friends, Paul, turned 30 this week and there was a bit of a shindig this weekend. I wasn't intending to make anything, as I was all cake baked out from last weekend's action, but seeing as it was a special birthday I decided to stop being lazy and bake!

I decided to make some Malteser cupcakes for a number of reasons:
  1. They are really easy and simple to make.
  2. I love Maltesers (I know they weren't for me, but hey, I can be selfish sometimes!)
  3. I had been pondering over what to make as part of Maison Cupcake's Forever Nigella #2.


I've never taken part in a blogging challenge before and as a newbie to this kind of thing, am quite excited by it!

So the recipe for the Malteser Cupcakes derives from Nigella's Feast where in its original form is a 20cm layer cake, topped with a crown of malty chocolate balls. I decided to turn this cake into cupcakes - a mixture of minis and standard sized, as I think they're easier to eat at a party, especially the minis.

I made a couple of tweaks to the original recipe, in that I added some crushed Maltesers to the cake batter for some texture contrast and I changed up the buttercream recipe, as I felt that the buttercream in the recipe was quite butter heavy with not enough icing sugar.

An interesting thing to note about the recipe is that it only uses 15g of butter in the sponge. I originally thought this was a typo, but it isn't! The sponge turned out quite dense, but in a gingerbread kind of way - the kind that gets squidgy and stickier the next day. The cakes will keep for about 2 days in an airtight container.


Chocolate and malty goodness!
The quantities below made up 12 minis and 12 standard sized cakes.

Chocolate Malteser Cake

Adapted from “Feast”, Nigella Lawson (2004)


For the cake
150g light muscovado sugar
100g caster sugar
3 large eggs
175ml milk
15g unsalted butter
2 tablespoons Horlicks
175g plain flour
25g cocoa
1 teaspoon baking powder
1/2 teaspoon bicarbonate of soda
50g Maltesers, crushed

For the buttercream icing
500g icing sugar
1 tbsp cocoa
3 tbsp Horlicks
150g soft unsalted butter
2 tablespoons milk
Maltesers, to decorate

The Cakes
Preheat the oven to Gas Mark 4 / 160C (fan) / 180C. Line a 12-hole muffin tray and a 12-hole mini muffin tray with the appropriate sized cupcake cases.

Beat the sugars and eggs until the sugar has dissolved and is light and frothy. This will take around 5 minutes with an electric mixer, probably about 10 by hand. 


Beating the eggs and sugars


In a separate bowl, sift the flour, cocoa, bicarb and baking powder.


Heat the milk, butter and Horlicks powder in a small saucepan until the butter has melted and the mixture is hot but not boiling. Whisk through whilst this is on the heat to get rid of any lumps.

Add the warm Horlicks mixture into the eggs a little at a time, beating as you do this. Fold in the dry ingredients thoroughly, then fold through the crushed Maltesers. The cake mixture itself will be quite thin and runny - don't worry as this is the correct consistency.

Divide the cake batter evenly between the cupcake case. because the batter is so runny, I found it easier to pour it into the cases with a measuring jug. Fill the cases no more than 2/3 full.

Bake in the oven for 15 minutes for the minis and 20 minutes for the larger cupcake, turning the trays after 10 minutes. -The cakes should have risen and by quite springy. Test with a cocktail stick - if it comes out clean, they are done.

Let them cool in their tins on a rack for about 5 minutes and then turn them out onto a cooling rack. Leave to cool completely before you ice them.

The Icing
Beat the butter, milk, Horlicks and cocoa along with half the icing sugar until smooth. This can take up to 10 minutes using an electric mixer. Gradually add the rest of the icing sugar and beat until the icing is smooth and creamy.

Pipe or spoon the icing onto the cupcakes, topping each one with a Malteser.


The cakes, especially the icing, really tasted like Maltesers - not too sweet or rich and quite light. They went down a storm at the party - all the minis went in the space of about 5 minutes, with my friends Paul and his wife Claire hiding away the larger cupcakes to enjoy alone over the weekend.


Tuesday, 8 February 2011

Birthday Treats

Friday was my brother in law's 21st birthday and I offered to make some birthday treats. Treats being a birthday cake and also some cupcakes.

Please excuse the bad writing!


Seeing as the salted caramel cakes went down so well last weekend at the murder mystery, I decided to whip up a batch alongside a chocolate cake and I also decided to make a batch of chocolate orange cupcakes too (Post on those to follow...)

For the chocolate cake used the same recipe as I used for the chocolate and raspberry cake I made a few weeks ago, but minus the raspberries. Instead I just used the chocolate ganache as a filling as well as to cover the cake. I also used some of the left over salted caramel frosting to pipe on the edges and the base of the cake. For this I used a medium sized star tip.

I also attempted to pipe on "happy birthday" which although didn't look too bad, I think need a little bit more practice!

We didn't end up eating the cake on the night, I think this was because I went a bit overkill with the cupcakes, but we did have it for dessert after Sunday dinner... Quote of the evening from my brother in law was "Did you make to cake too? I thought it had been bought..." not sure if that's a good or bad thing!


The cake itself was still moist after 2 days - this was probably down to the ton of ganache that was covering it.


The diet has already started!

Thursday, 3 February 2011

Murder and Armadillos!

Just a quick post on some cupcakes I made at the weekend... apologies for the photos, I only had my camera phone whilst making them! Salted Caramel topped with Dime (Daim??) bars. those of you old enough to remember should understand the armadillo reference....

YUM! minis and big cupcakes -  a lovely combo of sweet and salt!


Saturday was the day of my friend Dan's long awaited murder mystery dinner party and I was asked to make some cupcakes inspired by Dime Bars as part of a 3 part dessert course! 


"Of course" I said without hesitation, and promptly forgot that I would actually need to get my hands on some Dime bars which are actually quite difficult to come by. Well, they were for me. After trying various supermarkets and buying Rolos as a back up decoration, I ended up finding some at my corner shop! What I fool I was for not trying local in the first place!


I managed to make 12 minis and 9 large cakes with the recipes linked below and they went down a treat. A few were even eaten for breakfast the next day...


The cake recipe came from The Primrose Bakery book and the frosting came from Fiona Carins which can be found here at GoodFood.

Salted Caramel Frosting!!

Decoration wise, I piped the buttercream onto each cake using a star nozzle (I will post a bit of a how to on this, I promise!!) and then piled chopped up pieces of dime bar onto the cake. I thought they looked quite tasty at this point, but I couldn't help thinking they looked like they we missing something.

Naked

I had some dark chocolate in the cupboard and melted it down and drizzled it over each cake with a teaspoon. I think it gave them that extra oomph!

With designer handbag

Oh and if you're wondering - I wasn't the murderer!...there's always next time!!

Friday, 21 January 2011

Death by Cake

I am conscious that I haven’t posted for a while and that so far I haven’t blogged about baking. So much so it is going me nightmares. The truth is that I have just been really lazy this week and rather just get on and write, I have taken the option of drinking wine… (Speaking of which, Morrison’s have a lovely St Chinian red on offer for £4.99, it is usually £9.99, V. good!) For those who know me well, they will know that my first passion in the kitchen is baking.


It was my Father in Laws birthday last weekend and rather than make cupcakes (blog post on those to follow!) I decided to make a good old fashioned chocolate cake, with a bit of a fruity twist.

The idea of raspberries with chocolate is a very common combination and I think that the inclusion of a raspberry cream as the cake filling really helps to cut through the richness of the cake. The cake consists of a rich chocolate sponge, the raspberry cream and the whole thing is then covered in a beautiful, thick chocolate ganache icing.

The different elements of the cake are an amalgamation of 3 different Nigella Lawson recipes, who I think is pretty reliable when it comes to cake. (Although I have to say I don’t ever take cake decorating tips from her, she’s a bit scruffy for my liking and she’d probably agree with me).

Raspberry Chocolate Cake

For the cake
50g/2oz best-quality cocoa powder, sifted
100g/4oz dark muscovado sugar
250ml/8fl oz boiling water
125g/4½oz soft unsalted butter, plus some for greasing
150g/5oz caster sugar
225g/8oz plain flour
½ tsp baking powder
½ tsp bicarbonate of soda
2 tsp vanilla extract
2 free-range eggs

For the raspberry cream
1 punnet raspberries
300ml extra thick double cream

For the icing
75g unsalted butter
175g best quality dark chocolate, broken into small pieces
300g icing sugar
1 tablespoon golden syrup
125ml sour cream
1 teaspoon real vanilla extract
1 punnet of raspberries, to decorate

Preheat the oven to 180C/350F/Gas 4. Line the bottoms of two 20cm/8in sandwich tins with baking parchment and butter the sides.

Sift the cocoa into a large bowl and mix in the dark muscovado sugar. Pour in the boiling water and mix. Se to one side to cool slightly

Cream the butter and caster sugar together in a separate bowl, well until pale and fluffy


Sift the flour, baking powder and bicarbonate of soda together in another bowl and set aside for a moment.

Dribble the vanilla extract into the creamed butter and, then crack in one egg, quickly followed by a spoonful of the flour mixture (this stops it from curdling), then the second egg. Keep mixing after each addition. Incorporate the rest of the flour mixture little by little, then finally mix and fold in the cocoa mixture.


Divide the batter between the two cake tins and put in the oven for about 30 minutes. (Mine cooked in about 20, so be aware! If a cake tester comes out clean, it’s done!)

Leave the tins on a wire rack for 5-10 minutes, then turn the cakes out and set aside to cool. It took a good hour and a half – 2 hours.

For the filling, simply fork through the raspberries into the cream. If you haven’t bought thick double cream, you will need to whip it beforehand until it is soft and voluminous, but not too stiff.


To make the icing, melt the butter and chocolate in a good-sized bowl, set to one side.

While the chocolate and butter are cooling a little, sieve the icing sugar into another bowl.

Add the golden syrup to the cooled chocolate mixture, followed by the sour cream and vanilla and then when all this is combined whisk in the sieved icing sugar.

When you've done, you may need to add a little boiling water or more icing sugar depending if you need it to be thicker or runnier. It should be liquid enough to coat the cake easily, but thick enough not to drip off. In any case, the icing will dry off quite firm.


Assembling and decorating the cake
On your cake stand / plate cut out four strips of baking parchment to form a square outline on it (this stops the icing running on to the plate). Then sit one of the cakes, with the domed side down.


Spread the raspberry cream into the cake half evenly and smoothly with a palette knife / spatula. Sit the other cake on top, normal way up, pressing gently to sandwich the two together.


Spoon half of the icing on to the top of the cake and spread it over evenly. Spread the sides of the cake with the remaining icing and leave a few minutes till set, then carefully pull away the paper strips.


Decorate with raspberries. To keep them in place, I dipped the bottom ends into the icing to stick.

Try and not to devour it all at once.