Monday, 31 January 2011

Pie....

I officially suck at keeping up to date with my blog. Its been a few hectic weeks at work and also at home, and whilst I have been whipping up a number of treats, I have just been too lazy to write. I'll give myself a D- and must do better.

Pie...NOM!
 
Last Sunday was a cold, wet, horrible day. One of those days that made you want to just stay indoors, watch trashy TV and eat. I had one thing on my mind that day and that was pie. I love pie. Any pie, but in particular savoury. Pie is also a bit of a topical choice, as it is apparently a key food trend for 2011 (see here for the full story). In my opinion, pies aren't something that you can consider a "trend" food they've always been around, from schools, to football terraces and to pubs. they're among the top of the foods I have in my "comfort food" list. I defy any non vegetarian who doesn't love a pork pie and brown sauce! 

Anyway, aside from the pie rant, I actually made a really good steak, ale and stilton pie. Homemade pastry and everything, which I was particularly proud of. Steak, beer, cheese and pastry are four of my favourite foods, so to combine them all = winner!

The pie filling was an adaptation of Jamie Oliver's Steak, Guiness and Cheese Pie. The base recipe can be found on Mr Oliver's site

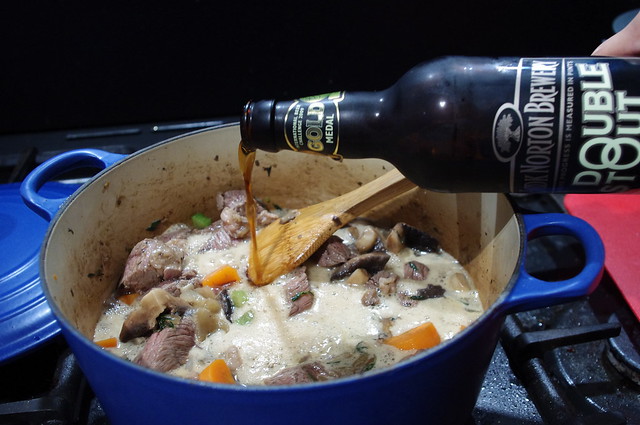
My changes to the recipe was that I used a lovely British Stout by Hook Norton instead of the Guiness and insead of the cheddar cheese I used the classic cheese of choice in this kind of pie - Stilton! So not to over power the pie, I used about 120g of Stilton.
This is brilliant, long slow cooking at its best. The only real bit of "cooking" is frying of the pie filling before whacking it in the oven for a couple of hours.

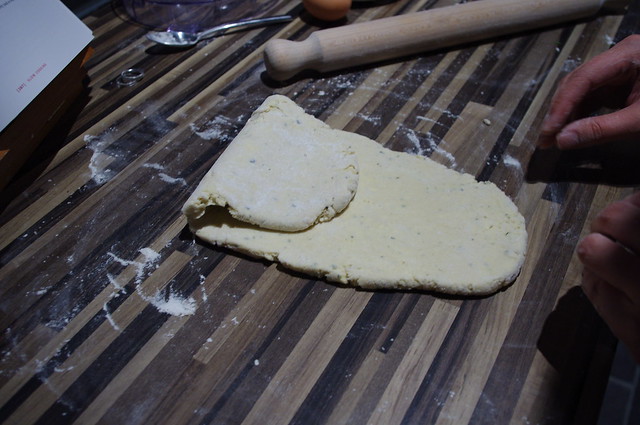
Whilst the pie filling was in the oven, I got on and made the pastry. I've never made pastry before, basically because I've always thought it would be too difficult and it's much easier to buy my own. However, I took the plunge and used Hugh Fearnley Whittingstall's Rough Puff Pastry recipe from his River Cottage "Meat" book. However, you can also find the recipe for it on the C4 Food site

Puff pastry relies on layers and layers of butter and flour - rough puff essentially a halfway house between puff and flaky pastry, but eeasier to make.

The key to achieving a good flake to the pastry is not to rub the butter in too much, you want to see lumps of butter - rather than cube the pastry as in the recipe, I grated it whilst super cold and then bright it together with the flour and the water. 


You also need to work very quickly and try and keep the pastry as cold as possible. If you feel that it is getting too warm, then pop it in the fridge for 30 mins and continue. Roll and fold the pastry at least a dozen times and chill until you need it.

When the pie filling is ready and you have added the cheese, line the pie dish with 2/3 or the pastry, fill with the meat mixture and top with the other 1/3 of pastry. Roughly crimp the edges, seal with egg wash and cook in the oven for 45 mins at 190°C.
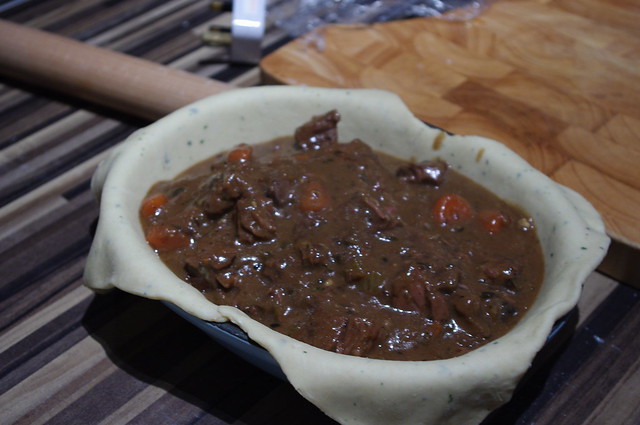


The beauty of this dish is that you can make the pastry and filling in advance, the pastry and filling freeze really well too.

We just ate it with peas, and a glass of Hook Norton Stout! 

Friday, 21 January 2011

Death by Cake

I am conscious that I haven’t posted for a while and that so far I haven’t blogged about baking. So much so it is going me nightmares. The truth is that I have just been really lazy this week and rather just get on and write, I have taken the option of drinking wine… (Speaking of which, Morrison’s have a lovely St Chinian red on offer for £4.99, it is usually £9.99, V. good!) For those who know me well, they will know that my first passion in the kitchen is baking.


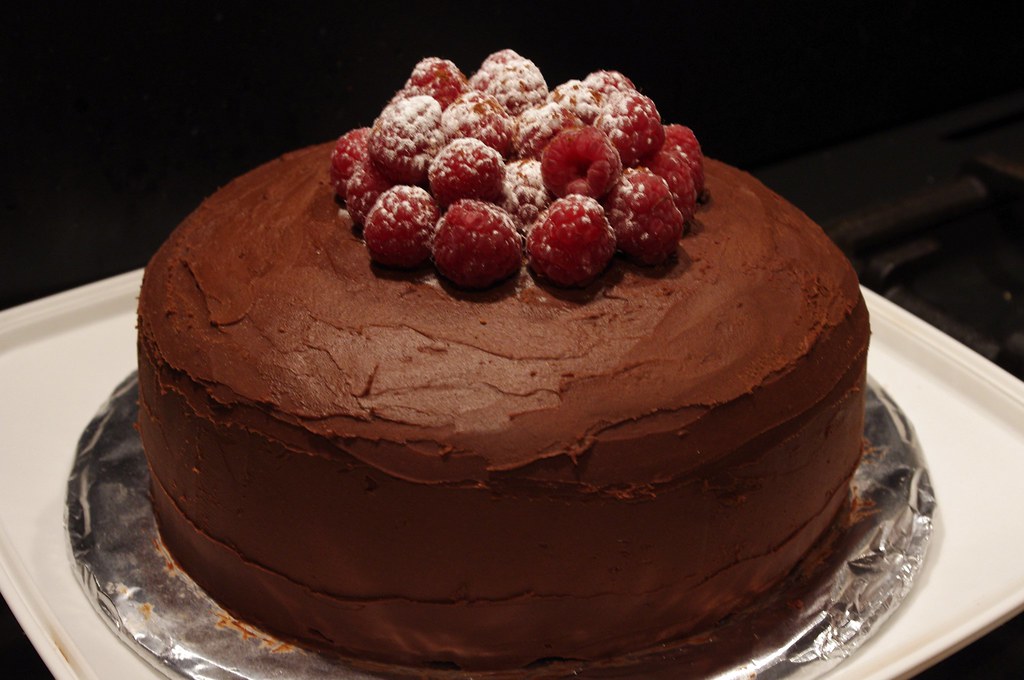
It was my Father in Laws birthday last weekend and rather than make cupcakes (blog post on those to follow!) I decided to make a good old fashioned chocolate cake, with a bit of a fruity twist.

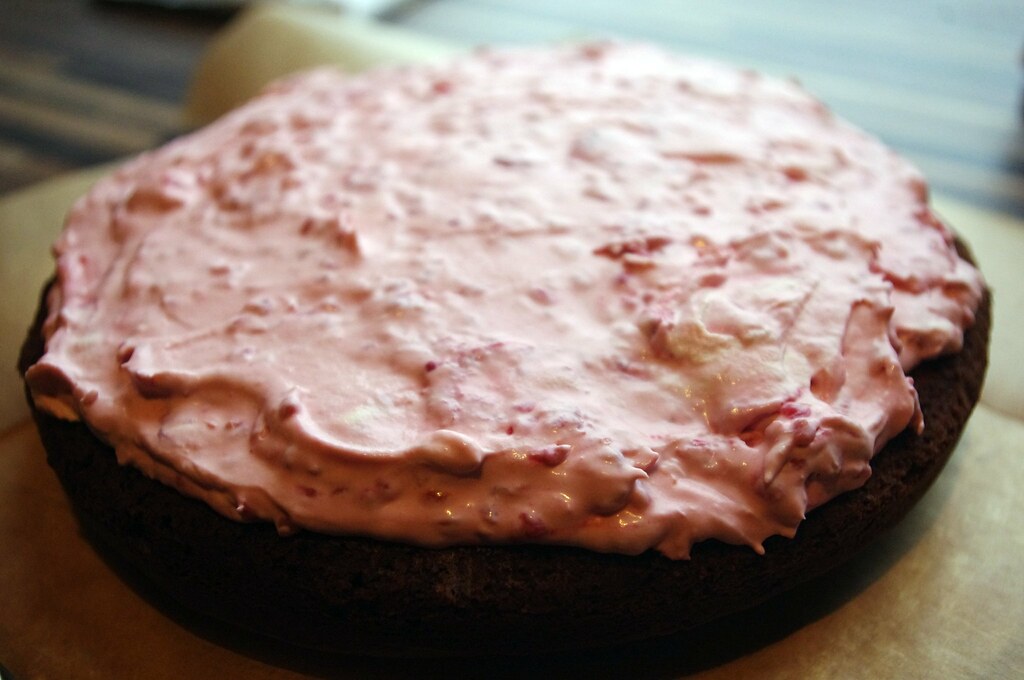
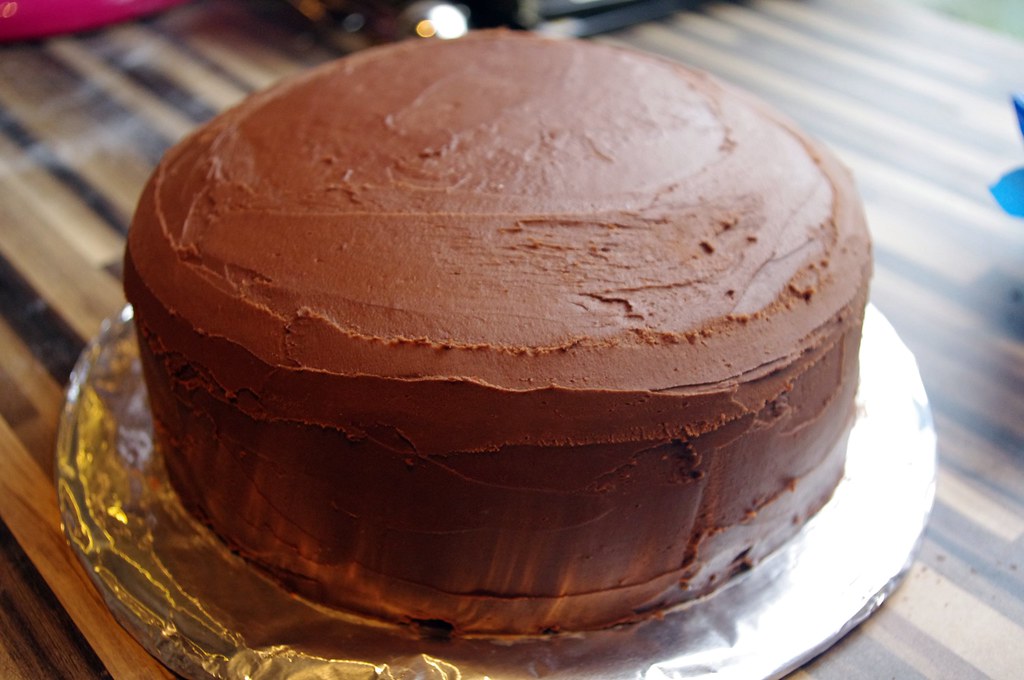
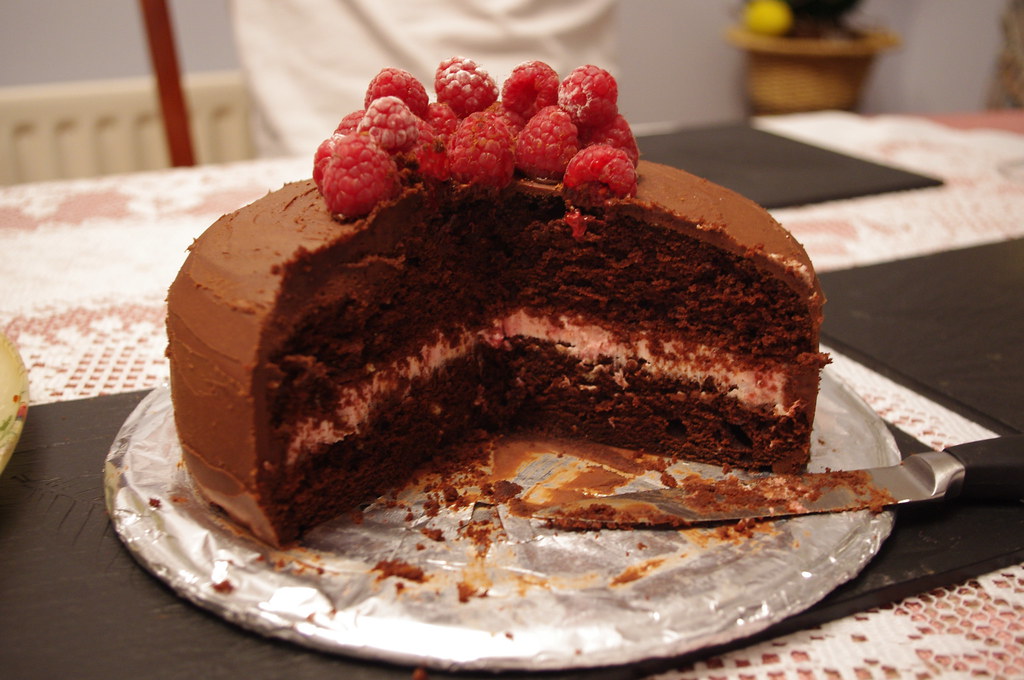
The idea of raspberries with chocolate is a very common combination and I think that the inclusion of a raspberry cream as the cake filling really helps to cut through the richness of the cake. The cake consists of a rich chocolate sponge, the raspberry cream and the whole thing is then covered in a beautiful, thick chocolate ganache icing.

The different elements of the cake are an amalgamation of 3 different Nigella Lawson recipes, who I think is pretty reliable when it comes to cake. (Although I have to say I don’t ever take cake decorating tips from her, she’s a bit scruffy for my liking and she’d probably agree with me).

Raspberry Chocolate Cake

For the cake
50g/2oz best-quality cocoa powder, sifted
100g/4oz dark muscovado sugar
250ml/8fl oz boiling water
125g/4½oz soft unsalted butter, plus some for greasing
150g/5oz caster sugar
225g/8oz plain flour
½ tsp baking powder
½ tsp bicarbonate of soda
2 tsp vanilla extract
2 free-range eggs

For the raspberry cream
1 punnet raspberries
300ml extra thick double cream

For the icing
75g unsalted butter
175g best quality dark chocolate, broken into small pieces
300g icing sugar
1 tablespoon golden syrup
125ml sour cream
1 teaspoon real vanilla extract
1 punnet of raspberries, to decorate

Preheat the oven to 180C/350F/Gas 4. Line the bottoms of two 20cm/8in sandwich tins with baking parchment and butter the sides.

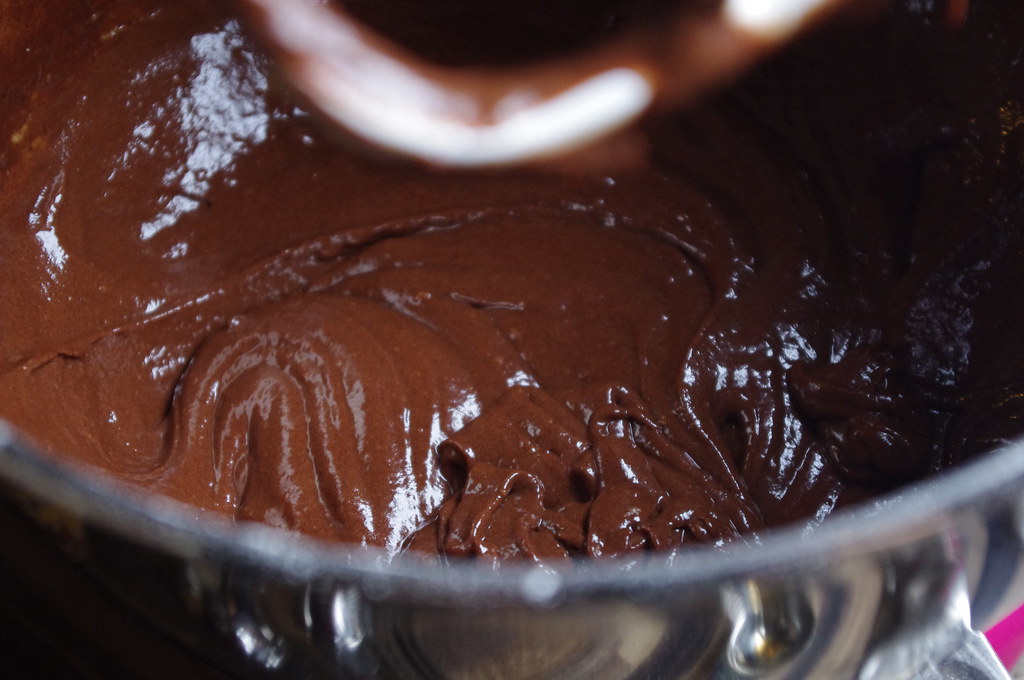
Sift the cocoa into a large bowl and mix in the dark muscovado sugar. Pour in the boiling water and mix. Se to one side to cool slightly

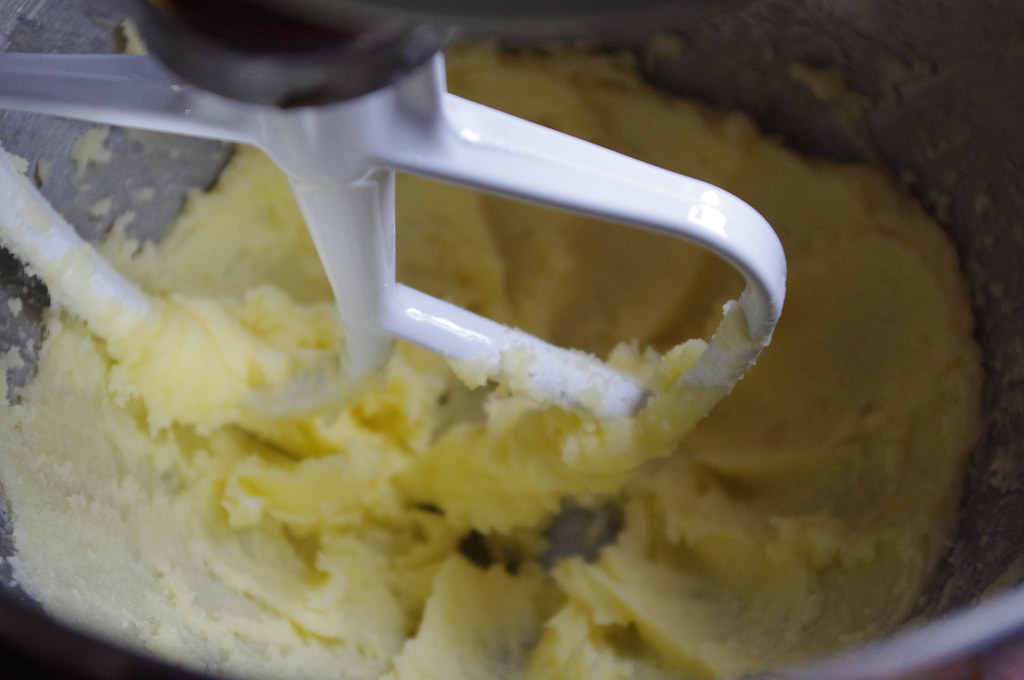
Cream the butter and caster sugar together in a separate bowl, well until pale and fluffy


Sift the flour, baking powder and bicarbonate of soda together in another bowl and set aside for a moment.

Dribble the vanilla extract into the creamed butter and, then crack in one egg, quickly followed by a spoonful of the flour mixture (this stops it from curdling), then the second egg. Keep mixing after each addition. Incorporate the rest of the flour mixture little by little, then finally mix and fold in the cocoa mixture.


Divide the batter between the two cake tins and put in the oven for about 30 minutes. (Mine cooked in about 20, so be aware! If a cake tester comes out clean, it’s done!)

Leave the tins on a wire rack for 5-10 minutes, then turn the cakes out and set aside to cool. It took a good hour and a half – 2 hours.

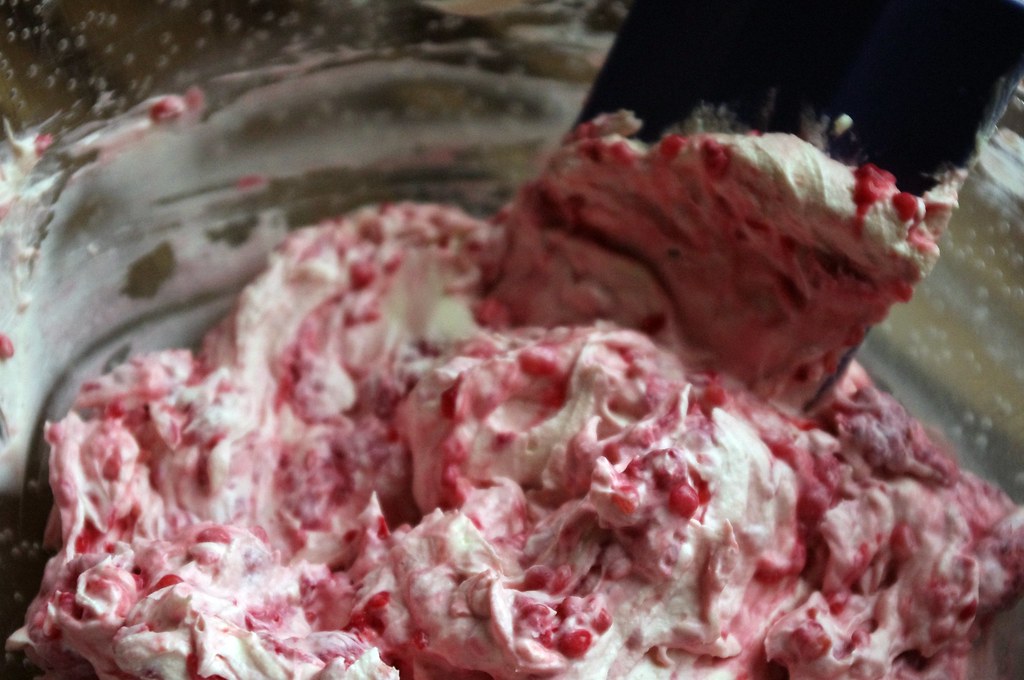
For the filling, simply fork through the raspberries into the cream. If you haven’t bought thick double cream, you will need to whip it beforehand until it is soft and voluminous, but not too stiff.


To make the icing, melt the butter and chocolate in a good-sized bowl, set to one side.

While the chocolate and butter are cooling a little, sieve the icing sugar into another bowl.

Add the golden syrup to the cooled chocolate mixture, followed by the sour cream and vanilla and then when all this is combined whisk in the sieved icing sugar.

When you've done, you may need to add a little boiling water or more icing sugar depending if you need it to be thicker or runnier. It should be liquid enough to coat the cake easily, but thick enough not to drip off. In any case, the icing will dry off quite firm.


Assembling and decorating the cake
On your cake stand / plate cut out four strips of baking parchment to form a square outline on it (this stops the icing running on to the plate). Then sit one of the cakes, with the domed side down.


Spread the raspberry cream into the cake half evenly and smoothly with a palette knife / spatula. Sit the other cake on top, normal way up, pressing gently to sandwich the two together.


Spoon half of the icing on to the top of the cake and spread it over evenly. Spread the sides of the cake with the remaining icing and leave a few minutes till set, then carefully pull away the paper strips.


Decorate with raspberries. To keep them in place, I dipped the bottom ends into the icing to stick.

Try and not to devour it all at once.

Monday, 10 January 2011

Friday Night Mess, or Jumbalaya

It was supposed to be a quiet night in with the Hubs and a DVD as he was working early in the morning. However, I was asked to go for a few drinks by the Mother in Law. I felt I had to do my wifely duties and represent, so dinner was a bit of an off the cuff, rushed affair, but tasty nonetheless.


The last time I made a jumbalaya was when I was trying to lose timber, so it was a Weight Watchers recipe which was a bit insipid and lacked one of the main elements of a jumbalaya - chrorizo!


The idea of making this dish was born out of a few factors:
  1. I had lots of leftover chicken from the Nigella dish the previous night 
  2. I had bought some cooking chorizo the other day 
  3. I was after something relatively easy, a one pot dish.
  4. I had all of the ingredients needed.
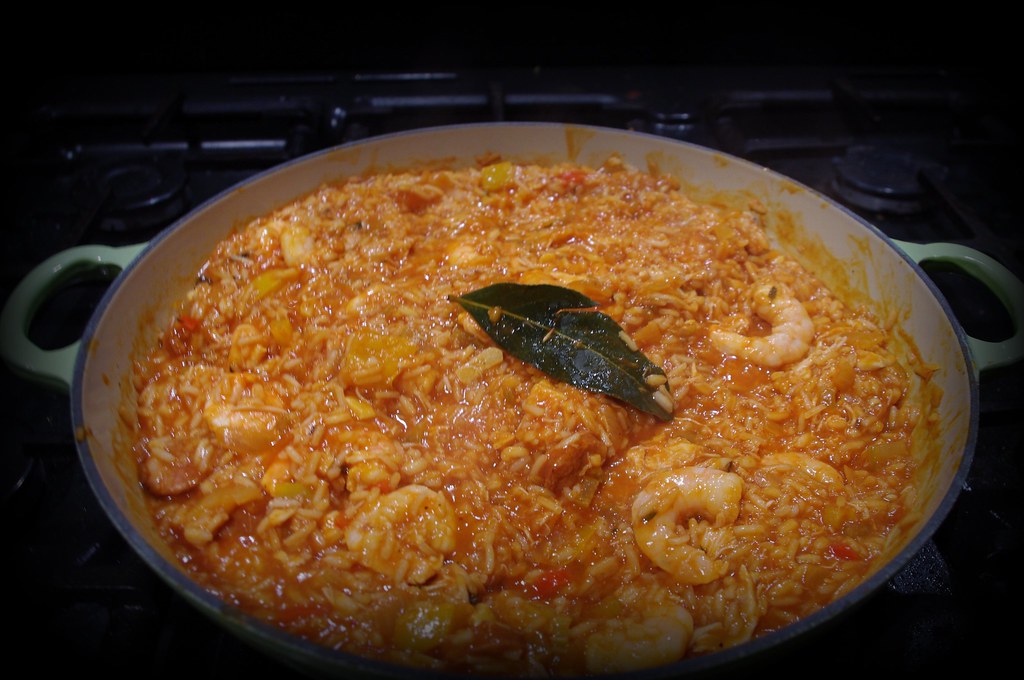
I based the recipe on Jamie Oliver's Chicken and Sausage Jumbalaya from his America book, but again, with a few tweaks. The main one is that Jamie roasts off chicken thighs for it, but with me having lots of leftover cooked chicken, I threw this in later on. I have to say it was a really lovely comforting dish with a lovely spicy kick! 

I'll definitely be making this again but when I do, I'll probably put in half the quantity of tomatoes to turn down the acidity, and add more chorizo to add more zing. These quantities are, as I mentioned a bit ad libbed but it made about 4 generous servings.

My Take on Jamie's Jumbalaya
125g chorizo sausage chopped into 1cm thick slices 
250g cooked chicken, chopped into chunks (you can use raw, just cook this off after the chorizo) 
Couple of handfuls of king prawns, preferably raw, but I had some cooked.
1 onion chopped
2 celery stalks, trimmed and diced
1 pepper, deseeded and chopped (preferably green, I only had a yellow)
1 bay leaf
A few sprigs of thyme, leaves picked
3 cloves of garlic sliced
1 red chilli, finely chopped (feel free to leave seeds in if you like it hot!)
1 tin of tomatoes, chopped
500ml chicken stock
300g long grain rice ( I didn't have enough long grain so used basmati too)

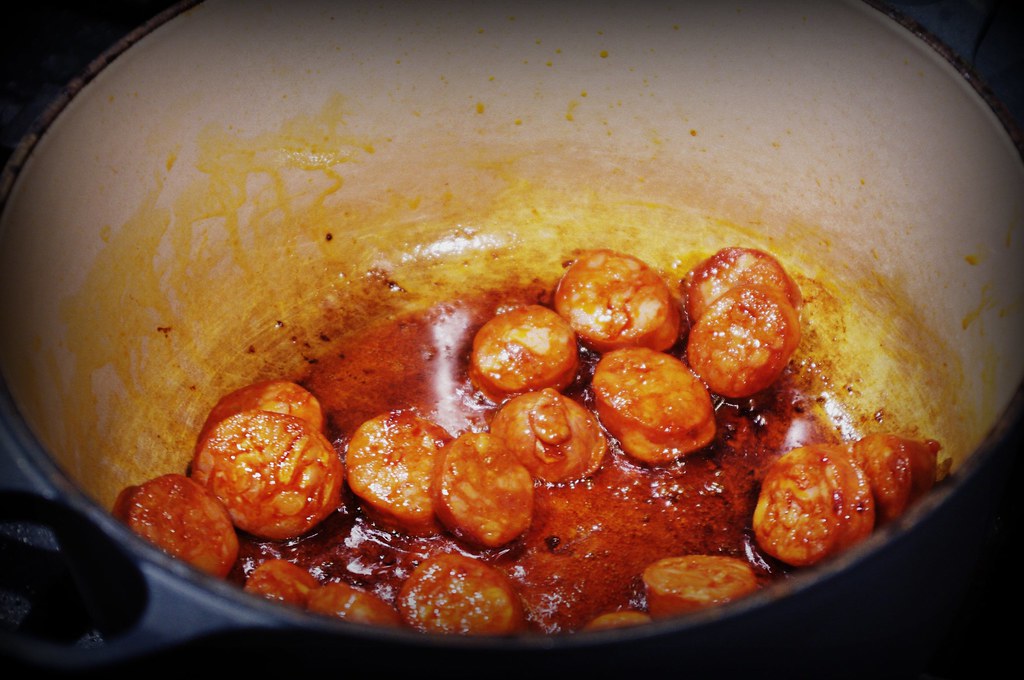
Starting with a cold, large* casserole pan, add the chorizo and turn onto a medium heat and allow the oil from the chorizo to render out and the pieces to brown. I find that by starting off with a cold pan stops the chorizo from browning too quickly and means the oil renders out nicely.


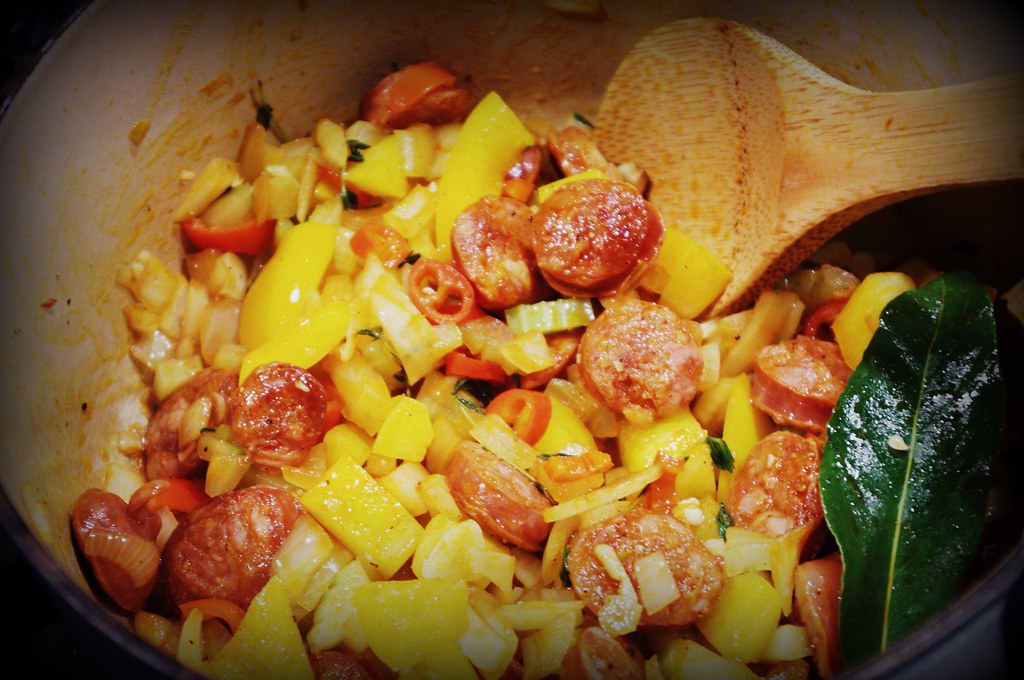
After 5 mins, add the onion, pepper, celery, thyme and bay. Season. Keep on the heat until everything softens, about 10 minutes. Stir regularly.


Then add the chilli and garlic, soften slightly and then add the tomatoes and stock. Bring to a simmer and the add the rice. Stir well and then clamp on the lid. Make sure you stir every few minutes making sure it doesn't stick to the bottom of the pan. It will take about 15-20 minutes for the rice to cook through.

Stir in the prawns and add a little more water if it's looking too dry. You're looking for a porridgy consistency at this point. Place the lid on again and continue cooking for about 3 mins.


Serve with a green salad if you like. We didn't.

Hubs took leftovers to work the next day. He thought it tasted even better after the flavours developed even more.

*I emphasise large, I used my 20cm Le Creuset and then had to transfer everything to a much larger pan later, as I didn't realise it would make quite so much!

Thursday, 6 January 2011

And then I Broke the Bird's Breast!

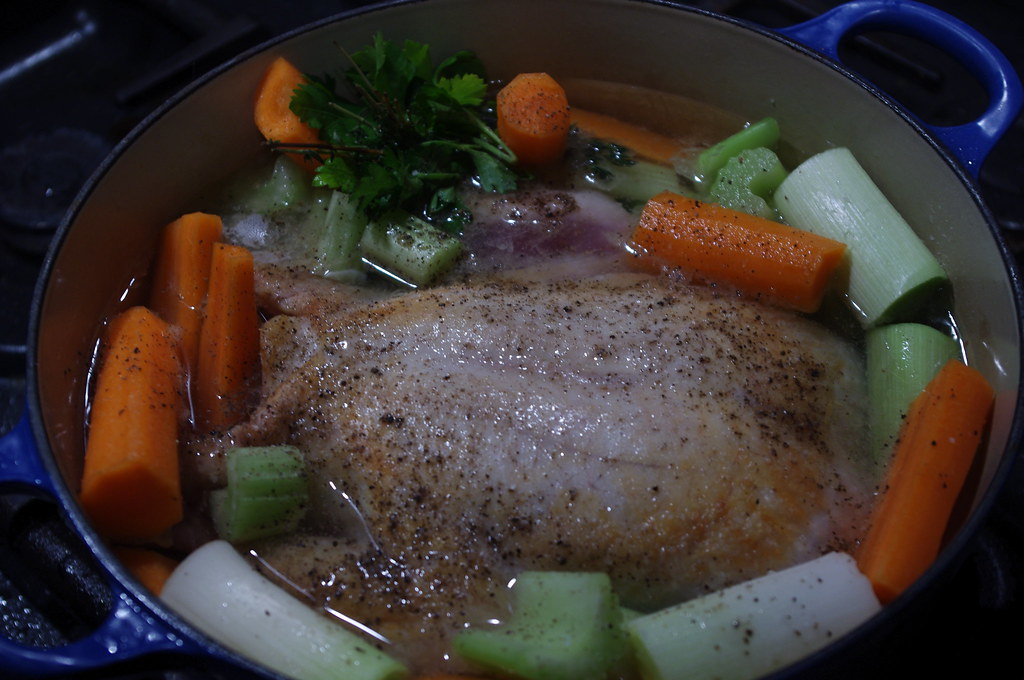
This is my second attempt at Nigella Lawson's Praised Chicken dish which is from her Kitchen book (one of my faves from 2010) and also featured in one of the TV Episodes.


It's one of those dishes that really makes you feel virtuous, as it's just poached chicken, veg and rice. Definitely one for January, it's a welcome change to all of the excesses of the Christmas and New Year. (Speaking of which, the decorations need to come down tonight!!) I was hoping that the fact it's full of chickeny goodness would cheer the husband up, as he had a bit of a nightmare with trains tonight! Well, this coupled with a few beers anyway. Think it worked!

I have made some slight tweaks to Nigella's original recipe, but its essentially the same. The only bit if kit you will need is a rather large pan that will fit the chicken. My Le Creuset only just fits everything in and it's 24cm wide and about 10 cm deep. I love one pot cooking and this is easy peasy.


Nigella's  Chicken

1 chicken, approx 1.5 kg (pref free range / organic please!)
A glass of white wine
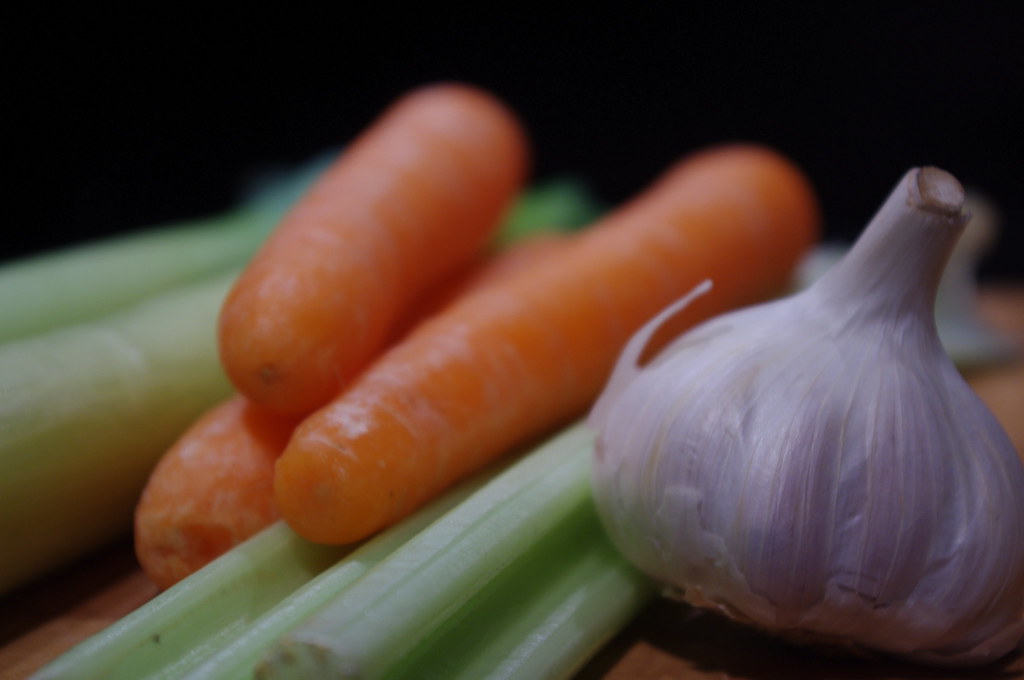
2 carrots cut into batons
2 stalks of celery, chopped
2 leeks, each cut into 4 batons
4 garlic cloves, peeled but kept whole
A few sprigs of parsley
A few sprigs of thyme
Cold water

To Serve
Rice
Parsley

Untruss the chicken and then snip off its ankles (If it's not a better welfare bird then you won't have to do this as they will have already been removed) but don't throw them away!

Then press down on the breast of the bird until you hear its breastbone crack and the bird flattens slightly. Like Nigella, I really enjoyed this bit! Great if you feel like a bit of violence on a Thursday evening... If you're a wuss then skip this part, but be warned that it may not fit into your pan. Season the bird.

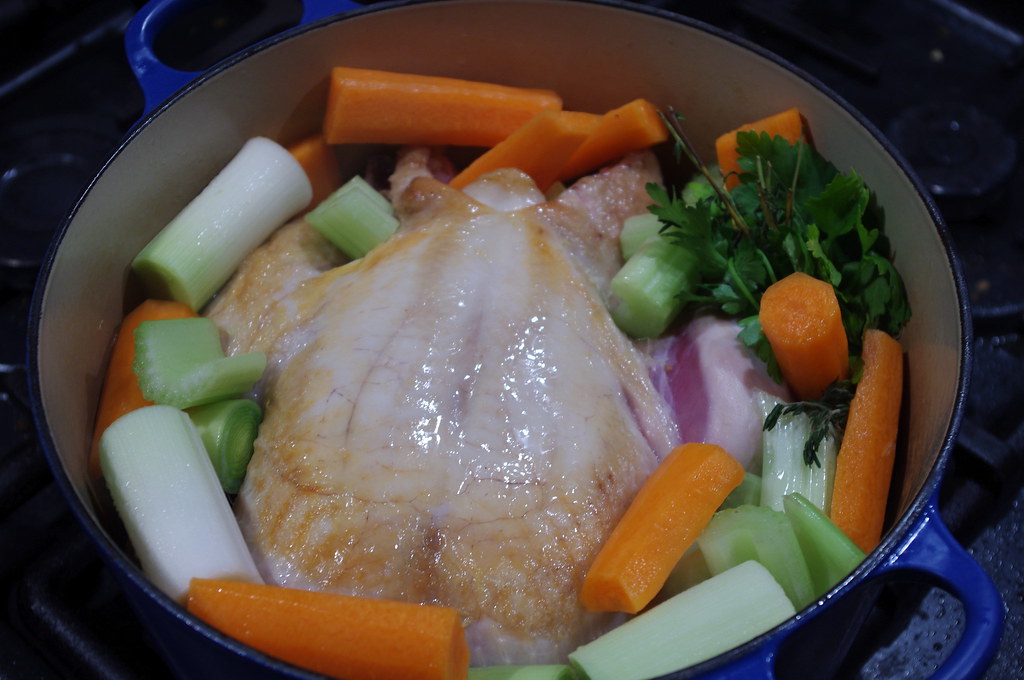
Splosh some olive oil into the pan and heat up slowly. Once it's warm enough, place the chicken in the pan, breast side down and turn the heat up. After a few minutes, the chicken should have browned so turn it over and pop in the bird ankles (Of course these are not for eating, unless you want to, but they will add flavour to the soup).


You don't need to completely cover the chicken

Add the white wine and let it bubble away slightly before adding the garlic, carrots, leeks and celery. Add the parsley and thyme (I tie them up with the elastic I untrussed the chicken with).

The add enough cold water so that most of the chicken is covered, bring to a rumbling simmer and then clamp the lid on.

The chicken should take around 1 hour 30mins - 45 mins. Once ready, remove from the pan and carve.

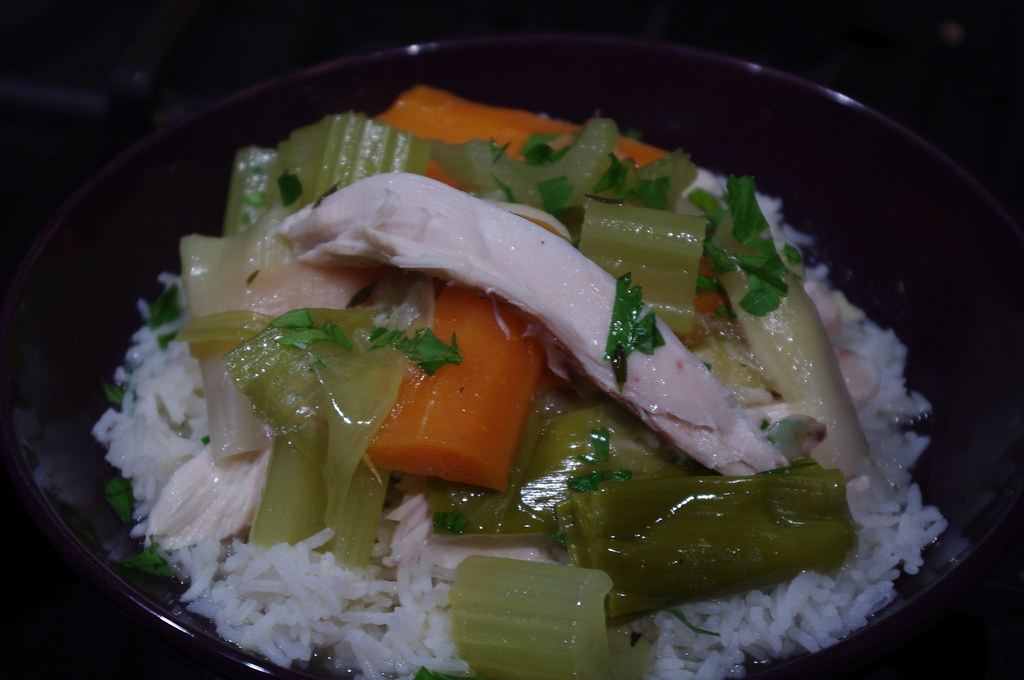
Serve the chicken, soup and veg with rice (I used basmati as this is all I had in the cupboard, but wild rice would be yum!) and an extra smattering of parsley. Not the prettiest of dishes, but it tastes brill. Felt so healthy that a glass of wine was in order to restore the balance...


This also leaves shed loads of leftover chicken as for some reason it goes a very long way and any leftover soup can be used as a stock. Bonus.

Tuesday, 4 January 2011

How I met your Father....

My husband often tells me that the reason he married me was because of my meatballs. They are one of his favourite things to eat and I often end up making them at least a couple of times a month. My usual ones are of the Italian variety and I serve them with tagliatelle or spaghetti.


I have to say that I never really tend to stick to a tried and tested recipe, I like to try different variants every time, just to see if I can make them that little bit better.
This time, I made a few tweaks, namely the inclusion of breadcrumbs to the meatball mix (I have never really seen the point of using them before but have heard these really keep them tender) baking the meatballs rather than frying them off, and the addition of a bay leaf to the sauce.
Spiced Meatballs in Tomato Sauce
For the meatballs
2-3 cloves garlic, crushed (depends if you like garlic!)
500g minced beef / pork or a mixture of the two
60g breadcrumbs (I used an old pitta bread and blitzed it)
1 tsp ground cinnamon
1/2 a freshly grated nutmeg
Grated zest of 1 lemon
small bunch of parsley, finely chopped (I used parsley because I had some in my fridge, but feel free to use whichever herbs you choose, I often use basil).
For the tomato sauce
1 large jar (650g?) passata
1 med - large onion, finely chopped
2 sticks celery, finely chopped
2 cloves garlic,
a few sprigs of thyme, leaves picked (Again or use whichever herbs you have at hand)
1 bay leaf
1 chilli (optional) - deseeded if you don't want too much heat or leave them in if you do. 
glug of olive oil
1 tbsp sugar

To serve
Tagliatelle or spaghetti
Chopped parsley
Grated parmesan

Preheat the oven to 200°C / gas mark 6

Firstly, make the meatballs. Simply mix all of the ingredients into a bowl (or whiz up in a food processor like I do) and season well. Form the mixture into walnut sized balls and place on a greased baking tray.


Then place the meatballs in the oven for about 10-15 mins or until golden brown. (They don't need to be cooked through)


Whilst the meatballs are in the oven, make a start on the sauce. Add a glug of olive oil to a large pan and add the onion and celery. Soften for around 5 minutes, taking care not to brown them too much. Then add the garlic, herbs, chilli and bay leaf. Stir and soften for another 3 minutes and then add the passata and the sugar. (The sugar takes the acidity away from the tomatoes). Then fill the passata jar  a third full with water and add that too.


Allow the sauce to come to a simmer then add the meatballs to the sauce.

Leave the meatballs and sauce to rumble away on a low heat until the sauce has thickened. (This can take from 30 - 45 mins, but it's worth the wait!)


Cook the pasta and stir it into the sauce and meatballs. Serve in a large, heated shallow bowls and scatter with parsley and serve with grated parmesan


Enjoy with a glass of red (or white or pink of you prefer!)

Saturday, 1 January 2011

Another Food Blog Blah Blah Blah...

I was never someone who kept a diary, in fact I'm not really one of those people who like to talk about themselves in great detail. This is probably because I'm actually quite a dull person.

Here are the things you need to know about me:
  1. I love food and love to cook.
  2. I used to be fat but lost the weight, so I have to try and dampen my love of food but fail miserably.
  3. I also love to bake. Cupcakes in particular - I started making them last year and realised I had a bit of knack for them


    My Christmas Chocolate Cupcakes

  4. I love a drink (Red wine, gin and real ale in particular).
  5. I am a feeder - seeing as I can't feed myself everything I like, well, you get the picture.
  6. My parents run a Chinese, and even though I hated it when I was younger because I was a walking stereotype / cliche, I think that my love of food is because of this.
  7. I am a dictator in the kitchen, possibly due to the above.
  8. I love cats
  9. I love my Kitchenaid Mixer
The love of my life

I'll try and share my thoughts about food and any recipes I think are worth a mention.