Thursday, 17 February 2011

Belly Nice!

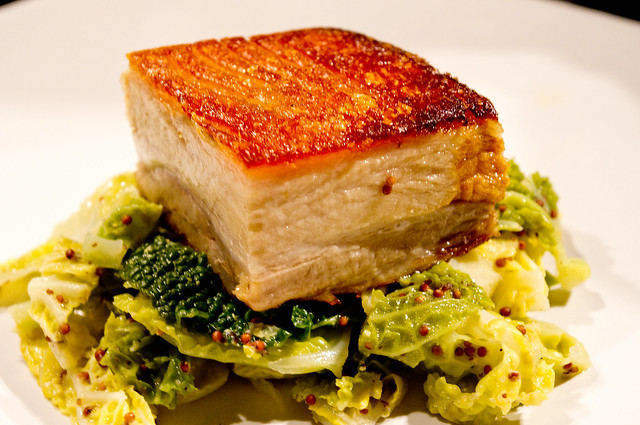
My friend Dan is a very good cook - I've never disliked anything he's made and he's great at giving foodie hints and tips. We both subscribe to BBC Good Food Magazine and in February's edition there was a brilliant recipe for pork belly. Dan made it for the murder mystery party I went to the other week and I was hooked. The pork was melt in the mouth and the crackling crisp. It looked really professional too and I'm all about the presentation!


Mmmm Pork!!
Now I've made pork belly in the past where I've roasted it long an slow in the oven with good results but I really think this is the only way I'm going to cook this cut of pork. Be warned though - this is a 2 day process but the main bulk of the cooking is done on the first day and is ideal for entertaining as it only needs pan frying at the last moment.


I was missing a few ingredients for the braising stage, and because I was only feeding the 2 of us, the piece of pork belly was smaller - it was enough to serve 2, but can be easily doubled. So below is my recipe. (Note that some of the pictures aren't brilliant as they were taken with my phone. The good ones were taken by the Husband)


Cider Braised Pork Belly (Serves 2)


Ingredients
1 large carrot , chopped
1 leek , roughly chopped
2 garlic cloves , smashed
A bunch of parsley stalks
2 bay leaves
300ml good-quality cider
small splash cider vinegar , plus extra to season
1 litre chicken stock
800g piece unscored boneless pork belly (mine was scored though, it didn't really make a difference)
2 tbsp sunflower oil


Day 1:
Heat oven to 180C/160C fan/ gas 4. Place all the ingredients except the pork and sunflower oil in a pan that will fit the pork. Season, bring everything to the boil then turn down the heat and slide the pork into the pan. The pork should be totally covered - if it isn't, top up with water. Cover the dish with a lid and place it in the oven for 3 hrs.


After 3 hours, leave it to cool slightly in the stock. Line a flat baking tray with cling film. Carefully lift the pork into the tray and make sure you remove any veg or other bits from the surface of the pork as it will end up pressed into the pork. Cover the pork with another sheet of cling film and cover with a flat tray or dish - the tray must be completely flat as any indentations will be pressed into the pork.


Weigh the pork down and leave to cool in the fridge overnight. I used my heavy stone mortar along with a couple of cans to really weigh it all down. You want to flatten the pork so with ends up all the same thickness. Strain the juices into a jug or small saucepan, cover and chill.


Day 2
Unwrap the pork and place on a board. Trim the uneven edges so that you have a neat, straight piece of meat. Cut the meat into equal pieces and set aside until ready to cook. Skim off any bits of fat (should be easy as it will be set) from the braising juices and tip what will now be jelly into a saucepan, then bubble down by about two-thirds until starting to become slightly syrupy. Add a few more drops of vinegar, to taste.


Heat the sunflower / veg oil in a large frying pan until hot, then turn the heat down. Make sure you don't use olive oil as it will burn.


Add the pork to the pan, skin-side down - be careful as it will spit and attack you! I placed a tray partially over the pan so the it didn't cover everything in oil. Sizzle the pork for around 5 mins until the skin is crispy. Flip it over and cook for 3-4 mins until browned.


Et voila, perfect pork! Thanks Dan for making this first, as I wouldn't have tried it otherwise, purely because of the 2 day process!
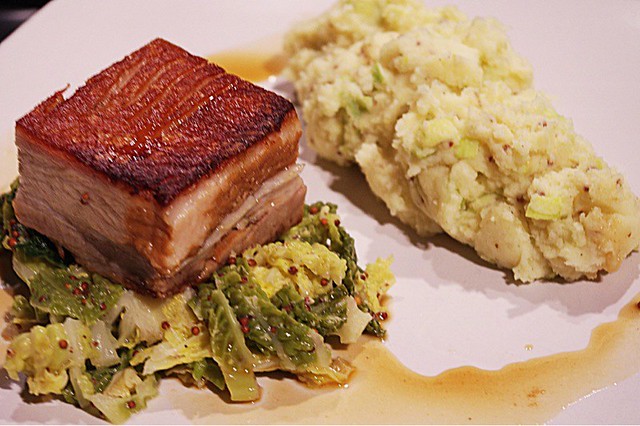


I served ours with champ (but made with leeks) and also some mustard cabbage, a drizzle of the reduced sauce and a nice glass of red. It would also pair well with cider.

Wednesday, 16 February 2011

Aiming to Peas!

The husband isn't the biggest fan of fish. I am a massive fan of fish. Therefore sometimes we have a problem when I really need a seafood fix!

Don't get me wrong, its not as if he refuses to eat fish, he just needs some gentle coaxing sometimes and there are certain things that I love that are definite no-no's - namely mussels, smoked salmon and mackerel. I tend to reserve these to eat when I am alone!

Again, I think sometimes our opinions of food are shaped by our childhoods. I was brought up eating lots of fish, on the bone and I was taught at an early age not to be scared of bones. The husband really wasn't and probably the only fish he was given to eat was battered. However, he's has come on a long way and is willing to try most things.

The other night I decided to make something a little bit different and I also had a bit of a hankering for scallops. The husband actually doesn't mind scallops, but he loves risotto and he also loves peas. So I thought about combining the three, to make a dish which was the best of both - something for me and something for him. I do make a good negotiator.

Scallop and pea puree often appear together on menus and I have a basic recipe for a pea risotto. However, after a bit of a recipe search I came across one from Delicious Magazine which also incorporates pea puree in the risotto itself.

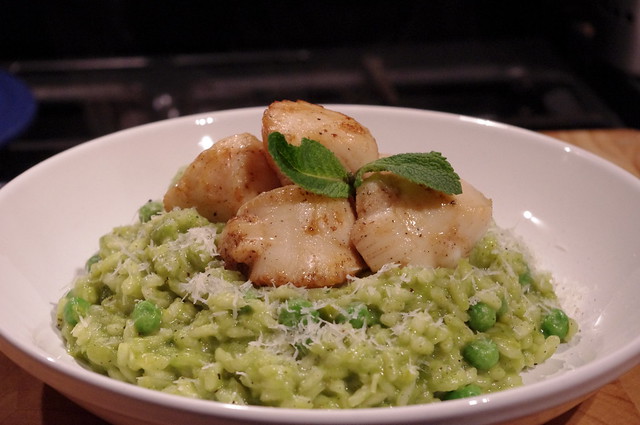
I think Shrek and the Incredible Hulk would love this meal
Overall the risotto was a nice balance between the sweet of the pea and the scallop and also the salty of the parmesan in the risotto. I know that Italians would be horrified at the thought of cheese and seafood, but I think it worked. The only bit of advice I would give to anyone who wants to make this would be that you need to make sute that you have all of your pans (4!!) / equipment out and ready as there are lots of different pans / gadgets on the go at once and you need to keep an eye on everything. I was terrified of overcooking the scallops and turning £10 worth of lovely fish into rubber. Luckily it turned out all ok and the plus point was that the husband also loved it.

Scallop and Pea Risotto (Serves 4)

For the Scallops
15g unsalted butter
1 tbsp olive oil
300g roeless scallops, thawed if frozen
Fresh baby mint leaves, to serve

For the pea and mint risotto
1.2 litres chicken or vegetable stock
75g butter
1 small white onion, diced
1 stick celery, diced
225g risotto rice
50ml dry white white wine (optional)
175g freshly shelled or frozen peas, plus a couple of handfuls
2 tbsp chopped fresh mint
25g Parmesan, finely grated

First, you’ll need to make the risotto but the key to a good risotto is hot stock, so put the chicken or vegetable stock in a saucepan, bring to the boil and keep hot over a low heat.

Melt 50g of the butter in a medium pan, add the onion and celery and cook gently for a couple of minutes until the onion and celery are soft and translucent. Make sure they don’t colour too much.

Add the rice and stir until all the grains are coated in butter. Pour in the white wine and simmer, stirring, until it has nearly disappeared. Add a ladleful of stock and stir over a medium heat until it is nearly all absorbed, then add another. Continue like this for 20-25 minutes or until al dente (so it has a bit of a bite to it).

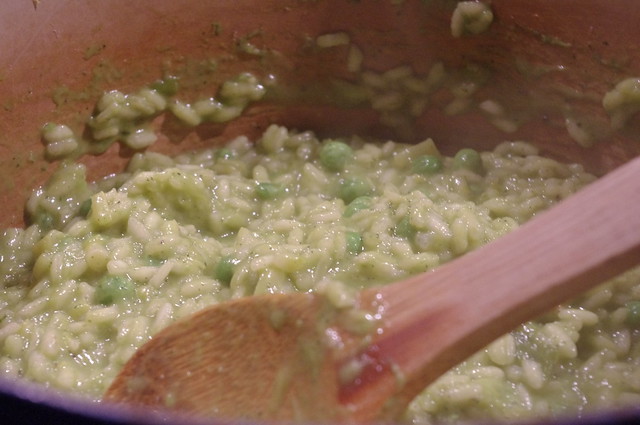
Meanwhile, cook 175g of the peas in a pan of boiling salted water for 4-5 minutes, until tender. Drain well, tip into a food processor / blender and add the remaining butter and chopped mint. Process until smooth, and then set aside. If you find that it is hard work to puree this up all a small amount of stock to loosen.


When the risotto has about 5 minutes to go, heat a large frying pan over a high heat until smoking hot. Reduce the heat to medium-high, add the butter, olive oil and half the scallops and sear for 1 minute, seasoning with salt and pepper as they cook. Quickly turn them over, season again and cook for another minute. Be careful not to overcook as they will end up like boot leather. Spoon them onto a plate and keep warm while you cook the remainder.


When the rice is tender but still a little al dente in the centre, stir in the pea purée, a handful of frozen peas, Parmesan and salt and pepper. Spoon onto warm plates and pile the scallops on top. Serve immediately, scattered with baby mint leaves and some extra parmesan.


Looks impressive, but really isn’t that hard to make.

Sunday, 13 February 2011

Chocs Away...

One of my friends, Paul, turned 30 this week and there was a bit of a shindig this weekend. I wasn't intending to make anything, as I was all cake baked out from last weekend's action, but seeing as it was a special birthday I decided to stop being lazy and bake!

I decided to make some Malteser cupcakes for a number of reasons:
  1. They are really easy and simple to make.
  2. I love Maltesers (I know they weren't for me, but hey, I can be selfish sometimes!)
  3. I had been pondering over what to make as part of Maison Cupcake's Forever Nigella #2.


I've never taken part in a blogging challenge before and as a newbie to this kind of thing, am quite excited by it!

So the recipe for the Malteser Cupcakes derives from Nigella's Feast where in its original form is a 20cm layer cake, topped with a crown of malty chocolate balls. I decided to turn this cake into cupcakes - a mixture of minis and standard sized, as I think they're easier to eat at a party, especially the minis.

I made a couple of tweaks to the original recipe, in that I added some crushed Maltesers to the cake batter for some texture contrast and I changed up the buttercream recipe, as I felt that the buttercream in the recipe was quite butter heavy with not enough icing sugar.

An interesting thing to note about the recipe is that it only uses 15g of butter in the sponge. I originally thought this was a typo, but it isn't! The sponge turned out quite dense, but in a gingerbread kind of way - the kind that gets squidgy and stickier the next day. The cakes will keep for about 2 days in an airtight container.


Chocolate and malty goodness!
The quantities below made up 12 minis and 12 standard sized cakes.

Chocolate Malteser Cake

Adapted from “Feast”, Nigella Lawson (2004)


For the cake
150g light muscovado sugar
100g caster sugar
3 large eggs
175ml milk
15g unsalted butter
2 tablespoons Horlicks
175g plain flour
25g cocoa
1 teaspoon baking powder
1/2 teaspoon bicarbonate of soda
50g Maltesers, crushed

For the buttercream icing
500g icing sugar
1 tbsp cocoa
3 tbsp Horlicks
150g soft unsalted butter
2 tablespoons milk
Maltesers, to decorate

The Cakes
Preheat the oven to Gas Mark 4 / 160C (fan) / 180C. Line a 12-hole muffin tray and a 12-hole mini muffin tray with the appropriate sized cupcake cases.

Beat the sugars and eggs until the sugar has dissolved and is light and frothy. This will take around 5 minutes with an electric mixer, probably about 10 by hand. 


Beating the eggs and sugars


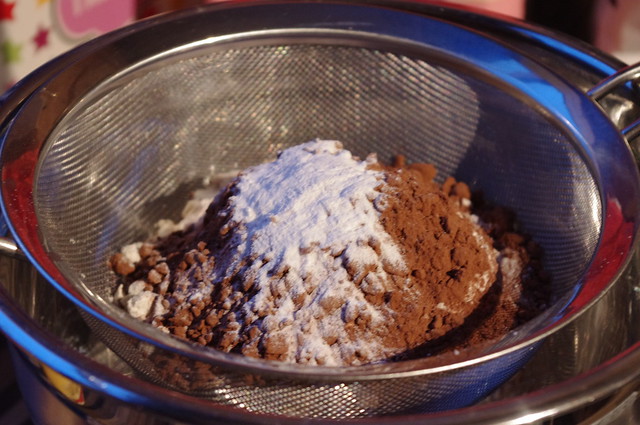
In a separate bowl, sift the flour, cocoa, bicarb and baking powder.


Heat the milk, butter and Horlicks powder in a small saucepan until the butter has melted and the mixture is hot but not boiling. Whisk through whilst this is on the heat to get rid of any lumps.

Add the warm Horlicks mixture into the eggs a little at a time, beating as you do this. Fold in the dry ingredients thoroughly, then fold through the crushed Maltesers. The cake mixture itself will be quite thin and runny - don't worry as this is the correct consistency.

Divide the cake batter evenly between the cupcake case. because the batter is so runny, I found it easier to pour it into the cases with a measuring jug. Fill the cases no more than 2/3 full.

Bake in the oven for 15 minutes for the minis and 20 minutes for the larger cupcake, turning the trays after 10 minutes. -The cakes should have risen and by quite springy. Test with a cocktail stick - if it comes out clean, they are done.

Let them cool in their tins on a rack for about 5 minutes and then turn them out onto a cooling rack. Leave to cool completely before you ice them.

The Icing
Beat the butter, milk, Horlicks and cocoa along with half the icing sugar until smooth. This can take up to 10 minutes using an electric mixer. Gradually add the rest of the icing sugar and beat until the icing is smooth and creamy.

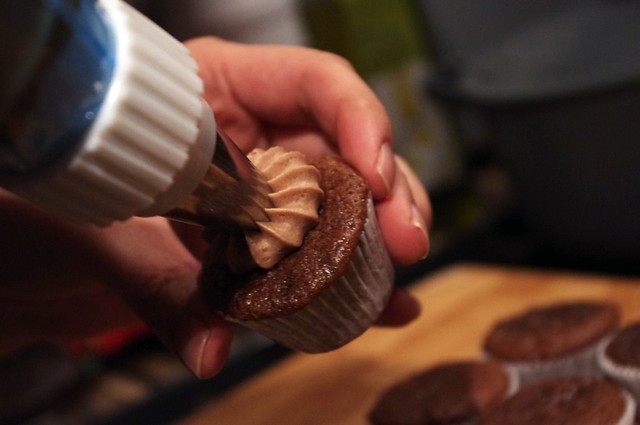
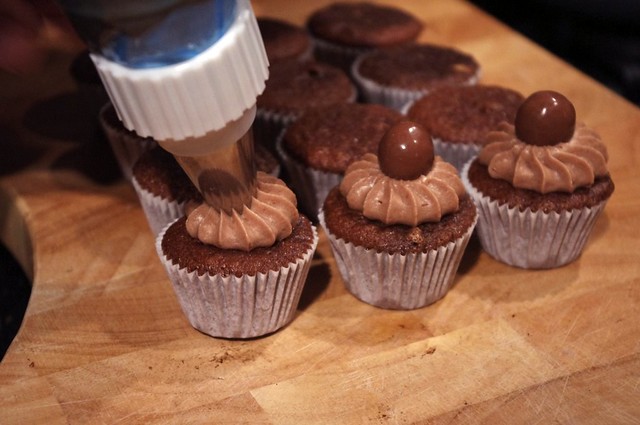
Pipe or spoon the icing onto the cupcakes, topping each one with a Malteser.


The cakes, especially the icing, really tasted like Maltesers - not too sweet or rich and quite light. They went down a storm at the party - all the minis went in the space of about 5 minutes, with my friends Paul and his wife Claire hiding away the larger cupcakes to enjoy alone over the weekend.


Friday, 11 February 2011

I'll Beetroot-ful, this soup is delicious!

Yes, another post, another bad pun. I'll see if I can keep this going, but I'll try. I won't be beet-en!

Ok, so beetroot. I hated beetroot as a kid. As someone raised mainly on a Chinese diet as a child, and having never seen a beetroot in my whole life, I have memories of "Salad Day" at my primary school, at the age of 6 and being forced to eat this disgusting purple stuff that was cold, flabby and soaked in vinegar. I think a lot of people have had similar experiences which is probably why a lot of people don't like it. 

Past experiences were enough to put me off beetroot for life but my stance was turned around after trying honey glazed roasted beetroot a number of years ago and I was converted. Now I can't get enough of the stuff and sometimes I do even treat myself to the pickled variety, but only sometimes.

There was a massive glut of beetroot at my local farm shop and ended up buying a couple of kilos in order to make this fantastic soup that was served up at my friend Dan's murder mystery party the other week. I found myself making this at 6.30am on a Wednesday morning after not being able to get back to sleep....


The recipe kind of a Middle Eastern take on the classic Russian borscht and can be eaten hot or cold. I had it hot for lunch one day and then chilled the next. They were both delicious but there was something about the chilled version, really refreshing and perfect for a warm day.

I have adapted the Hugh Fearnley Whittingstall recipe slightly and added a touch of ginger for warmth and instead of the spiced yoghurt he suggests, I opted for soured cream as a nod to its Eastern European roots. 

This is a really quick, really easy soup to make, plus it's the most amazing colour that really cheers you up. Suffice to say I love garish colours, so this soup is perfect for me, really beet-iful! (yes yes I know!!)

Beetroot and Cumin Soup 
Ingredients
50g butter
1 tbsp olive oil
1 large onion, peeled and chopped
1 fat clove garlic, peeled and chopped

1/2 thumb sized piece of ginger

1 tsp cumin seeds
750g beetroot, peeled and cut into small chunks
750ml vegetable or chicken stock (or water)
Salt and ground black pepper
1 tbsp flat-leaf parsley, chopped

Get a large pan over a medium heat. Add the olive oil to the pan and then add in the onion, garlic, ginger and cumin and cook gently for five to 10 minutes, until the onion, ginger and garlic are soft but try not to colour them too much.

Add the beetroot chunks, stir everything around then add the stock. Bring to a simmer, stick on a lid and cook for around 20-25 minutes, until the beetroot is tender.

Blend up the soup, return it to the pan and season to taste. If it seems too thick, thin it down with a little more stock or water to get it to the right consistency.

Serve the soup, hot or chilled, with a dollop of soured cream swirled in just before serving and some parsley sprinkled on top.

Beets me how a soup can be so simple and so good!

Wednesday, 9 February 2011

I'm not good at a lot of things, but I do give good bread...

Yes, I know this is a really bad bread pun, but come on, I need to try and make these posts as exciting as possible. Any other suggestions for bread based puns are always welcome...

I have a bit of a love hate relationship with bread. I love it, but I hate the effect it has on my hips - especially after I've gone through 4 slices smothered in butter and marmalade...YUM!


Whilst I try and stay away from bread, the Husband loves it and when I'm not feeling too lazy I do try and send him off to work with sandwiches made with the home made stuff. 

We don't own a breadmaker - it was on my gadget list a while back but seeing as I now have the Kitchenaid, I can't really justify it! I made the bread using Ina (the name I gave to the KA!) and her dough hook, but I have made it by hand in the past.

The recipe is adapted from Rachel Allen's Food for Living and it makes 2 loaves, or up to 20 rolls. I ended up making 1 loaf and 6 decent sized rolls with mine.

 Check our my big bouncy baps! (Yes, I am juvenile)

This is a double rise recipe - I have tried single rise ones before but for me the loaves always turn out quite dense and heavy. I think when you take the time to prove the dough properly, you are rewarded with a nice, light loaf. Yes, it takes time, but I think you can't rush these things.

Note that the recipe below can be made with all white, or wholemeal flour - feel free to mix up the ratio of white - wholemeal too to get the right loaf consistency.

Also, you can experiment with adding extras to the bread during it's second knead - add in some seeds or maybe some cheese - don't be scared to experiment. I'm going to try blue cheese and walnuts at some point soon.

Honey Wholemeal Bread

Ingredients
450ml warm water (approx 1 part boiling to 2 parts cold)
3 tbsp honey
3 tsp dried yeast
300g strong white flour
600g wholemeal flour
2 tsp salt
100ml olive oil or 100g butter, cut into cubes

In a small bowl / mug / jug mix the warm water with the honey, add the yeast and leave to stand for 5 minutes until frothy. You'll know it's ready when it gets a head like a nice beer.

Place the flours in a big mixing bowl (or the bowl of a electric mixer) and mix in the salt and then add the oil / rub in the butter. Pour most of the frothy liquid into the flour and mix to a dough - it shouldn't be too wet and sticky; if it's too dry add more warm water and if it's too wet, add more flour.

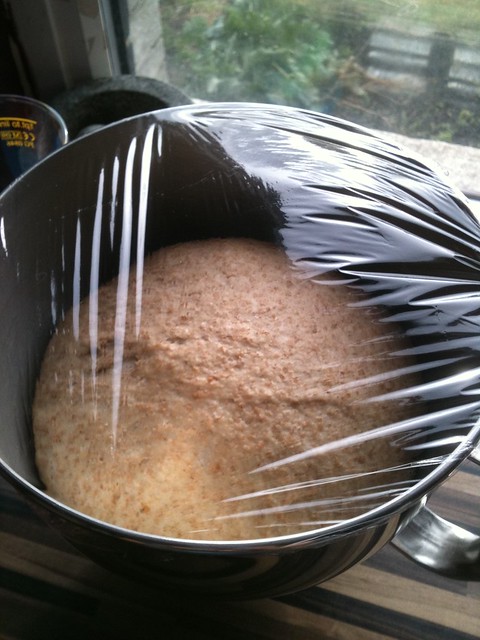
Knead by hand on a floured surface for about 10 minutes (this takes about 5 minutes in a mixer) until the dough is smooth and springy. Place in a large oiled bowl, cover with cling film and leave somewhere warm for 2-3 hours until it's doubled in size. It's risen enough when it does not spring back when you push your finger onto the dough. for me, it took about 2 hours.

Doubled in size
When it's risen, knock back the dough by punching it down in the bowl and kneading on a floured surface for 1 minute. Allow to rest on the work surface, covered with a tea towel for 5 minutes before shaping.
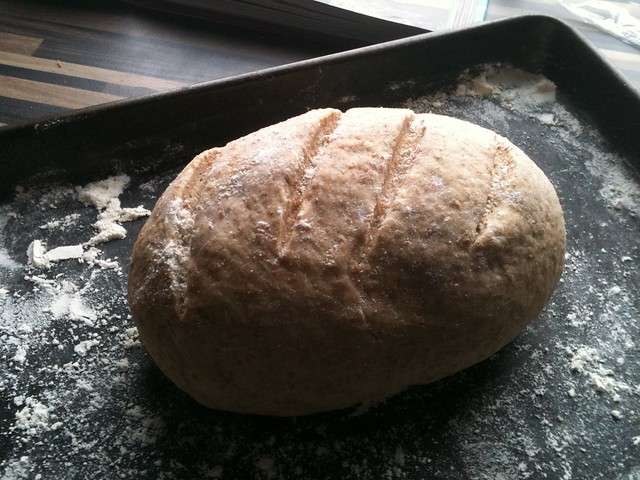
Shape into your loaves / rolls and place them on a floured baking tray. Slash the loaves (but not the rolls) and sprinkle them with flour. Cover with a tea towel and allow to rise again somewhere warm until they have doubled in size. The dough has risen enough when it does not spring back when you push your finger onto it (this may take another 45 minutes).


Preheat the oven to 200c/ gas mark 6.

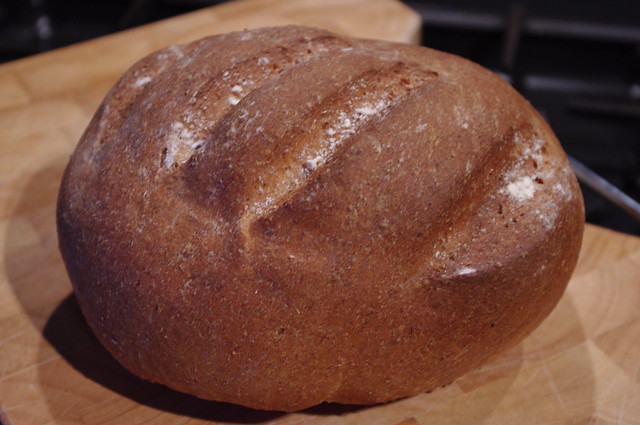
Bake the bread in the oven for 30-40 minutes or until it sounds hollow when tapped on the base. For rolls, this will only take 10-15 mins depending on their size.


Leave to cool on a wire rack, or devour whilst still warm with lots and lots of BUTTER!!

Tuesday, 8 February 2011

Birthday Treats

Friday was my brother in law's 21st birthday and I offered to make some birthday treats. Treats being a birthday cake and also some cupcakes.

Please excuse the bad writing!


Seeing as the salted caramel cakes went down so well last weekend at the murder mystery, I decided to whip up a batch alongside a chocolate cake and I also decided to make a batch of chocolate orange cupcakes too (Post on those to follow...)

For the chocolate cake used the same recipe as I used for the chocolate and raspberry cake I made a few weeks ago, but minus the raspberries. Instead I just used the chocolate ganache as a filling as well as to cover the cake. I also used some of the left over salted caramel frosting to pipe on the edges and the base of the cake. For this I used a medium sized star tip.

I also attempted to pipe on "happy birthday" which although didn't look too bad, I think need a little bit more practice!

We didn't end up eating the cake on the night, I think this was because I went a bit overkill with the cupcakes, but we did have it for dessert after Sunday dinner... Quote of the evening from my brother in law was "Did you make to cake too? I thought it had been bought..." not sure if that's a good or bad thing!


The cake itself was still moist after 2 days - this was probably down to the ton of ganache that was covering it.


The diet has already started!

Thursday, 3 February 2011

Murder and Armadillos!

Just a quick post on some cupcakes I made at the weekend... apologies for the photos, I only had my camera phone whilst making them! Salted Caramel topped with Dime (Daim??) bars. those of you old enough to remember should understand the armadillo reference....

YUM! minis and big cupcakes -  a lovely combo of sweet and salt!


Saturday was the day of my friend Dan's long awaited murder mystery dinner party and I was asked to make some cupcakes inspired by Dime Bars as part of a 3 part dessert course! 


"Of course" I said without hesitation, and promptly forgot that I would actually need to get my hands on some Dime bars which are actually quite difficult to come by. Well, they were for me. After trying various supermarkets and buying Rolos as a back up decoration, I ended up finding some at my corner shop! What I fool I was for not trying local in the first place!


I managed to make 12 minis and 9 large cakes with the recipes linked below and they went down a treat. A few were even eaten for breakfast the next day...


The cake recipe came from The Primrose Bakery book and the frosting came from Fiona Carins which can be found here at GoodFood.

Salted Caramel Frosting!!

Decoration wise, I piped the buttercream onto each cake using a star nozzle (I will post a bit of a how to on this, I promise!!) and then piled chopped up pieces of dime bar onto the cake. I thought they looked quite tasty at this point, but I couldn't help thinking they looked like they we missing something.

Naked

I had some dark chocolate in the cupboard and melted it down and drizzled it over each cake with a teaspoon. I think it gave them that extra oomph!

With designer handbag

Oh and if you're wondering - I wasn't the murderer!...there's always next time!!