Sunday, 27 February 2011

Pie and Beer

I have already written about my love of pie. All types of pie. as long as there is lots of pastry and lots of filling, then I'm there. I also love beer. Proper beer. Real ale. As far as I'm concerned the two go hand in hand.

This weekend was the annual Bradford Beer Festival. One of the highlights of my year. Local friends and London friends all descend upon Saltaire to sample the finest beers that the UK breweries have to offer. To mark the occasion I decided to bring a pie. A pork pie. I've been obssessing over making my own pork pie for weeks and decided that it would be perfect to bring one along with me.
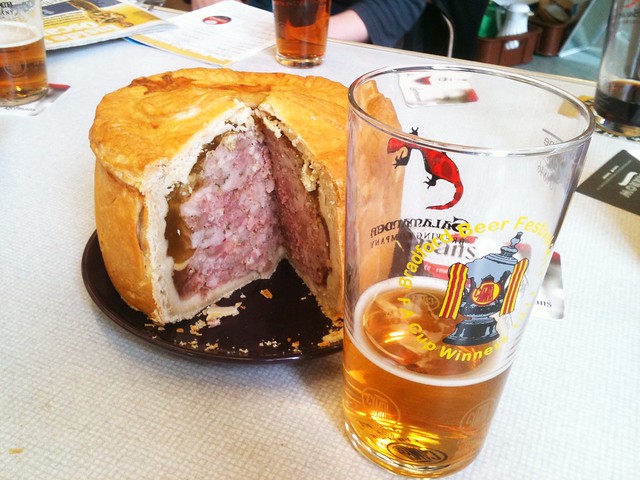

Beer + Pie = Perfect combination!
Now I know that a pork pie is something that not very many people tend to make at home these days - quite possibly because it is so easy to buy decent pies. However, I'm always concerned about what has actually gone into the pie so by making your own means you know exactly what's in it. Using good quality meat is a must.

There was something really enjoyable about the whole process. The making of the soft, tactile pastry and the meticulous chopping of the meat. This pie needs time, I made it over 2 days...but you will be rewarded, and I highly recommend you try it.

It was bigger than anticipated but it did really well in feeding around 12-15 people - washed down with beer it was amazing.

The recipe comes from Hugh Fearnley Whittingstall's River Cottage Meat book, on page 444.

Hugh's Pork Pie

Ingredients

For the pastry:
550g plain flour
100g butter
100g lard
200ml water
2 eggs
1 1/2tsp salt 

For the filling:
1kg pork shoulder - chopped into 5cm dice (takes time and a sharp knife is a must!)
250g streaky bacon - chopped finely
250g pork belly - minced. I whizzed it up in the food processor
2 large sprigs of thyme, finely chopped
12 sage leaves, finely chopped
1tsp salt
1tsp black pepper
1tsp white pepper
1/2tsp mace
A pinch of cayenne pepper

For the jelly
200ml chicken stock
1x 15g sachet powder gelatine

Melt the butter and lard together in the pan, with the water. While the fats are melting, mix 550g of plain flour and one and a half teaspoons of salt together in a large bowl, form a well in the flour and then break two eggs into the bowl. Mix the eggs into the flour slightly and then slowly pour in the fat and water, mixing all the time. I used my mixer and a dough hook, but can easily be done my hand.


The dough will come together. You may need to add more flour or water, depending on whether it feels too sticky or dry. the dough will be very soft and pillowy! Briefly knead the dough, then wrap it in clingfilm and let it rest in the fridge for an hour or so.

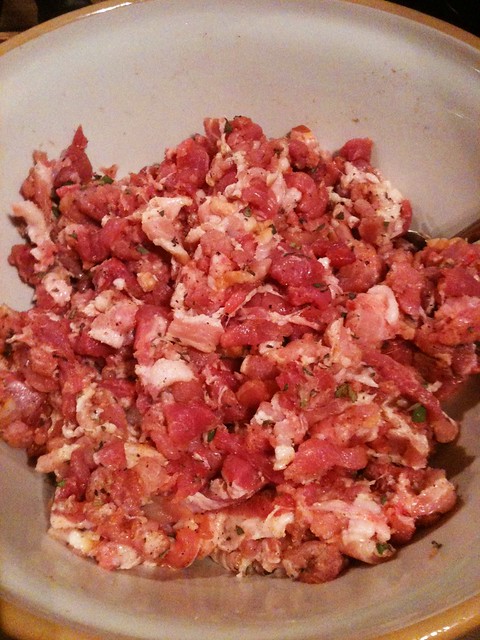
For the filling, mix all of the ingedients thoroughly in a large bowl. The reason for the different cuts of meat is for texture, the shoulder provides a "meaty" texture, the bacon flavour and the belly provides much needed fat, and also act as a glue for the meat mixture.

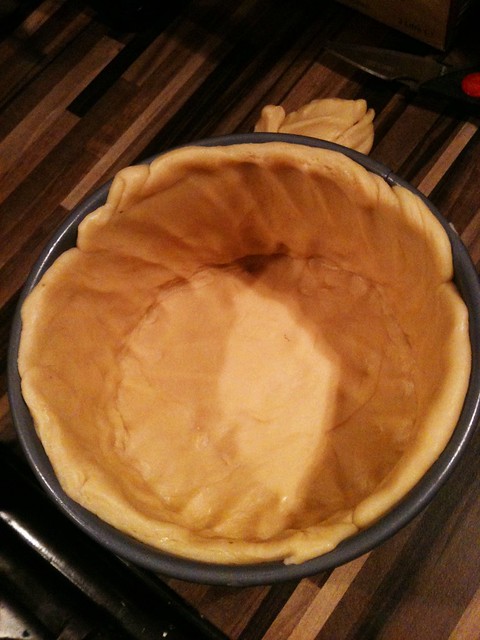
Now to assemble the pie. Cut off about a third of the pastry and put it to one side for the lid, then roll out the rest into a large round, appox 1cm thick. Slide the pastry into a greased cake tin with a loose base and press it down so that the pastry reaches the top of the tin. I used an 18cm cake tin with high sides, the original recipe asks that you use a 20cm tin. so if you use a 20cm, then make sure the pastry reaches approx 3/4 up the sides. By using a spring form tin with a clip on the side will make the ‘getting the pie out’ operation much simpler.

Now, getting the pastry into the tin seems much simpler than it sounds - the pastry is very soft a slippery and it will try to fall down, be vigilant and confident with it. Make sure there are no holes in the pastry walls.


Then fill the casing with the filling. Really cram it in until it can't take any more. Remember, the pie filling will shrink up on cooking.
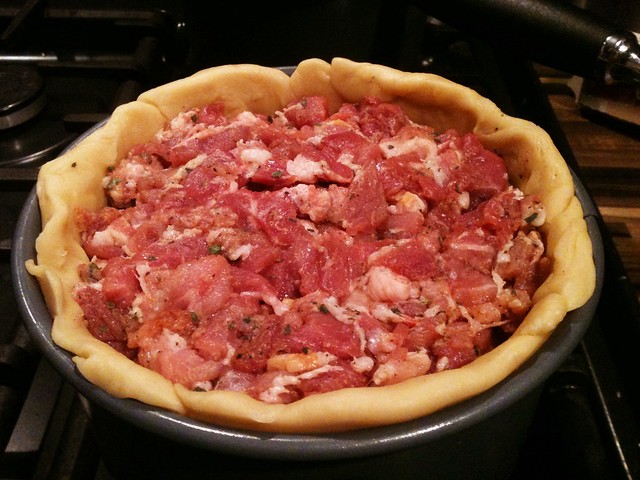


The roll out the remaining pastry into a lid and crimp it onto the top of the pie - make sure you use a beaten egg to seal the lid, as it is the only thing strong enough to keep everything in the pastry. For an extra bit of decoration I cut out a couple of leaves from the leftover pastry. Make sure you also cut a 1cm hole in the middle of the lid for steam to escape.
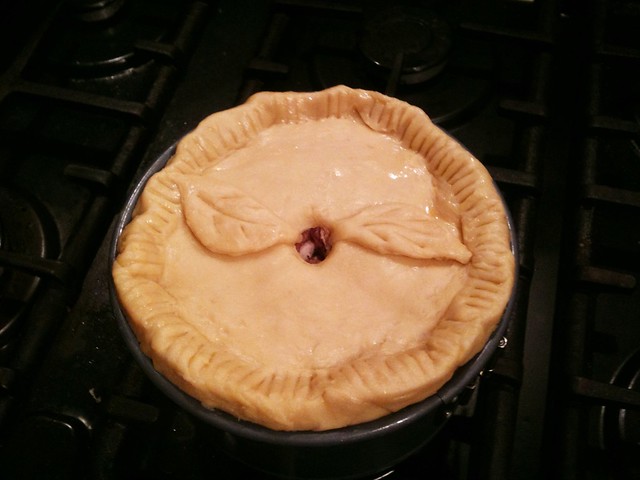
Ready for the oven
Bake at 180c for half an hour, then reduce the heat to 160c and continue to cook for a further hour and a quarter. After this time, take the pie out of it’s tin and brush the top and sides with beaten egg, returning it to the oven for another quarter of an hour to brown.

Then you'll need to wait for the pie to cool before adding the jelly. Probably an hour or so, but as it was 11pm by the time the pie came out of the oven, I left it to cool overnight, then put it in the fridge until the evening.

The recipe details stock made from pigs trotters, boiling them down for a couple of hours. I didn't really have the time, so I bought a tub of ready made fresh chicken stock, heated it up gently and dissolved the gelatine into it.

Once the jelly is ready, you'll need to pour it into the hole - use a turkey baster if you have one - I poured it in using a measuring jug. Pour it in slowly, giving it time to settle in the pie, filling in the cavities left by the shrunked meat. Pour it in until you can't fit in any more.
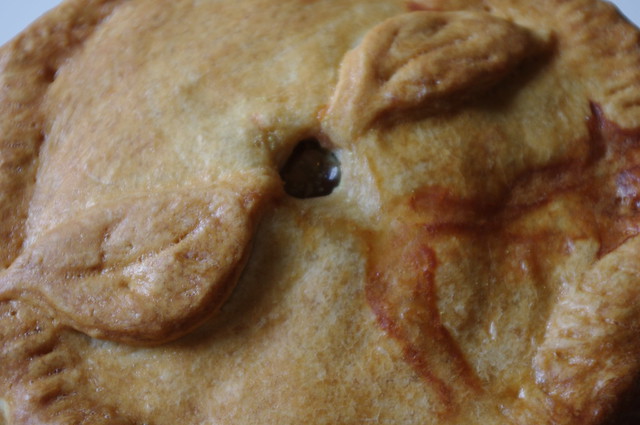
Filled with jelly
Now the subject of jelly in a pork pie is a contentious one - some people hate it, but I think it is integral to a good pork pie - it is there to fuse the meat to the pastry and without it, the pastry just falls away from the meat once cut.

Once the pie is filled refrigerate, until the jelly is set - ideally overnight but it should be ready after 5 hours.

The pie will keep in the fridge for about 2 weeks - I think the next time I make it I might add in a few boiled eggs. If you don't want to make a huge pie, then you could make individual pies by lining a muffin tin. After the first 30 minutes of cooking time, take them out, brush with egg and cook for a further 25 minutes.

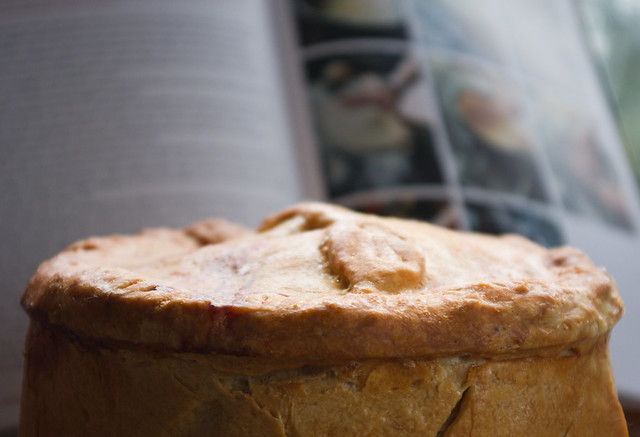

Thanks Hugh!

Thursday, 24 February 2011

F.E.A.R.

This is just a quickie...for the past few months / weeks I have been thinking about attempting macarons. Macarons scare the living shit out of me. The stuff of nightmares, well them and soufflés, oh and scary clowns. And ventriloquist dummies. Sob sob sob.


Now I love a good cake - cakes are easy, they're quirky and if you botch it up then cover it up with frosting and no-one would ever ever know. But macarons - they are refined and delicate and if you mess it up then EVERYONE can see and then I'll get upset and embarrassed. Me? perfectionist? No....

However, because I am just so stubborn and want to learn to be a better baker, I bit the bullet and decided just to give it a go. This was spurned on my the fact that my boss kindly brought me back some amazing macarons from Angelina in Paris whilst he was there last weekend... They were slightly battered, but delicious! Light, crispy, chewy and eaten on one sitting...all by me.

Ta Steven!
Anyway, to the macarons. As I said, I have been doing a lot of reading over the past few weeks and found a really good number of tutorials, a couple of which being from Food Nouveau, Bakerella and The Pink Whisk.

Across all 3 the recipes / techniques are pretty similar, using a French macaron recipe. I won't post the recipe details now as I want to follow up with a full and thorough post on method, etc. once I really feel that I have nailed it.

I ended up making chocolate ones, I added cocoa to the shells and filled them with chocolate ganache.

I thought they looked good, chewy and slightly crispy on the tops of the shells. I think that the next time I make some I will tweak them slightly - I thought the almonds could do with being finer and I might not have mixed the meringue in enough, for fear of knocking all of the air out... But hey, overall I was pleased!

As I said, going to make some more this weekend so macarons will be back...

Tuesday, 22 February 2011

Meal for One

The Husband has been working strange shifts for the past few days and also over weekends so I have often been cooking just for me in the evenings. Because it's just cooking for one, I tend to make something that's quick, but I also try to be relatively healthy too.


Continuing on a fishy theme, this week I made a very quick but tasty prawn linguine with chilli, lemon and parsley.


Prawn Linguine with Chilli, Lemon and Parsley (Serves 1)


Ingredients
200g raw tiger prawns (you can use pre cooked if you can't find any)
1-2 cloves garlic, chopped finely (depends on how much you like)
1 red chilli, chopped (seeded or deseeded depending on preference) 
Zest and juice of half a lemon
2-3 tbsp chopped tomatoes or a small handful of cheery tomatoes, chopped roughly
1 tbsp Olive oil
Small bunch or parsley, chopped
100g linguine

Cook the linguine in a large pan of salted boiling water until al dente (approx 8-9 mins).


Whilst the pasta has about 4 minutes to go, get another pan on a high heat and add the olive oil. once the oil is hot, turn it down slightly and then add the chilli, garlic and lemon zest. Be careful they don't burn in the heat of the oil and after 30 seconds throw in the prawns and cook until they turn pink. Add the lemon juice and the tomatoes, season to taste and then throw in the parsley. Take off the heat as you don't want the prawns to overcook. 


NB - if you are using cooked prawns, throw these in at the end of making the sauce and warm through.


Drain the pasta, then add to the sauce.


Serve with or without parmesan (I do) and maybe some crusty bread (I didn't). A nice dry white would also go really well, perhaps a Marlborough Sauvignon Blanc.

Sunday, 20 February 2011

Love is in the air...

Bit late with this blog post, but unless you've been hidden under a rock for the past week you'll know that it was Valentines day on Monday.


Now, those of you that know me will know that I have a heart of stone and romance isn't my thing. I am a bit of a cynic about the whole valentines thing. Quite possibly because I NEVER got that card or flowers (Of course I do now being happily married!) BUT this year I thought I would try and do something to get in the whole spirit of St Valentine.


I've never made red velvet cupcakes before and with them being pretty much the cupcake of choice at this time of year, I thought I'd give it a go...


Ahh my heart's softening up already!
For those who don't know what red velvet cake is, it is an American cake which is flavoured with cocoa and vanilla and is always topped with a creamy white icing, usually made with cream cheese. However, the most distinctive feature of red velvet is that the cake is bright red due to the use of red food colouring. The use of food colouring is a more recent things, originally the cakes gained a red hue due to the reaction of cocoa, vinegar and buttermilk, which all feature in this recipe. For more info, check out the Wikipedia page.


Anyway, history lesson over. I have a number of red velvet recipes but I decided to choose Nigella's from her most recent book Kitchen as I have heard a lot of good things about this recipe. Because the recipe uses cocoa, I thought I could sneak this post into Forever Nigella too.


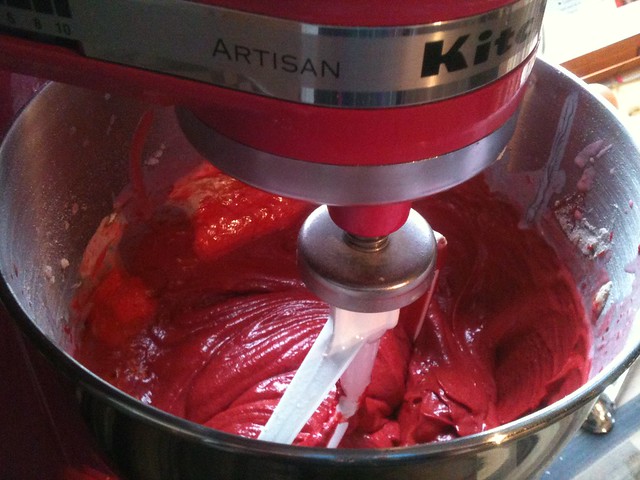
The recipe itself is pretty straightforward to make. I think I was most apprehensive about adding the food colouring - it calls for 1 tbsp of gel colour...usually you only need a teeny tiny amount of this colouring but I listened to Nigella and the result was the most fabulous coloured batter.


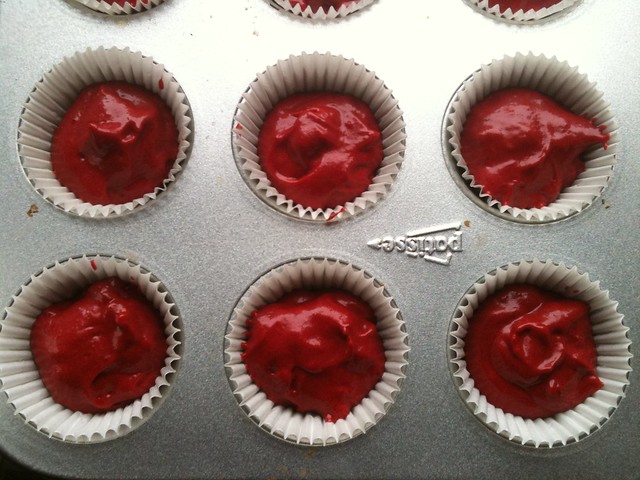
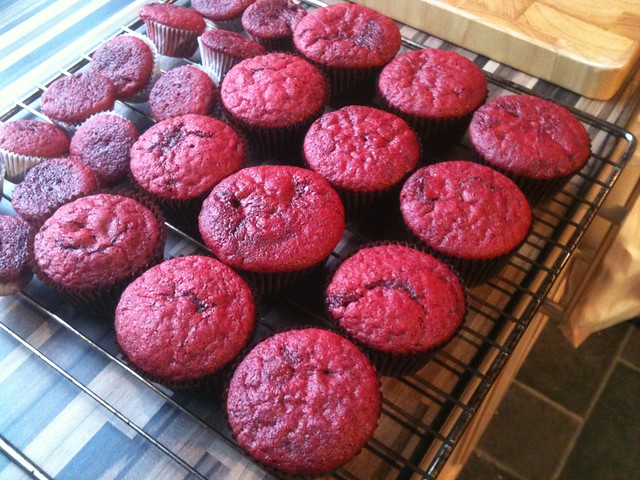
The recipe is said to make 24 cupcakes - I managed to squeeze out the 24, but 12 minis and 12 standard sized cakes.


Once baked, the cakes aren't quite as vibrant, but a more muted shade.


The sponge had a lovely moist crumb which wasn't too sweet. I think what really made the cakes was the brilliant lemony cream cheese frosting - Nigella gives the option of using cider vinegar or lemon juice in the frosting. Obviously I went for the lemon option as the thought of vinegar freaked me out slightly.

I piped the frosting on the cake, and although the looked nice - I thought they needed an extra something, an extra bit of love. So what better than some love hearts? Sometimes a little bit of schmaltz can be good! Is that my heart melting a bit? Maybe...

Saturday, 19 February 2011

Go go gadget go!

I have a confession to make. I am a bit of a kitchen gadget whore! A few years ago I would have lusted over the latest Miu Miu or Marc Jacobs handbag, or spent my last £5 on a copy of Elle magazine. Then with the onslaught of my 30's came sensible flat shoes and copies of Good Food magazine.

I've rambled on before about how much I love my Ina, my Kitchenaid - quite possibly the most beautiful thing I own in the kitchen other than Maud, the old, battered ceramic chicken, who was left in our care by the previous owners of our house and I can't bear to throw away.

Lovely Maud

The newest addition to the kitchen is our new Nespresso CiTiz machine. Yes, I have succumbed to a very pretentious pod coffee machine, but I absolutely love it. there are a number of pod machines out there on the market but the Nespresso pods are considered to be the best. I'm not a massive coffee expert, all I know is that I like mine dark, short and strong!

The pods are only available online / mail order through the "Nespresso Club" and there are a range of coffees to suit your taste. I am quite a lazy person by nature so to be able to stick a pod in the machine and press a button is brilliant for me.

However, aside from the ease and convenience, it's also very very pretty! Not that I'm shallow of course... I think the only disadvantage is that my intake of coffee has increased dramatically.

I think I need to curb my purchasing habit for a while, but I did see a lovely pasta attachment for Ina...

Thursday, 17 February 2011

Belly Nice!

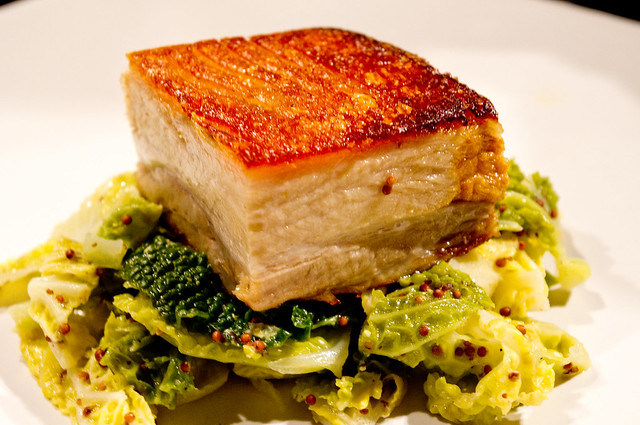
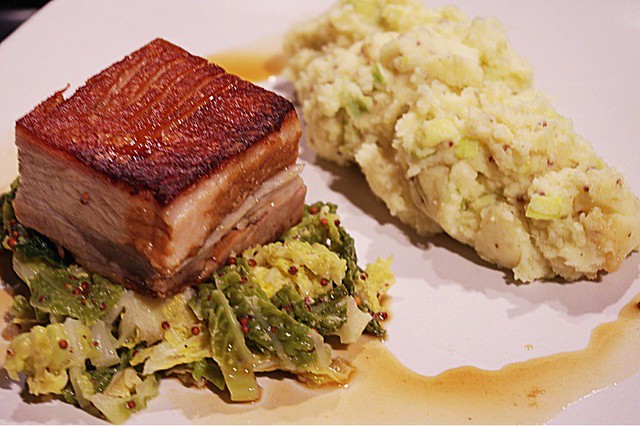
My friend Dan is a very good cook - I've never disliked anything he's made and he's great at giving foodie hints and tips. We both subscribe to BBC Good Food Magazine and in February's edition there was a brilliant recipe for pork belly. Dan made it for the murder mystery party I went to the other week and I was hooked. The pork was melt in the mouth and the crackling crisp. It looked really professional too and I'm all about the presentation!


Mmmm Pork!!
Now I've made pork belly in the past where I've roasted it long an slow in the oven with good results but I really think this is the only way I'm going to cook this cut of pork. Be warned though - this is a 2 day process but the main bulk of the cooking is done on the first day and is ideal for entertaining as it only needs pan frying at the last moment.


I was missing a few ingredients for the braising stage, and because I was only feeding the 2 of us, the piece of pork belly was smaller - it was enough to serve 2, but can be easily doubled. So below is my recipe. (Note that some of the pictures aren't brilliant as they were taken with my phone. The good ones were taken by the Husband)


Cider Braised Pork Belly (Serves 2)


Ingredients
1 large carrot , chopped
1 leek , roughly chopped
2 garlic cloves , smashed
A bunch of parsley stalks
2 bay leaves
300ml good-quality cider
small splash cider vinegar , plus extra to season
1 litre chicken stock
800g piece unscored boneless pork belly (mine was scored though, it didn't really make a difference)
2 tbsp sunflower oil


Day 1:
Heat oven to 180C/160C fan/ gas 4. Place all the ingredients except the pork and sunflower oil in a pan that will fit the pork. Season, bring everything to the boil then turn down the heat and slide the pork into the pan. The pork should be totally covered - if it isn't, top up with water. Cover the dish with a lid and place it in the oven for 3 hrs.


After 3 hours, leave it to cool slightly in the stock. Line a flat baking tray with cling film. Carefully lift the pork into the tray and make sure you remove any veg or other bits from the surface of the pork as it will end up pressed into the pork. Cover the pork with another sheet of cling film and cover with a flat tray or dish - the tray must be completely flat as any indentations will be pressed into the pork.


Weigh the pork down and leave to cool in the fridge overnight. I used my heavy stone mortar along with a couple of cans to really weigh it all down. You want to flatten the pork so with ends up all the same thickness. Strain the juices into a jug or small saucepan, cover and chill.


Day 2
Unwrap the pork and place on a board. Trim the uneven edges so that you have a neat, straight piece of meat. Cut the meat into equal pieces and set aside until ready to cook. Skim off any bits of fat (should be easy as it will be set) from the braising juices and tip what will now be jelly into a saucepan, then bubble down by about two-thirds until starting to become slightly syrupy. Add a few more drops of vinegar, to taste.


Heat the sunflower / veg oil in a large frying pan until hot, then turn the heat down. Make sure you don't use olive oil as it will burn.


Add the pork to the pan, skin-side down - be careful as it will spit and attack you! I placed a tray partially over the pan so the it didn't cover everything in oil. Sizzle the pork for around 5 mins until the skin is crispy. Flip it over and cook for 3-4 mins until browned.


Et voila, perfect pork! Thanks Dan for making this first, as I wouldn't have tried it otherwise, purely because of the 2 day process!


I served ours with champ (but made with leeks) and also some mustard cabbage, a drizzle of the reduced sauce and a nice glass of red. It would also pair well with cider.

Wednesday, 16 February 2011

Aiming to Peas!

The husband isn't the biggest fan of fish. I am a massive fan of fish. Therefore sometimes we have a problem when I really need a seafood fix!

Don't get me wrong, its not as if he refuses to eat fish, he just needs some gentle coaxing sometimes and there are certain things that I love that are definite no-no's - namely mussels, smoked salmon and mackerel. I tend to reserve these to eat when I am alone!

Again, I think sometimes our opinions of food are shaped by our childhoods. I was brought up eating lots of fish, on the bone and I was taught at an early age not to be scared of bones. The husband really wasn't and probably the only fish he was given to eat was battered. However, he's has come on a long way and is willing to try most things.

The other night I decided to make something a little bit different and I also had a bit of a hankering for scallops. The husband actually doesn't mind scallops, but he loves risotto and he also loves peas. So I thought about combining the three, to make a dish which was the best of both - something for me and something for him. I do make a good negotiator.

Scallop and pea puree often appear together on menus and I have a basic recipe for a pea risotto. However, after a bit of a recipe search I came across one from Delicious Magazine which also incorporates pea puree in the risotto itself.

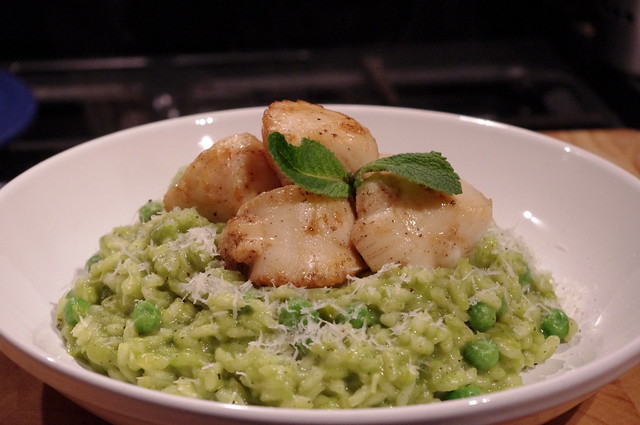
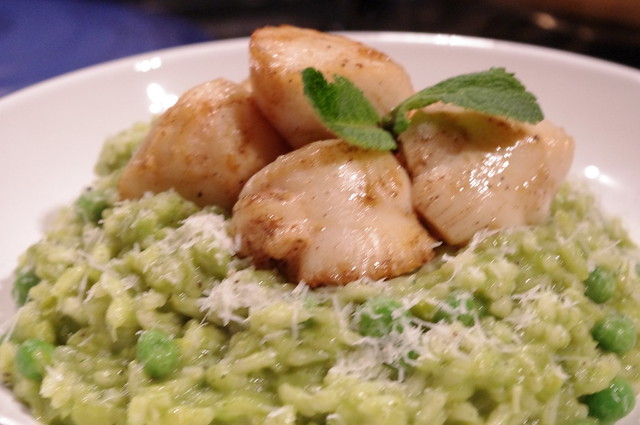
I think Shrek and the Incredible Hulk would love this meal
Overall the risotto was a nice balance between the sweet of the pea and the scallop and also the salty of the parmesan in the risotto. I know that Italians would be horrified at the thought of cheese and seafood, but I think it worked. The only bit of advice I would give to anyone who wants to make this would be that you need to make sute that you have all of your pans (4!!) / equipment out and ready as there are lots of different pans / gadgets on the go at once and you need to keep an eye on everything. I was terrified of overcooking the scallops and turning £10 worth of lovely fish into rubber. Luckily it turned out all ok and the plus point was that the husband also loved it.

Scallop and Pea Risotto (Serves 4)

For the Scallops
15g unsalted butter
1 tbsp olive oil
300g roeless scallops, thawed if frozen
Fresh baby mint leaves, to serve

For the pea and mint risotto
1.2 litres chicken or vegetable stock
75g butter
1 small white onion, diced
1 stick celery, diced
225g risotto rice
50ml dry white white wine (optional)
175g freshly shelled or frozen peas, plus a couple of handfuls
2 tbsp chopped fresh mint
25g Parmesan, finely grated

First, you’ll need to make the risotto but the key to a good risotto is hot stock, so put the chicken or vegetable stock in a saucepan, bring to the boil and keep hot over a low heat.

Melt 50g of the butter in a medium pan, add the onion and celery and cook gently for a couple of minutes until the onion and celery are soft and translucent. Make sure they don’t colour too much.

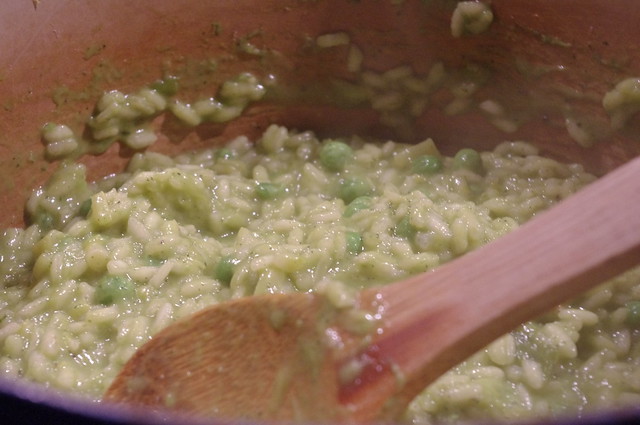
Add the rice and stir until all the grains are coated in butter. Pour in the white wine and simmer, stirring, until it has nearly disappeared. Add a ladleful of stock and stir over a medium heat until it is nearly all absorbed, then add another. Continue like this for 20-25 minutes or until al dente (so it has a bit of a bite to it).

Meanwhile, cook 175g of the peas in a pan of boiling salted water for 4-5 minutes, until tender. Drain well, tip into a food processor / blender and add the remaining butter and chopped mint. Process until smooth, and then set aside. If you find that it is hard work to puree this up all a small amount of stock to loosen.


When the risotto has about 5 minutes to go, heat a large frying pan over a high heat until smoking hot. Reduce the heat to medium-high, add the butter, olive oil and half the scallops and sear for 1 minute, seasoning with salt and pepper as they cook. Quickly turn them over, season again and cook for another minute. Be careful not to overcook as they will end up like boot leather. Spoon them onto a plate and keep warm while you cook the remainder.


When the rice is tender but still a little al dente in the centre, stir in the pea purée, a handful of frozen peas, Parmesan and salt and pepper. Spoon onto warm plates and pile the scallops on top. Serve immediately, scattered with baby mint leaves and some extra parmesan.


Looks impressive, but really isn’t that hard to make.