Thursday, 7 April 2011

Roasted Gobi with Aloo Saag Curry

The Husband and I took a trip to our local farm shop the other evening and staring at me were some beautiful looking Romanescos. Lime green in colour with cone shaped florets, it really is an attractive looking vegetable. A member of the brassica family, it seems to sit somewhere in between a broccoli and cauliflower.


I've never actually cooked with Romanesco before, mainly because I have never come across them in the supermarket / shops. However, this is not for lack of trying to find one. Funnily enough, the appearance of this vegetable in my local shop does coincide with the Great British Food Revival series on BBC2. In the first episode, the Hairy Bikers did their bit to campaign for the resurgence of the humble cauliflower, which is often overlooked in favour of broccoli. From that episode, I was really excited by their Saag aloo with roasted gobi curry. As much as I am a huge carnivore,  I do have a love for veggie curries.

The star of the curry is the cauliflower, which if first roasted off in the oven for 20 mins. Now cauliflower is not a vegetable I would ever think of roasting, but it seems to bring out the most amazing nuttiness which transfers well into the curry.

However, I didn't follow their recipe to the letter, I have issues with too much fat in my food, (cakes of course are an exception, but come on - I've got to cut back somehow!) plus I didn't have all of the ingredients in my pantry, so this is my take on Dave and Si's recipe.

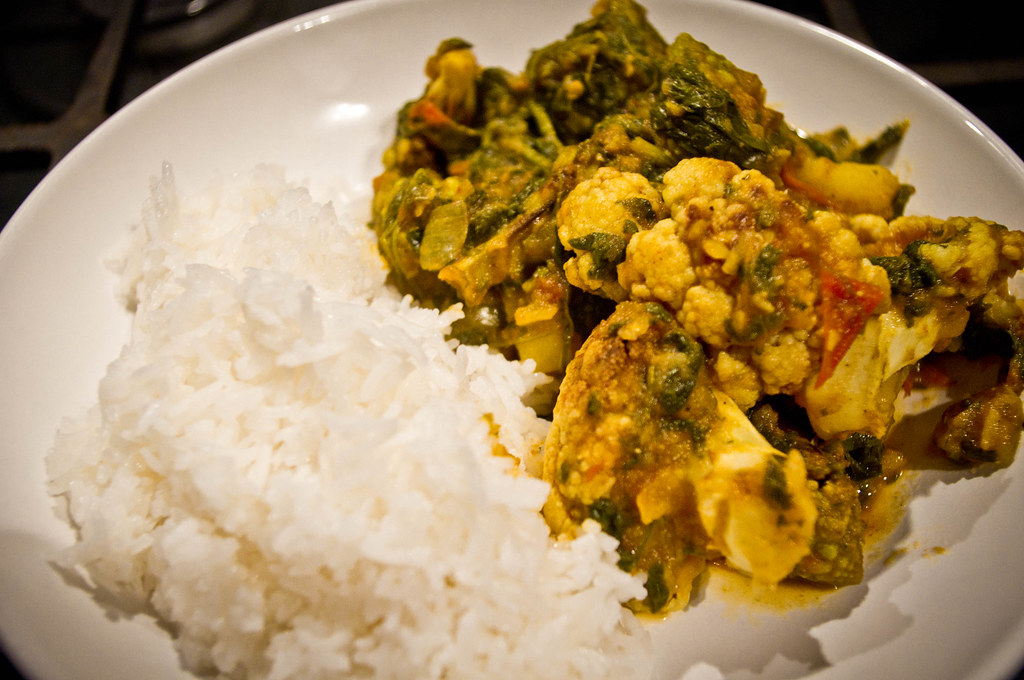
The dish has bags of flavour and texture and really leaves you feeling satisfied without the heavy feeling of a meat curry. The roasting of the cauliflower really adds depth to the dish. Definitely one I will be making again!

Roasted Gobi and Aloo Saag Curry

Ingredients

For the roasted cauliflower

1 small romanesco
1 small cauliflower
A drizzle of olive oil
Salt & pepper

For the Aloo Saag Curry
1 large onion
2 cloves of garlic, finely chopped
1 green chilli - up to you if you remove or keep the seeds, finely chopped
1 inch piece of ginger, finely chopped / grated
1 tsp ground cumin
1/2 tsp turmeric
1/2 tsp ground coriander
1/4 tsp cinnamon
1/2 tsp fenugreek
3 potatoes, peeled and chopped into inch cubes
4 large tomatoes, chopped
250g bag of spinach leaves, washed
50ml water
Lemon juice
1/2 tsp Garam Masala

To serve
Basmati rice


Preheat the oven to 180C/350F/Gas 4.

Break up the two cauliflowers into bite-sized florets and place into a baking tray. Drizzle with olive oil and season with salt and freshly ground black pepper. Roast for 20 minutes, or until golden-brown. Ideally you want a bit of crunch still to the cauliflower, as it will add texture to the finished dish. Set to one side.


For the curry, fry off the onion in a pan until softened, about 3 mins. Add the chilli, garlic and ginger, then add the powdered spices (with the exception of the garam masala). Keep stirring for about a minute or two so that the spices do not burn, add a drop of water if you find the pan sticking.

Add the potatoes and coat in the onions and spices, then add the tomatoes, spinach and water. When you add the spinach, put the lid on the pan and wait for the spinach to wilt, as it will be an impossible task to try and stir everything before this point, the spinach will be everywhere!

Leave to simmer for about 20 minutes, stirring occasionally, or until the potato is cooked through. There should still be a bit of liquid in the pan at this point, but this is fine, as the cauliflower will absorb this.

Add the cauliflower to the pan and then season to taste. Add a squeeze of lemon juice and the garam masala. Stir through and it is ready to serve with basmati rice. I think a tomato, onion and coriander salad would be a nice refreshing side to go with it also.

Let's support the cauliflower!

Sunday, 3 April 2011

Wedding Bells

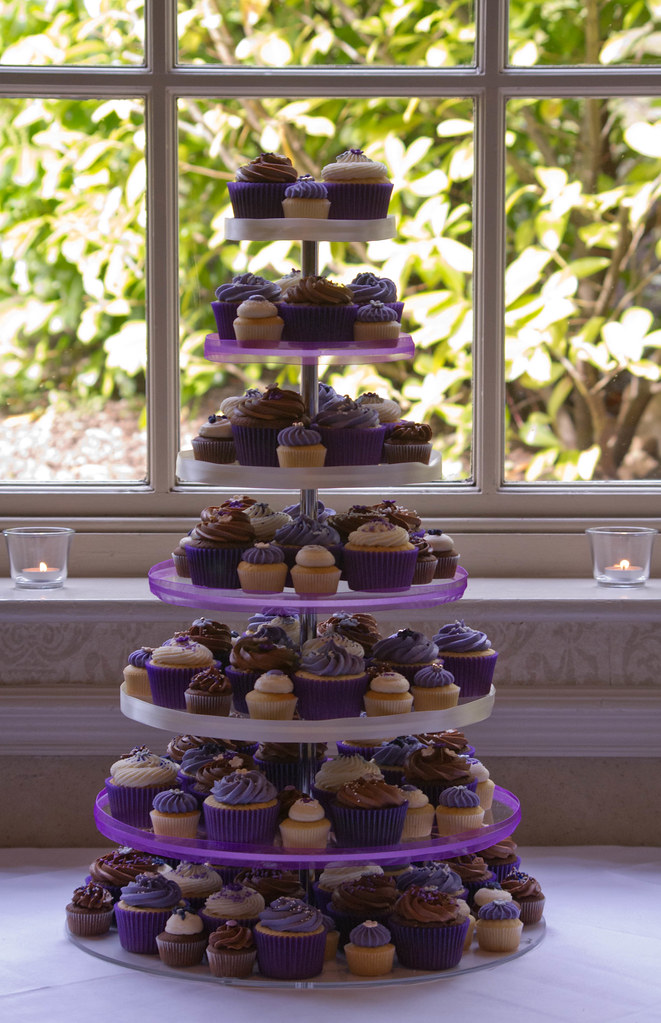
This weekend marked my first ever attempt at creating cupcakes for an event - a wedding. However, the bride is also my boss. So no pressure there to try and make the cupcakes even more perfect!

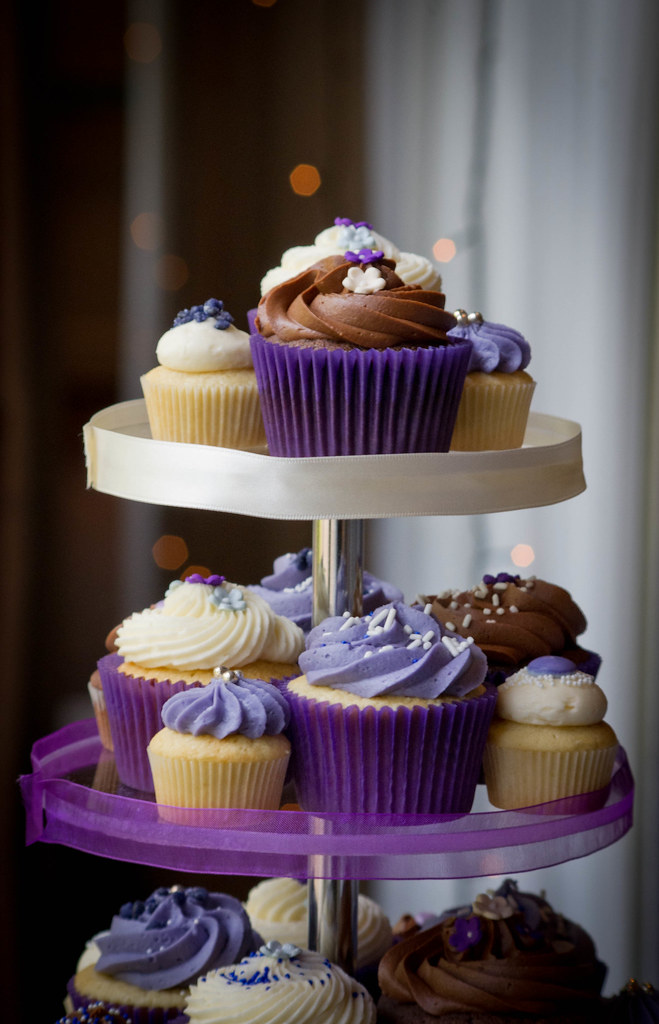
Luckily, I wasn't really given a brief as such - the Bride wanted a mixture of standard and mini cupcakes and decided to stick with the simple flavours of vanilla and chocolate. The colour theme for the wedding was purple, so other than that I pretty much had free reign.


Rather than create a tower of uniform cupcakes, I wanted to bring in some different looks and textures, to create a bit of a vintage tea party feel to them. So i decided to use different piping swirls, colours for the vanilla cakes and also decorative touches. A bit unconventional if you like, which I really thought tied in to the bride's personality. The wedding itself was beautiful, and I was really pleased I could help be a part of it.

Seeing as this was the first time I was creating cakes for a large number, I had to be prepared. A really good blog post I read up on can be found here on Cupcake Bake Shop which really helped on hints and tips on baking in bulk.

I won't go into the recipes for either of the cakes, as they were just simply vanilla and chocolate, which can be easily found.

I spread the baking out over 2 days - the first I got the kitchen organised and made up the frostings, they keep well for up to a week in an airtight container. The second day I got down to the business of baking the cakes.

The cakes overall didn't take too long to bake - all in all they were completed in 6 hours. that was including an absolute baking fail where I accidentally had the oven at the wrong temperature, resulting on overflowed, sunken cakes! However, apart from this hurdle I think the whole process went really smoothly but I am under no illusion that this is due to the fact I am very lucky and have a Kitchenaid mixer, and also 2 ovens which makes things much much easier.

The most nerve wracking part of the process was transporting the cakes - I was so paranoid that the cakes would be ruined every time we went over a bump or hole in the road!

I think that overall I was pleased with how everything turned out. Unfortunately I am very very self critical and kept thinking I should have done one thing or another differently, that they could be better. The Husband soon knocked that out of me though! Speaking of the Husband, I really have to thank him for the beautiful pictures he took - think they made the cakes look better than they actually were. You can see more of his stuff on his blog.


I think the overall response to the cakes was a good one! I saw a few people taking them home with them too at the end of the night and I got a few compliments too - but of course the cakes weren't the star of the show, that accolade went to the Bride!

Creating 100+ cakes was a challenge but one I enjoyed. The fact I was given the freedom to be creative with the design was a bonus too! I felt slightly on edge throughout the ceremony and up until the point of the wedding breakfast - the Bride had no idea what the cakes were going to look like until the day, so once I had seen she was happy with them, I could kick back, relax and have a drink!

Cheers Mr & Mrs L - here's to a long, loving marriage!


Wednesday, 30 March 2011

Jamie's Italian, Leeds

As part of my friend Emma's hen celebrations, our party of nine hens took a trip to Jamie's Italian in Leeds to line our stomachs before killing ourselves with consumption!

I was the only one in the group who had eaten there before, and had enjoyed the experience both times so I was looking forward to my third visit.

As usual the queue for the restaurant had begun to snake around the building and it was only 6.00pm! Luckily groups of 8 or more are able pre book a table which saved us from having to queue. Cut to lots of stares and tuts from people who were waiting to get in! The table wasn't quite ready when we arrived, and the restaurant bar resembled a can of sardines, so we decided to go for a drink elsewhere and return later.

When we did return we were promptly taken to our table which was situated upstairs and away from most of the chaos, which was great. I have a feeling that the staff are trained to channel their inner Jamie Oliver persona, very friendly, very informal. Our waitress was just this, but it wasn't a bad thing. She was very  knowledgeable about the menu and confidently answered any questions we had.

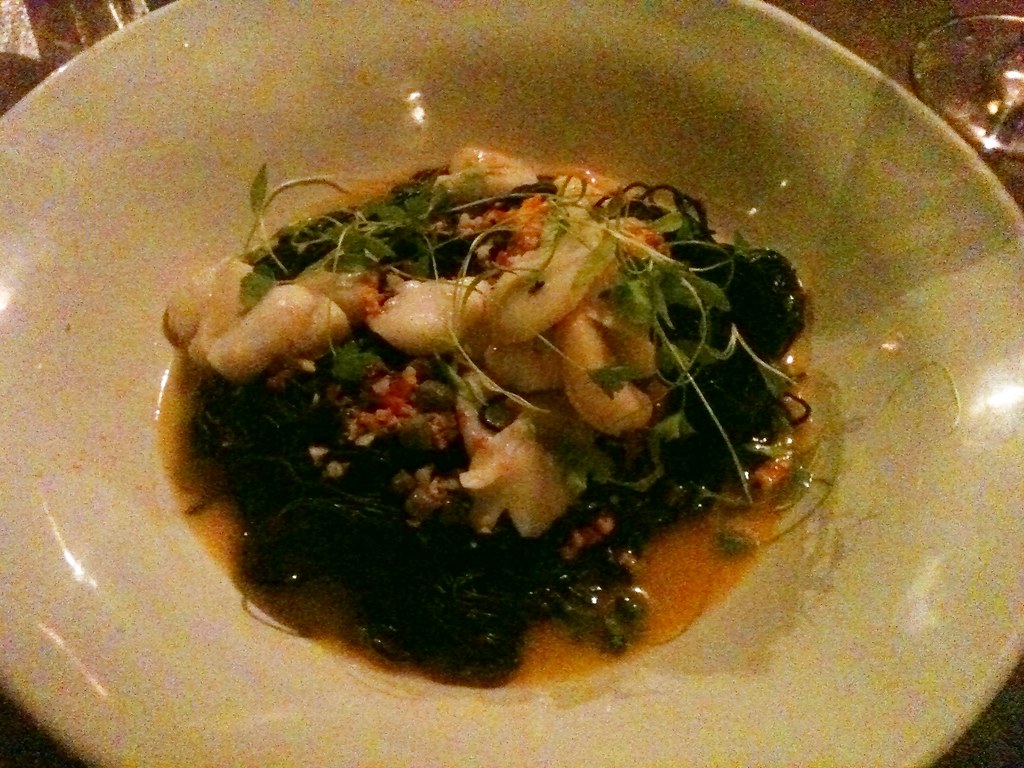
After spending an age deliberating what to order, I settled on the crispy squid with chilli, lemon and garlicky mayo for starters and the scallop and squid ink angel hair pasta for mains.


The squid was soft on the inside and light and crispy on the outside, with a nice kick of chilli. The mayo added a massive smack of garlic.


When my main arrived, the contrast in colour of the pale scallop and the black pasta was stunning (the awful photo really doesn't do it justice) Again I was hit with an almighty whack of chilli and garlic, but the sweetness of the scallop held its own against the strong flavours.

Some of the other lovely looking dishes were the rabbit ragu parpadelle - rabbit in a marscapone sauce and also the pumpkin panzerotti - a stuffed pasta dish. Definitely a couple of dishes I want to try next time.

We decided against a pudding and leave room for the shots of tequila, sambucca and Jagermeister that were to be had!

In total the bill for 9 of us, including wine was just over £200. A bargain I think you'd agree!

Our hen had a great evening...cue singing, dancing and blisters (on my part!)...Can't wait for the wedding!!

Sunday, 20 March 2011

Butternut Squash Cake

Last Thursday I finally managed to make it to this month's Clandestine Cake Club event. The club is run by Lynn, who also runs the Secret Tea Room.

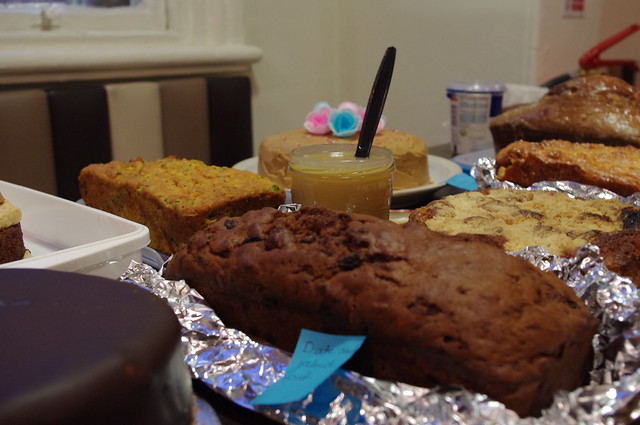
The Clandestine Cake Club is not a competition, it's an opportunity to meet at a "secret" location to eat and discuss cake. Cake being the word - it's not about cupcakes, whoopies, muffins or macarons, it's all about the good old fashioned cake! Think of it as an extension of social networking...most of the people in attendance are on Twitter or write their own blogs, so it was good to meet in person and chat about cake! I met some really lovely people and am really looking forward to the next event.

This month it was held at Primos in the Leeds Corn Exchange. The theme for this event was "Saucy Sweet or Sensual Savoury" In total I think there were 20 cakes, all of the ones I managed to try I thought were delicious. There was a good split between savoury and sweet cakes. I have to say the savoury ones were delicious! In particular I liked the pistachio and chorizo, the savoury semolina cake and also the pesto and courgette loaf. A couple of these recipes can be found on the CCC Site.


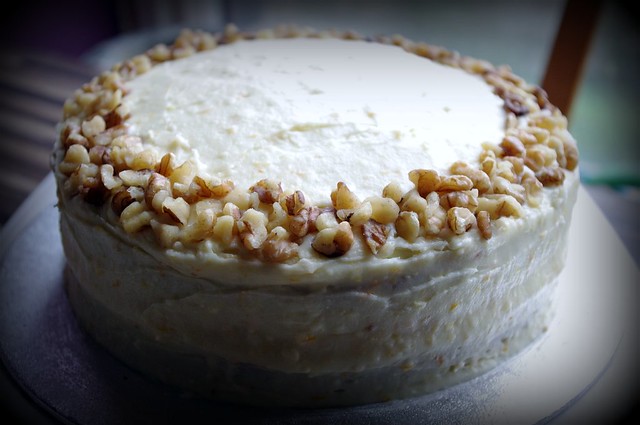
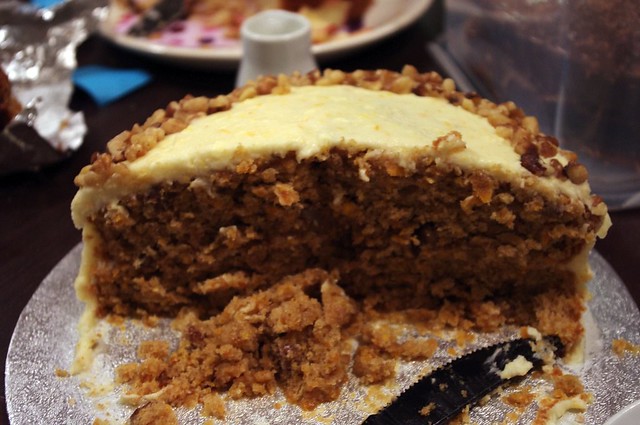
I decided to go down the sweet route, but use a savoury ingredient - butternut squash. I find that vegetables in cakes tend to give a really moist crumb and this one didn't disappoint! The butternut squash can be substituted for the more traditional carrot, but I also think that it would be really good using courgette and a lime frosting to give it some zing. (Must give this a try...)

I received some really lovely comments about my cake and I think it turned out really well, because there was so much cake, there was enough to take back home and share the people at work (along with slices of some of the other cakes I didn't get to try!)


The recipe is based on a Jamie Oliver Squash muffin recipe, but I have tweaked it slightly, adding extra spices and using my method for cream cheese frosting.

Spiced Butternut Squash Cake with Citrus Cream Cheese Frosting

For the cake
400g butternut squash, skin on, deseeded
350g light soft brown sugar
4 large eggs
300g plain flour, unsifted
2 tsp baking powder
100g walnuts
1 tsp ground cinnamon
1/2 nutmeg, grated
1 tsp vanilla
1/4 tsp salt
Grated zest of 1 orange
175ml extra virgin olive oil (I didn't have much EV left, so just used standard olive oil)

For the Cream Cheese Frosting
500g icing sugar
125g cream cheese
125g soft unsalted butter
Grated zest of 1 orange
Grated zest of 1 lemon

Preheat the oven to to Gas Mark 4 / 160C (fan) / 180C. Line and grease 2 x 20cm cake tins.


Either grate or whizz up the butternut squash in a food processor - set to one side.

Beat the sugar and oil until light and frothy, then add the eggs, one at a time, mixing each one in before the next. Then add the vanilla, the squash, walnuts and the orange zest. Beat gently

In another bowl, sift the flour, baking powder, salt, cinnamon and nutmeg. Fold into the Butternut squash mix.

Divide the mixture between the cake tins and bake for approx 25 - 30 mins, but do check after 20 mins as it will depend on your oven. Leave to cool in the tins for a few minutes and then turn out onto a cooling rack and leave until completely cold.

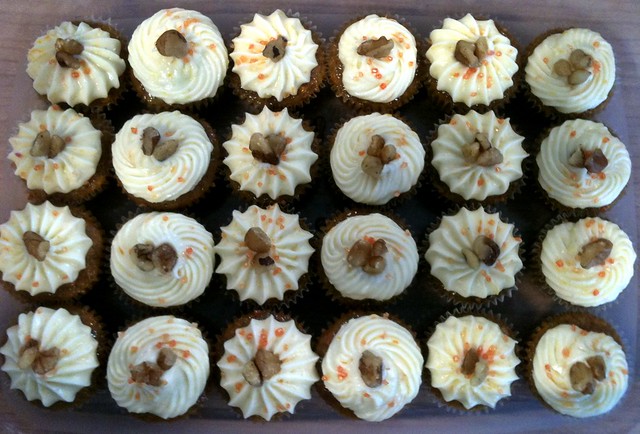
The quantities above actually made the 2 layers for the cake but I also got 24 mini cupcakes out of it too.


To make the frosting, combine all the ingredients in a mixer until smooth.

To decorate, sandwich a few spoonfuls of the frosting between the layers, and then using a pallate knife, spread the rest of the frosting over the top and sides of the cake. If you find that the frosting is getting a bit runny, then place the cake / frosting in the fridge for ten minutes or so and then continue.

I decorated the cake with a few walnuts.

Enjoy with a nice cup of tea and a chat!


I'm really looking forward to the next meet up, the theme is Vivaciously Victorian...lets get the thinking cap on then!

Tuesday, 15 March 2011

An Egg-cellent result at Ironcupcake:Leeds!

Last Sunday I decided to make a return to the Ironcupcake:Leeds competition. I haven't been for about 8 months sadly due to one thing and another but I decided I needed to get myself out there again....I have previously entered 3 times and won the last 2 times I entered, which gives me a 66.6% success rate...But could I do it again?? I have been keeping an eye on the competition over the past few months, and I have to admit, the competition is fierce!


(Cut to a Rocky training montage, but instead of drinking raw eggs and running up and down stairs think of me eating cake batter and chasing a cat out of the kitchen with a wooden spoon...)

For those who don't know what Iron Cupcake is, it's actually a global competition that was started over in the US (Milwaukee to be exact). It usually happens monthly and each competition has a theme and the bakers have to create a cupcake which ties in with said theme. To my knowledge there are 3 Ironcupcake cities in the UK - London (which is unfortunately taking a bit of a hiatus at the moment), Leeds and Northampton. Those who attend are either "bakers" or "eaters" the eaters also do the judging and score each cake for taste and presentation. For more info on the Leeds competition, which is held at the lovely Adelphi pub, please visit the site.

So March's theme was Chocolate Bars - I was racking my brain to think of a cake inspired by chocolate bars. I've done Malteser cupcakes before and I've also done Dime Bar ones too and I didn't want to just go with something I was comfortable with! Lunch hours have been spent staring at the chocolate aisle in the supermarket, looking for inspiration, when the thought of Cadbury's Creme Egg came to me after a conversation with my friend Heather and also whilst passing the Easter eggs in said supermarket... But how would I do it?

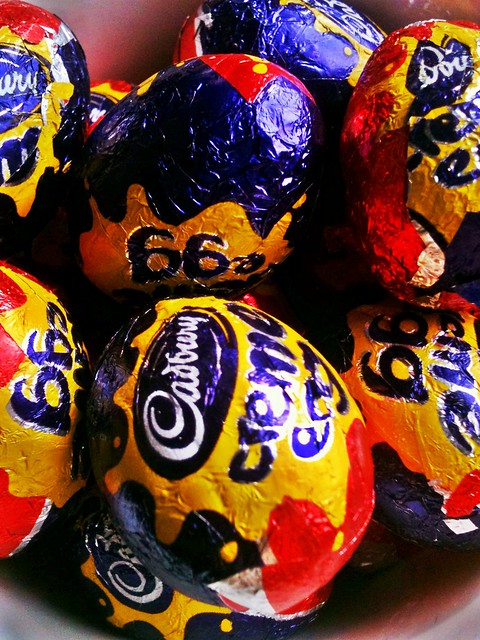
Mmmm Creme Eggs...
I had various ideas on how to create my cake - I thought about just filling a chocolate cake with a creme egg filling and topping with chocolate ganache, but I just thought that visually, it would just look like a chocolate cake and I wanted it to look fun, like the eggs themselves!

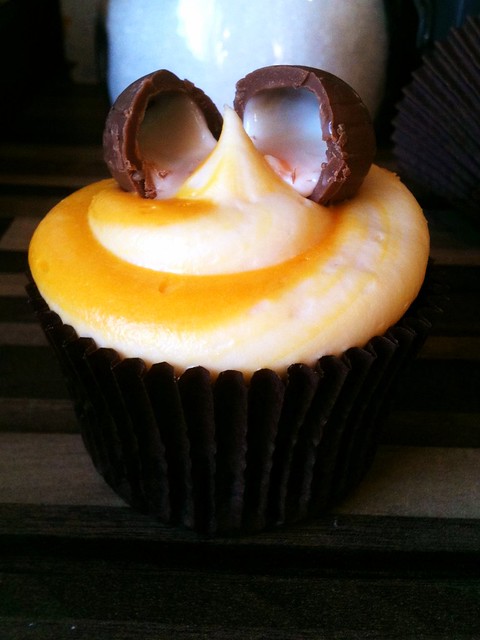
So I settled on incorporating the Creme Egg fondant filling within the icing, using a chocolate cake as a base. Because the fondant is so sweet, I thought a devil's food cake base would work well and also use a cream cheese icing to further cut back on the sweetness. I wanted to top the cake with a mini creme egg, but rather than just plonk a whole one on top of the cake, I wanted the icing to look like it was actually coming out of the egg, so I decided to "crack" the Creme egg open.

Creamy Eggy Chocolaty Goodness!


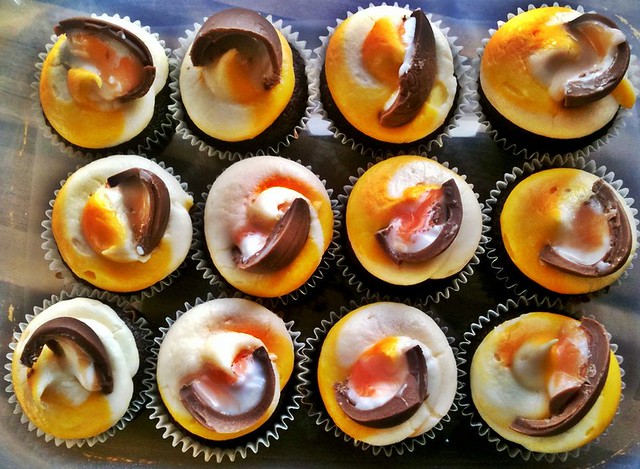
As part of the competition rules, bakers are asked to provide 12 cakes, with 9 of them chopped into quarters for tasting. My issue with this from previous experience in other competitions is that it's difficult and messy to chop them up at the event. I've also tried chopping the cakes up prior to arriving but the sponge seems to dry out. I thought it would be a good idea to make up 3 standard sized ones and then make up 36 minis - meaning all the eaters get their own cake and presentation wise, it means the cakes still look good!


Minis


Overall I was happy with the cake, but if I'm honest I didn't think it was a winner - I'm not sure why, maybe I'm just too hard on myself! The Eaters seemed to really like it so that's all that matters - so much so that I came first place!Yay! Success rate is now 75% - not that I'm counting.

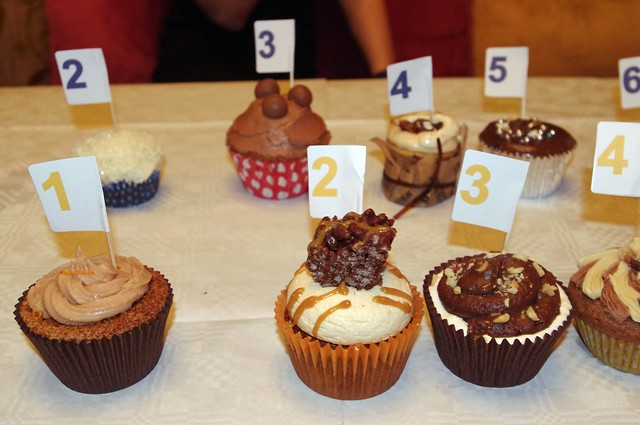
I had a taste of a few and I really liked Zoe's Toffee Crisp. For more pictures of the other cakes, check out the Ironcupcake Leeds site and also Em's blog, All the Small Things - she entered with a lovely Bounty cupcake and also was the evening's photographer. See if you can spot the hilarious picture of me grinning like an idiot, looking like a Chinese Janet Street Porter...

Some of the other cakes - yellow number 2 was my fave, Toffee Crisp!

More of the other cakes - some of the detail on some of them must have taken forever! Check out the characters on yellow 7 - Fruit and nuts!


April's theme is Nuts and Seeds...best get my thinking cap on!

Creme Egg Cupcakes

Ingredients
For the cakes, see my Devil's Food Cake Recipe

Cream cheese frosting
500g icing sugar
125g cream cheese
125g soft unsalted butter

Creme Egg Fondant Filling
170g golden syrup
60g butter, room temperature
375g icing sugar
1 teaspoon vanilla extract
1/4 teaspoon salt
Yellow food colouring (I use gel colouring as the liquid stuff tends to water everything down)

To Decorate

3 x bags of Mini Cadbury's Creme Eggs

Method
Preheat the oven to to Gas Mark 4 / 160C (fan) / 180C.

To make the sponges, make up the devils food cake batter and divide into cupcake tins - cook for 20-25 mins for the standards sized cakes and about 10-12 minutes for the minis. Test with a cake tester - if it come out clean, they're ready. Leave for a couple of minutes in the tines and then take out the cakes and leave to cool on a rack.

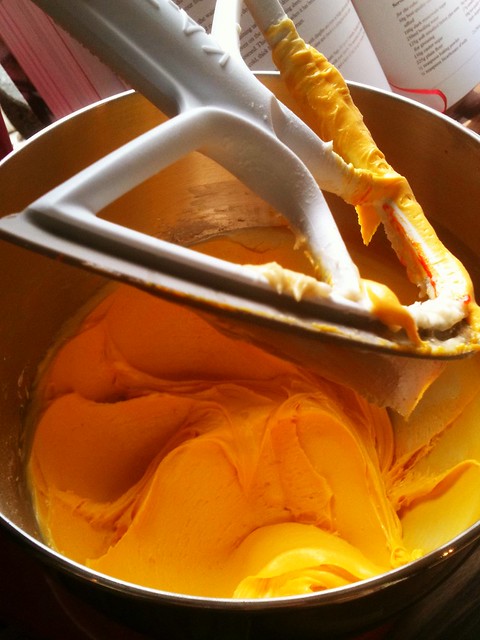
To make the fondant filling mix the butter, syrup and vanilla in a bowl - ideally you want to do with with an electric mixer, or it will take forever! Gradually add the icing sugar, then the food colouring and carry on beating until smooth. Cover and set to one side.

YUM! Cream egg yolk!!


Make the cream cheese icing - again, beat the butter, cream cheese and vanilla extract and then gradually add the icing sugar continue beating until smooth and thick. Use immediately or if not, cover and store in the fridge.

Once the cakes are cool, you can start to decorate.

To get the two-tone swirled effect, place some of the fondant down one side of a piping bag and add the cream cheese down the other side - try not to combine / mix them up too much. you want a1/3 - 2/3 ratio of fondant to cream cheese icing.

Pipe out the frosting on a plate until the two tone effect comes through and then ice the cakes. To decorate, I used 1 mini egg per standard sized cake and a 1/4 of a mini egg per mini. Allow the fondant centre from the eggs to spill over the top of the cake...

Feel free to eat in whatever way you wish!

Sunday, 27 February 2011

Pie and Beer

I have already written about my love of pie. All types of pie. as long as there is lots of pastry and lots of filling, then I'm there. I also love beer. Proper beer. Real ale. As far as I'm concerned the two go hand in hand.

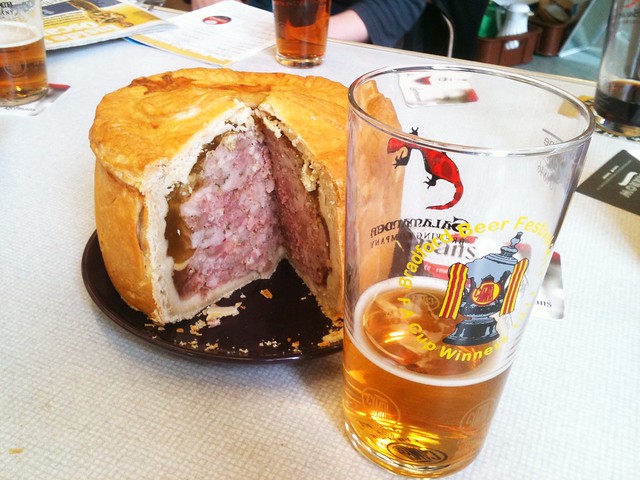
This weekend was the annual Bradford Beer Festival. One of the highlights of my year. Local friends and London friends all descend upon Saltaire to sample the finest beers that the UK breweries have to offer. To mark the occasion I decided to bring a pie. A pork pie. I've been obssessing over making my own pork pie for weeks and decided that it would be perfect to bring one along with me.


Beer + Pie = Perfect combination!
Now I know that a pork pie is something that not very many people tend to make at home these days - quite possibly because it is so easy to buy decent pies. However, I'm always concerned about what has actually gone into the pie so by making your own means you know exactly what's in it. Using good quality meat is a must.

There was something really enjoyable about the whole process. The making of the soft, tactile pastry and the meticulous chopping of the meat. This pie needs time, I made it over 2 days...but you will be rewarded, and I highly recommend you try it.

It was bigger than anticipated but it did really well in feeding around 12-15 people - washed down with beer it was amazing.

The recipe comes from Hugh Fearnley Whittingstall's River Cottage Meat book, on page 444.

Hugh's Pork Pie

Ingredients

For the pastry:
550g plain flour
100g butter
100g lard
200ml water
2 eggs
1 1/2tsp salt 

For the filling:
1kg pork shoulder - chopped into 5cm dice (takes time and a sharp knife is a must!)
250g streaky bacon - chopped finely
250g pork belly - minced. I whizzed it up in the food processor
2 large sprigs of thyme, finely chopped
12 sage leaves, finely chopped
1tsp salt
1tsp black pepper
1tsp white pepper
1/2tsp mace
A pinch of cayenne pepper

For the jelly
200ml chicken stock
1x 15g sachet powder gelatine

Melt the butter and lard together in the pan, with the water. While the fats are melting, mix 550g of plain flour and one and a half teaspoons of salt together in a large bowl, form a well in the flour and then break two eggs into the bowl. Mix the eggs into the flour slightly and then slowly pour in the fat and water, mixing all the time. I used my mixer and a dough hook, but can easily be done my hand.


The dough will come together. You may need to add more flour or water, depending on whether it feels too sticky or dry. the dough will be very soft and pillowy! Briefly knead the dough, then wrap it in clingfilm and let it rest in the fridge for an hour or so.

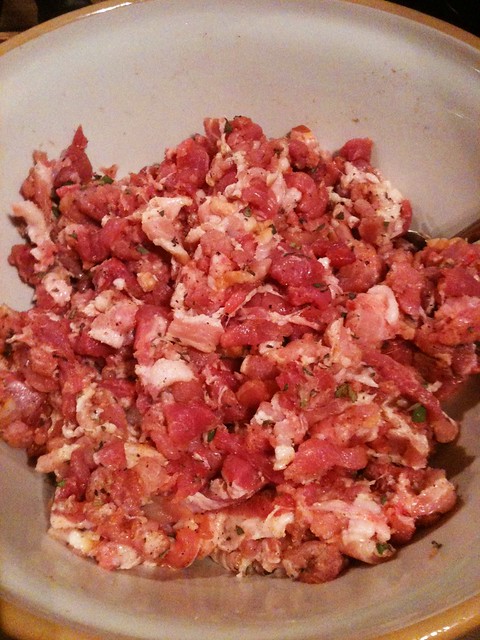
For the filling, mix all of the ingedients thoroughly in a large bowl. The reason for the different cuts of meat is for texture, the shoulder provides a "meaty" texture, the bacon flavour and the belly provides much needed fat, and also act as a glue for the meat mixture.


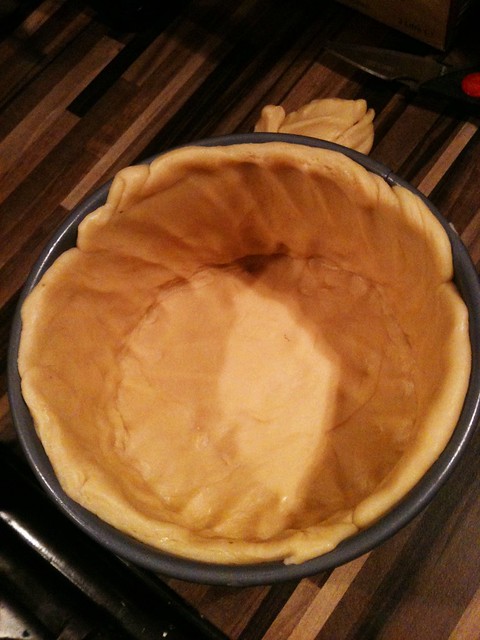
Now to assemble the pie. Cut off about a third of the pastry and put it to one side for the lid, then roll out the rest into a large round, appox 1cm thick. Slide the pastry into a greased cake tin with a loose base and press it down so that the pastry reaches the top of the tin. I used an 18cm cake tin with high sides, the original recipe asks that you use a 20cm tin. so if you use a 20cm, then make sure the pastry reaches approx 3/4 up the sides. By using a spring form tin with a clip on the side will make the ‘getting the pie out’ operation much simpler.

Now, getting the pastry into the tin seems much simpler than it sounds - the pastry is very soft a slippery and it will try to fall down, be vigilant and confident with it. Make sure there are no holes in the pastry walls.


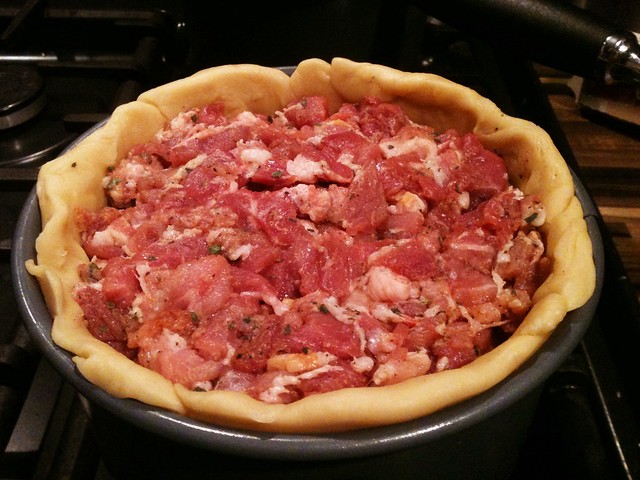
Then fill the casing with the filling. Really cram it in until it can't take any more. Remember, the pie filling will shrink up on cooking.


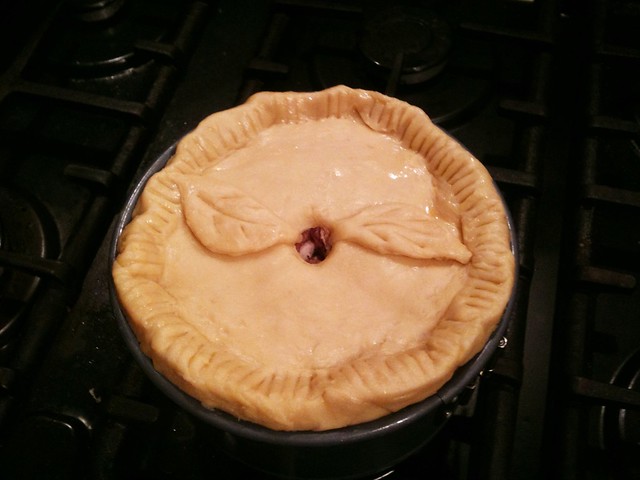
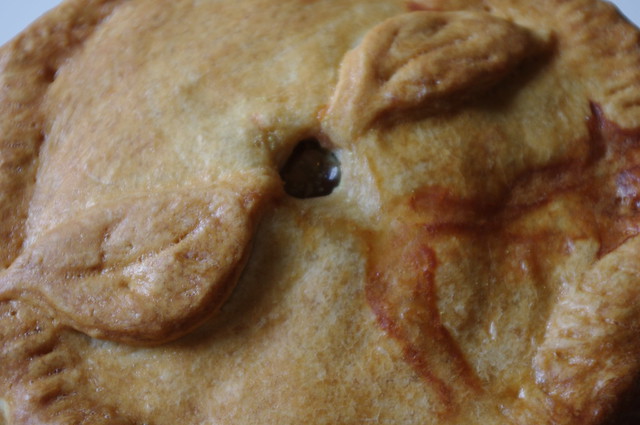
The roll out the remaining pastry into a lid and crimp it onto the top of the pie - make sure you use a beaten egg to seal the lid, as it is the only thing strong enough to keep everything in the pastry. For an extra bit of decoration I cut out a couple of leaves from the leftover pastry. Make sure you also cut a 1cm hole in the middle of the lid for steam to escape.

Ready for the oven
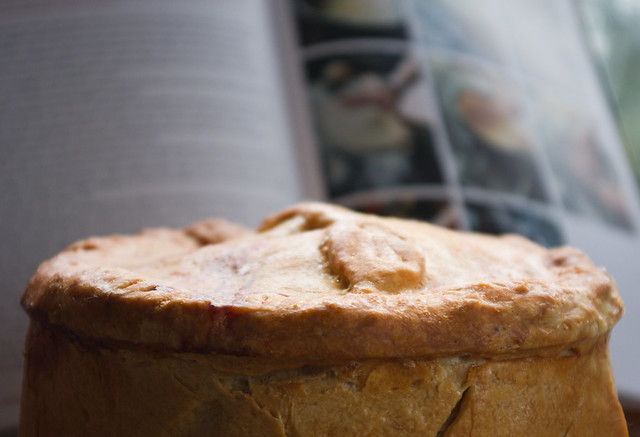
Bake at 180c for half an hour, then reduce the heat to 160c and continue to cook for a further hour and a quarter. After this time, take the pie out of it’s tin and brush the top and sides with beaten egg, returning it to the oven for another quarter of an hour to brown.

Then you'll need to wait for the pie to cool before adding the jelly. Probably an hour or so, but as it was 11pm by the time the pie came out of the oven, I left it to cool overnight, then put it in the fridge until the evening.

The recipe details stock made from pigs trotters, boiling them down for a couple of hours. I didn't really have the time, so I bought a tub of ready made fresh chicken stock, heated it up gently and dissolved the gelatine into it.

Once the jelly is ready, you'll need to pour it into the hole - use a turkey baster if you have one - I poured it in using a measuring jug. Pour it in slowly, giving it time to settle in the pie, filling in the cavities left by the shrunked meat. Pour it in until you can't fit in any more.

Filled with jelly
Now the subject of jelly in a pork pie is a contentious one - some people hate it, but I think it is integral to a good pork pie - it is there to fuse the meat to the pastry and without it, the pastry just falls away from the meat once cut.

Once the pie is filled refrigerate, until the jelly is set - ideally overnight but it should be ready after 5 hours.

The pie will keep in the fridge for about 2 weeks - I think the next time I make it I might add in a few boiled eggs. If you don't want to make a huge pie, then you could make individual pies by lining a muffin tin. After the first 30 minutes of cooking time, take them out, brush with egg and cook for a further 25 minutes.


Thanks Hugh!

Thursday, 24 February 2011

F.E.A.R.

This is just a quickie...for the past few months / weeks I have been thinking about attempting macarons. Macarons scare the living shit out of me. The stuff of nightmares, well them and soufflés, oh and scary clowns. And ventriloquist dummies. Sob sob sob.


Now I love a good cake - cakes are easy, they're quirky and if you botch it up then cover it up with frosting and no-one would ever ever know. But macarons - they are refined and delicate and if you mess it up then EVERYONE can see and then I'll get upset and embarrassed. Me? perfectionist? No....

However, because I am just so stubborn and want to learn to be a better baker, I bit the bullet and decided just to give it a go. This was spurned on my the fact that my boss kindly brought me back some amazing macarons from Angelina in Paris whilst he was there last weekend... They were slightly battered, but delicious! Light, crispy, chewy and eaten on one sitting...all by me.

Ta Steven!
Anyway, to the macarons. As I said, I have been doing a lot of reading over the past few weeks and found a really good number of tutorials, a couple of which being from Food Nouveau, Bakerella and The Pink Whisk.

Across all 3 the recipes / techniques are pretty similar, using a French macaron recipe. I won't post the recipe details now as I want to follow up with a full and thorough post on method, etc. once I really feel that I have nailed it.

I ended up making chocolate ones, I added cocoa to the shells and filled them with chocolate ganache.

I thought they looked good, chewy and slightly crispy on the tops of the shells. I think that the next time I make some I will tweak them slightly - I thought the almonds could do with being finer and I might not have mixed the meringue in enough, for fear of knocking all of the air out... But hey, overall I was pleased!

As I said, going to make some more this weekend so macarons will be back...